
I have finally started building my closet cabinets! I only got two units built yesterday because I ran into a few problems along the way. They weren’t roadblocks, just speed bumps.
First, I realized that I had made a miscalculation when cutting all of the backer boards for each unit. (Ugh, I’m going to blame that on pushing through with my work when I wasn’t feeling well over the weekend.) And then my 16-guage nail gun stopped working, so I had to make a trip to Home Depot and buy another nail gun. Also, some warped plywood and unlevel floors gave me challenges that I had to work through.
But at least I made some progress! And now that I have my system worked out, I’m hoping that the rest will go faster. So let me show you how I built my closet cabinet units.
First, I used my 16-guage nail gun with 1.5-inch nails and nailed the pieces together to form the sides, top, and bottom of the unit. To start, I had to find something to lean the first long side against so that I could get them nailed together.
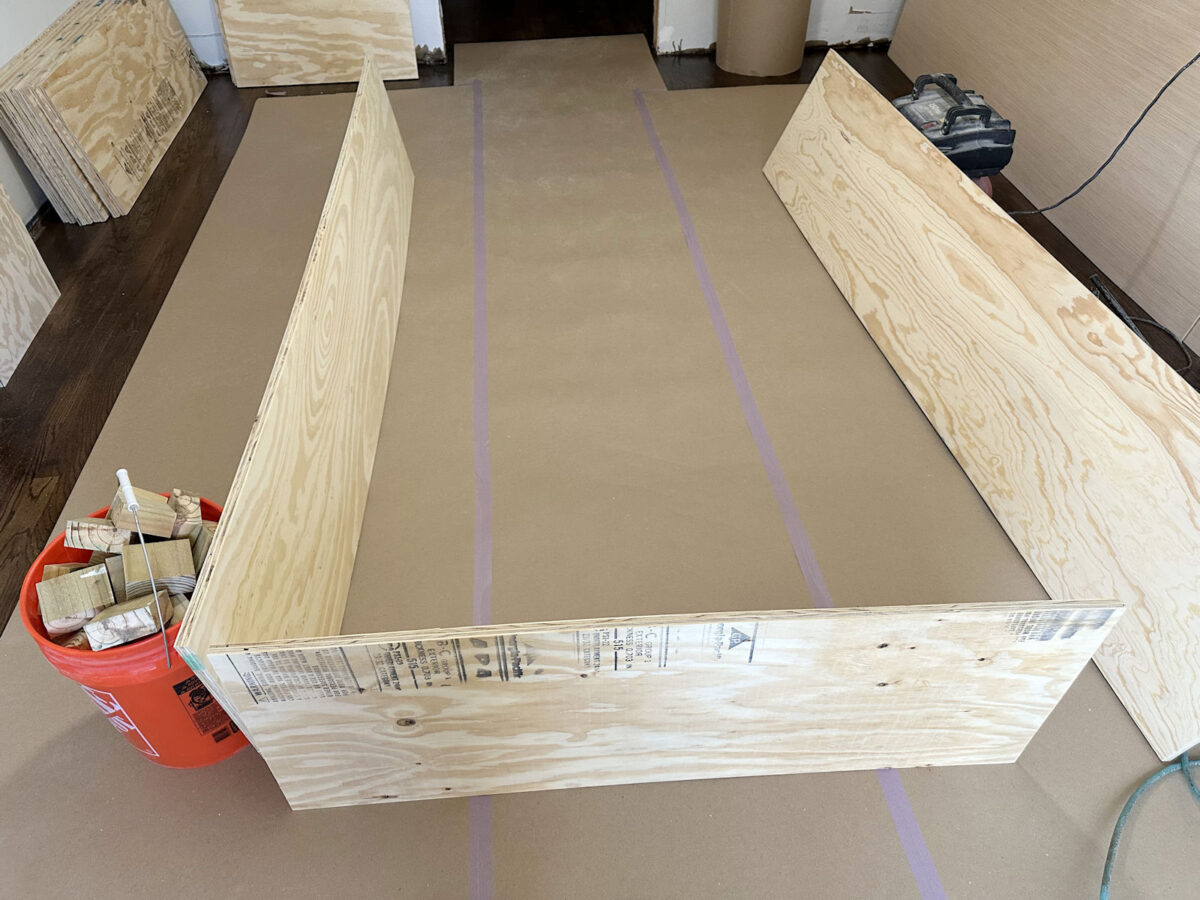
Once I had the first two pieces nailed together, the other two were easier. I put them together so that the shorter top and bottom pieces of the unit were nailed into the edges of the longer side pieces.

And it was at this point that I realized my mistake with the backer boards. I had intended to just place the 1/4-inch plywood on the back of the frame and nail it into place. But I realized very quickly that I had cut the backer board to the length of the long side pieces, and it needed to be the length of the side pieces PLUS 1.5 inches to cover the edges of the top and bottom pieces. Ugh. I didn’t want to buy all new 1/4-inch plywood at $28 a sheet for eight units, so I had to modify my plan on the fly.
Since I couldn’t add plywood to the length, my solution had to involve cutting plywood off of the width so that the backer board would fit nested completely inside the outer frame. But then I needed something to nail the backer board to. So I used my table saw and ripped down some extra 1″ lumber that I had on hand to 3/4-inch wide, and I nailed those strips around the bottom (which is actually the back side of the unit) into the frame pieces using 1.25-inch 16-gauge nails.

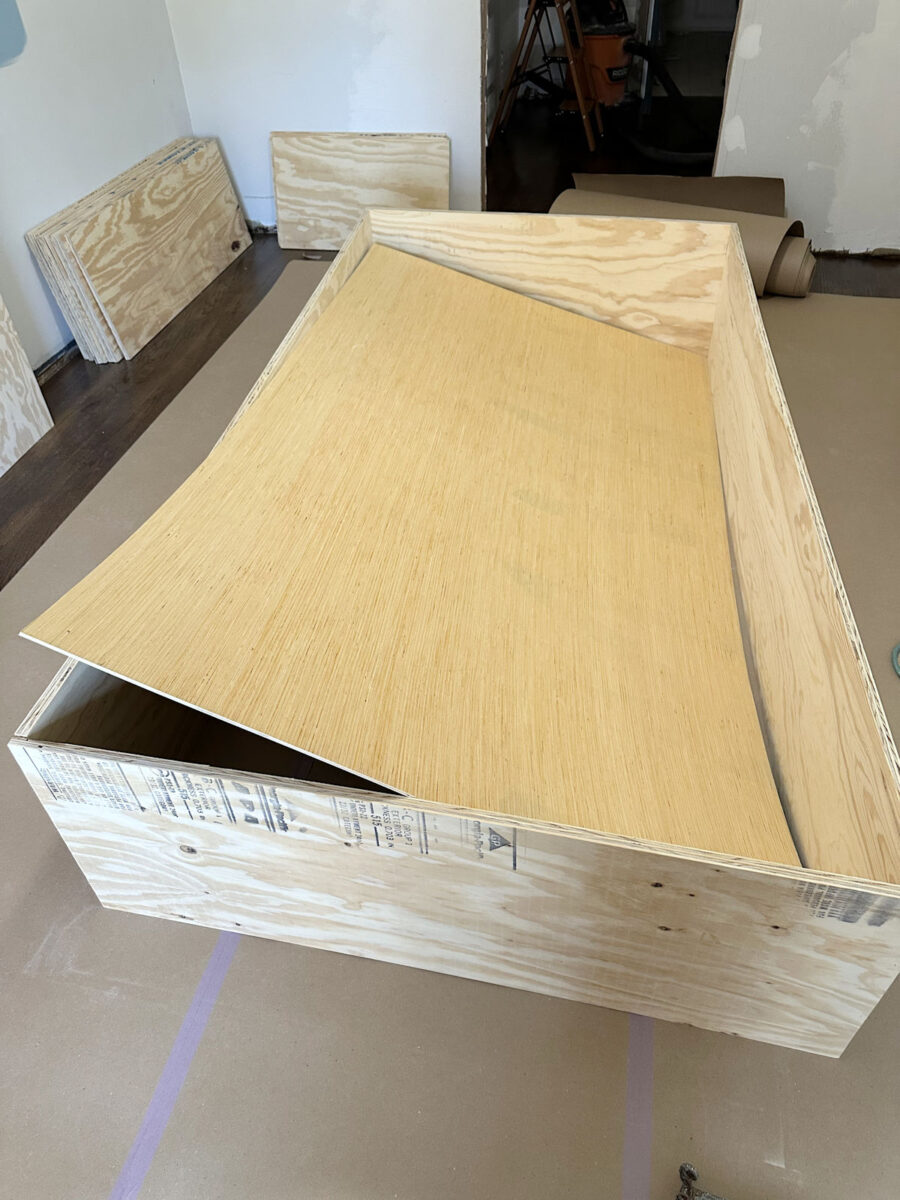
And then I used my circular saw with a guide to cut off the excess 1.5-inch strip from the width of the backer board, and I placed the backer board on top of the strips I had just attached.
The long sides of the plywood frame were a little bit bowed, so before nailing the backer board to the strips, I cut a spacer from some scrap lumber to the width of the unit and placed it in the middle to push the bowed pieces apart to the correct width. And then I nailed the 1/4-inch plywood backer board into place using 3/4-inch 18-guage nails.
After the backer board was in place and I had checked the corners to be sure they were square and nailed the backer board to the strips, I then went back and secured the side pieces (which had only been attached to each other with a few 16-gauge nails to this point) to each other using Spax #8 1.5-inch cabinet screws.
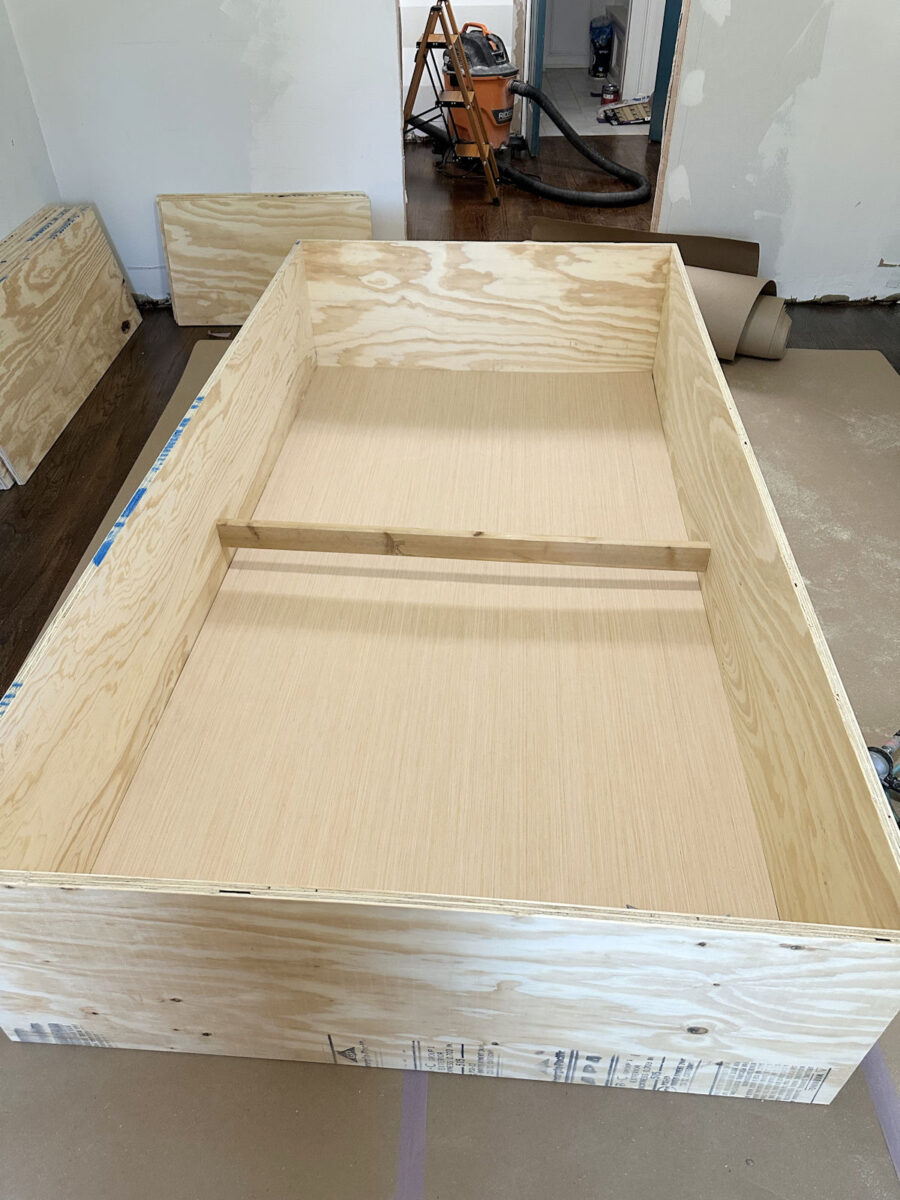
Next, I sat the unit upright and nailed a spacer board into place in the middle of the back to give a little more stability to the 1/4-inch plywood backer board. I nailed this into place using 2.5-inch 16-gauge nails through the sides of the unit and into the ends of that board. And then from the other side, I tacked the backer board to that strip of wood using 3/4-inch 18-gauge nails.

I very carefully slid the unit into place against the wall, trying not to rip the paper or scratch the floor. As it turns out, it really wasn’t as heavy as I expected it to be. And that was a good thing, because the next step was to tip the unit over and attach the feet. This is the only part of the whole thing that I attached using wood glue, and I used five feet per unit.
The feet are just 2×4’s that I cut to 2.75″ long using my miter saw. So I placed wood glue on the top of two feet, tipped the unit up and held it into place with one hand so that it was a few inches off the floor, and used my other hand to slide the feet into place, one on front and one on back. And then I went to the other side, put glue on two feet, lifted that side up a few inches with one hand, and slid the feet into place with my other hand. And finally, I placed a fifth one in the front center of the cabinet. I made sure the front feet were lined up perfectly with the front edge of the cabinet because these feet are what I’ll nail the bottom trim to when I start trimming out these units. Once all five feet were under the unit, I used my hammer to tap them into place exactly where I wanted them, and then I nailed them into place using 2.5-inch 16-gauge nails through the bottom piece of the unit and into the edges of the 2×4 feet.
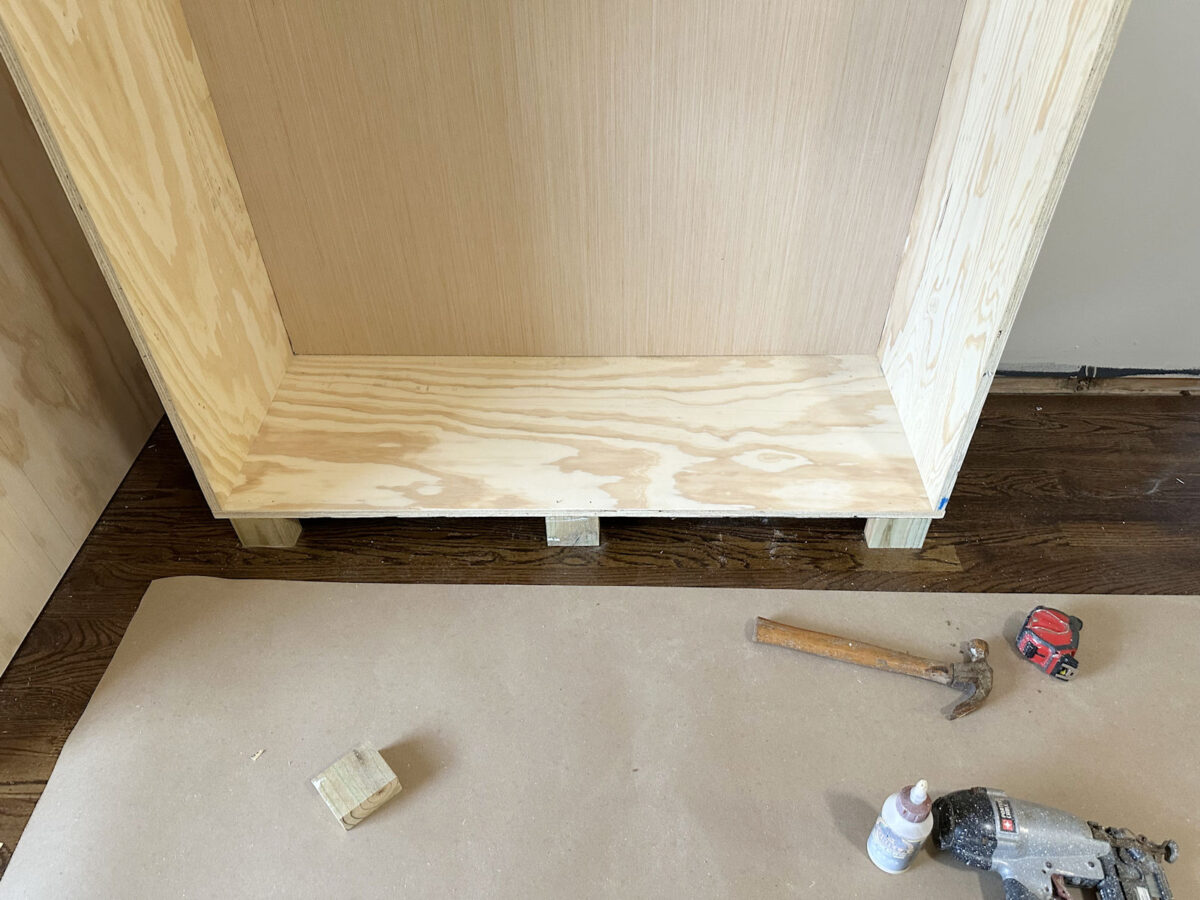
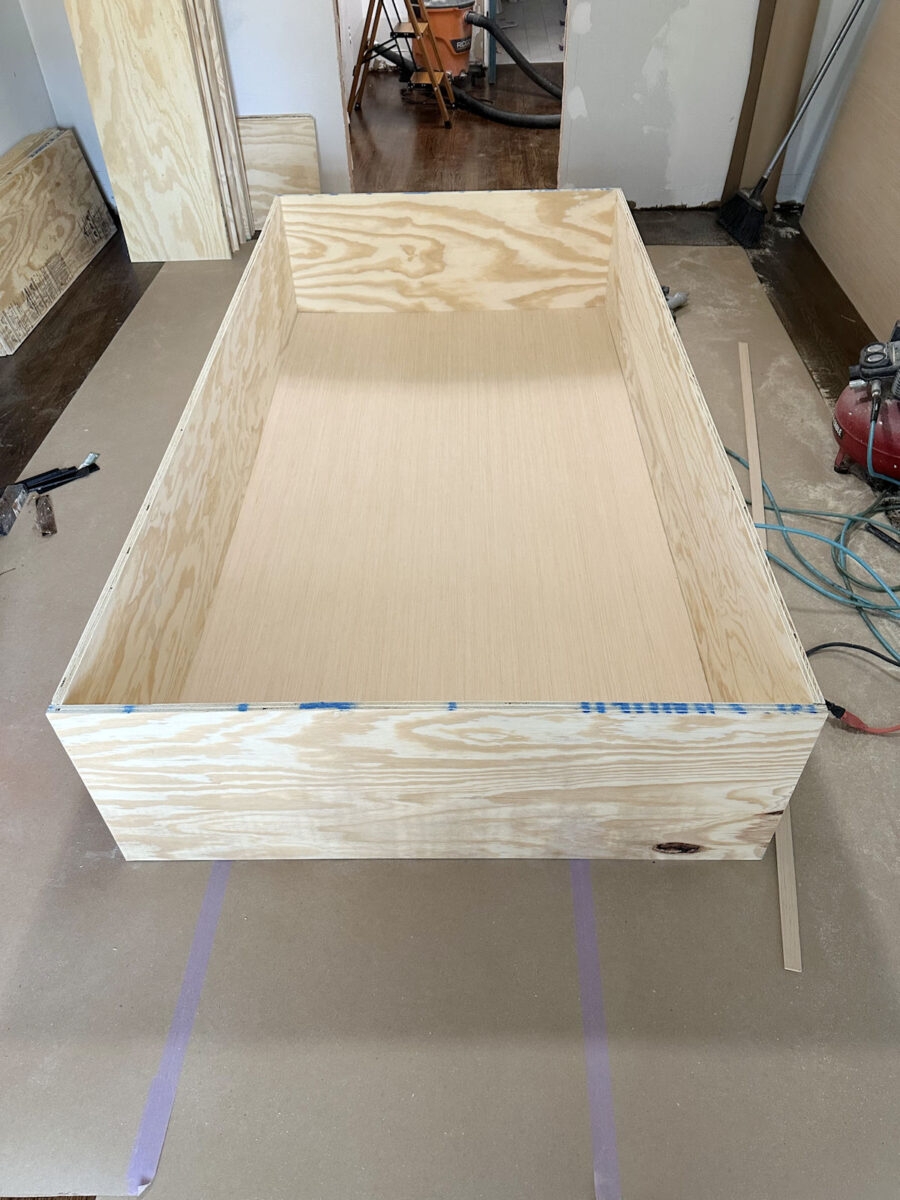
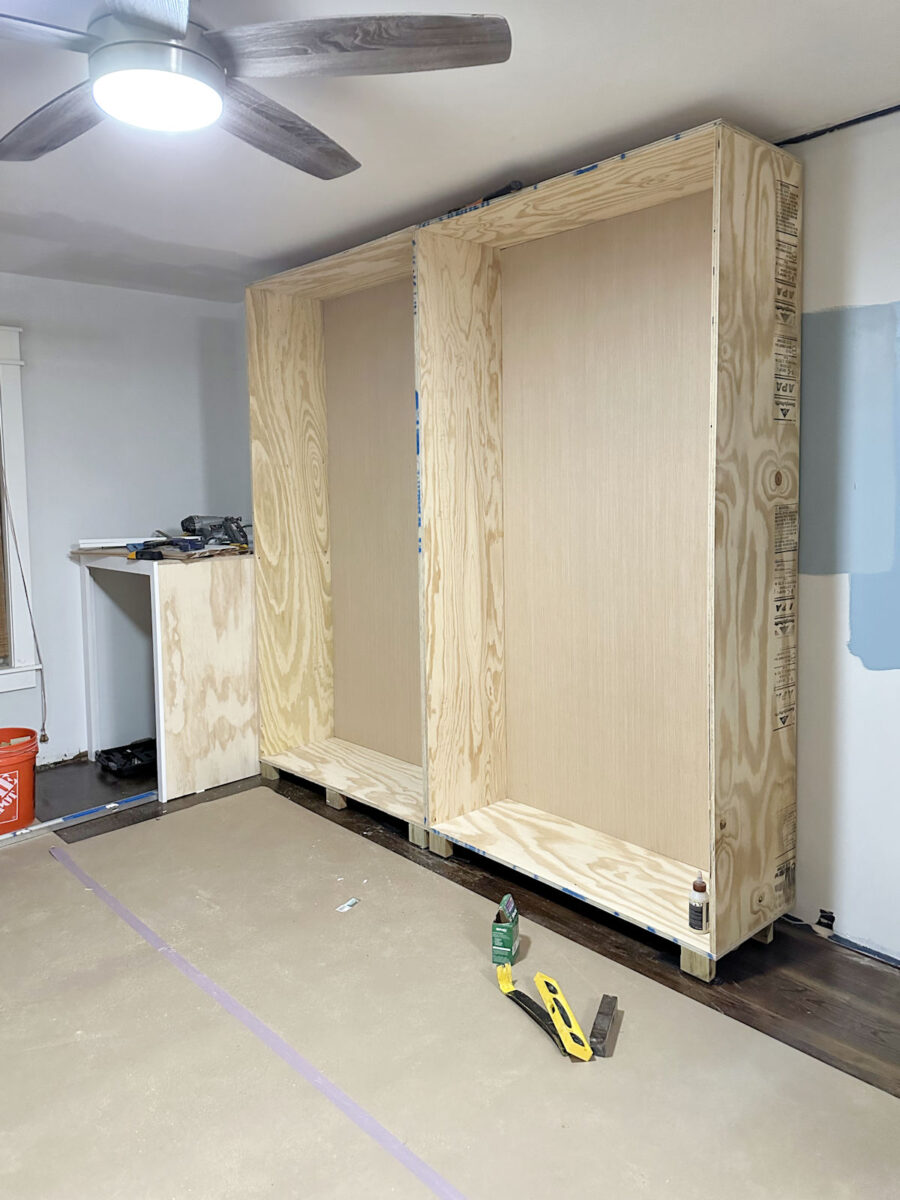
So here’s what the basic build looked like when it was finished.
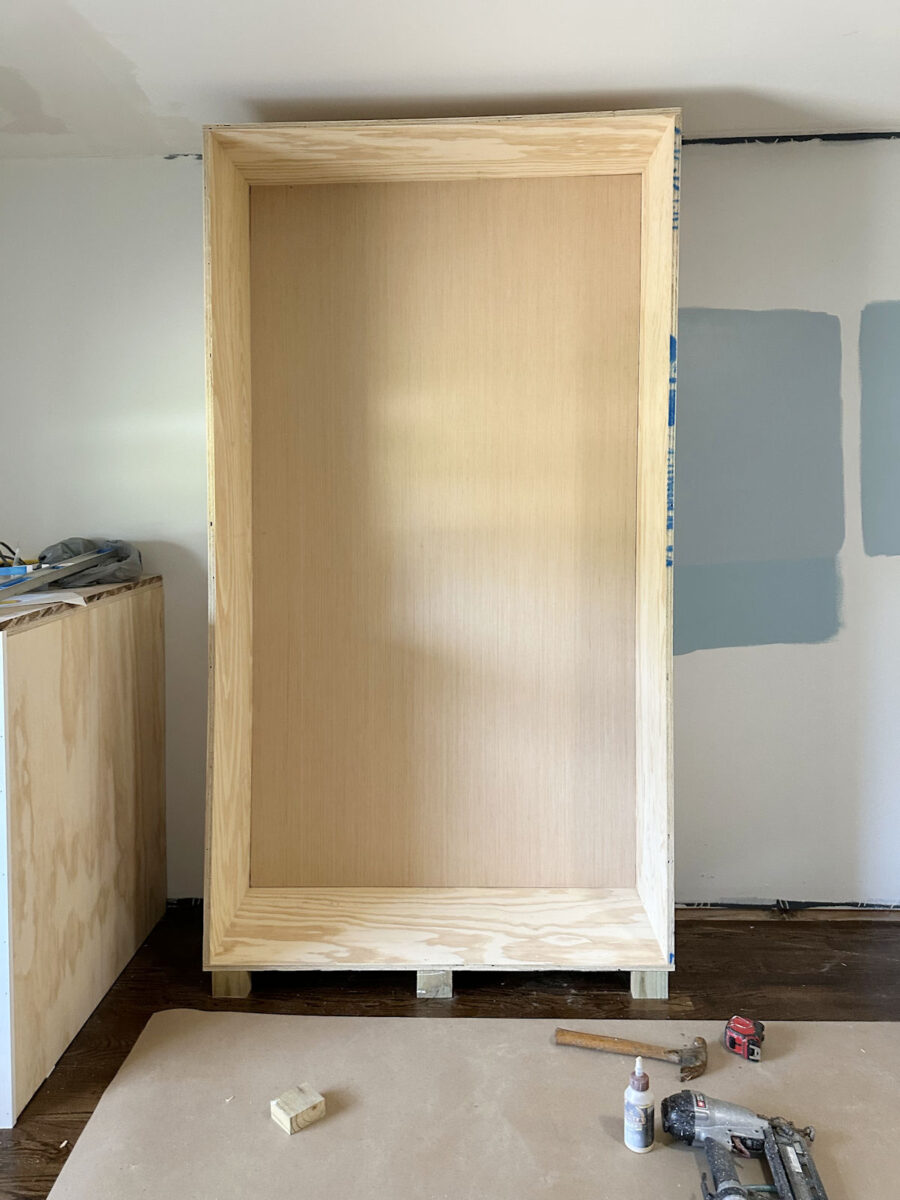
You can see that the long sides are still a little bit bowed, but I wasn’t worried about it. Once everything was in place and all the units were attached, I knew that would be taken care of. So I scooted the unit up against the washer cabinet and screwed those to cabinets together using Spax #8 1.5-inch cabinet screws. I made sure that I got the big unit as plumb as possible before screwing it to the washer cabinet. And since the washer cabinet was square, plumb, and level, screwing those two pieces together took the bow out of the left side piece of the tall unit.

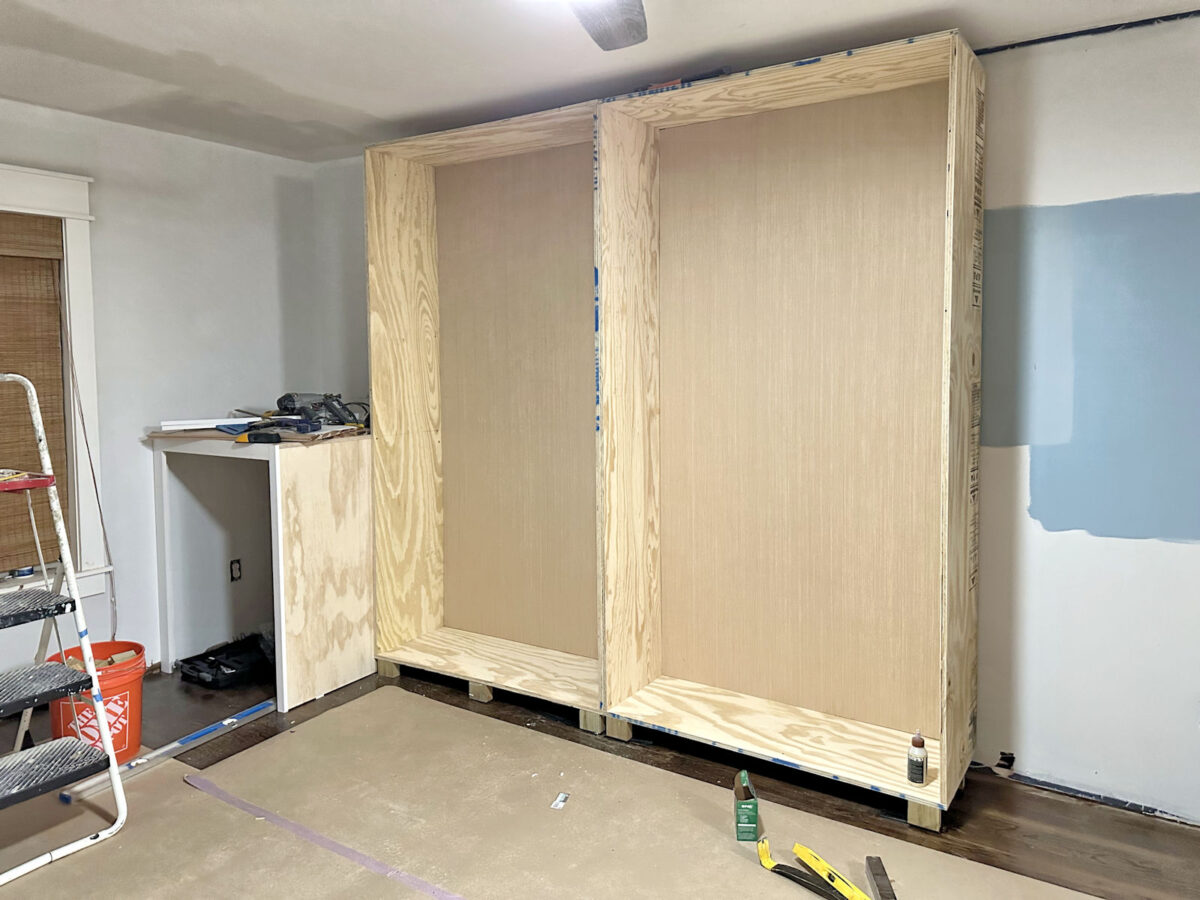
I built the second unit the exact same way, and then when I pushed it next to the first unit, the two weren’t quite meeting up like they should. So this took some work to get these two units to fit together like they should. First, I had to shim the feet on the second unit. And then it took quite a bit of pushing and pulling and wrestling with these units to get them to line up.
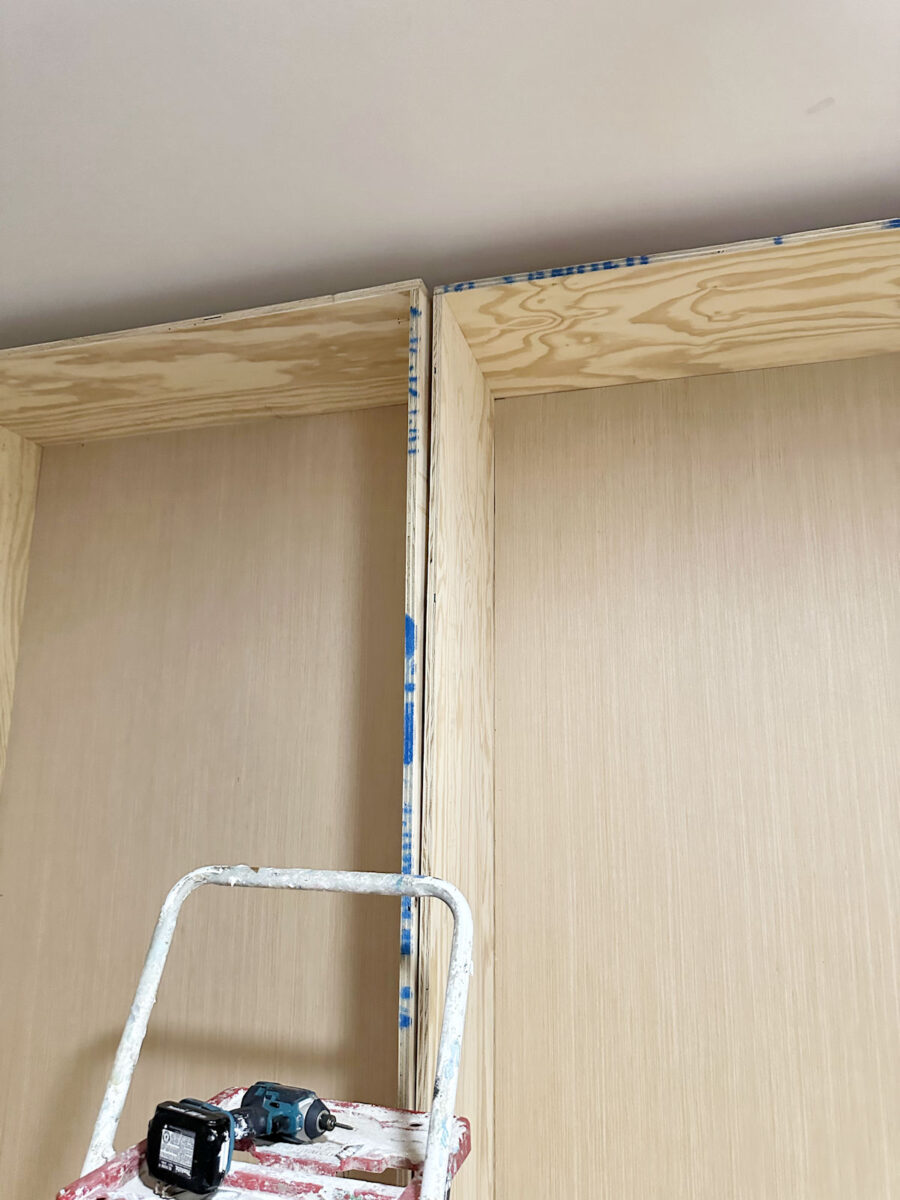
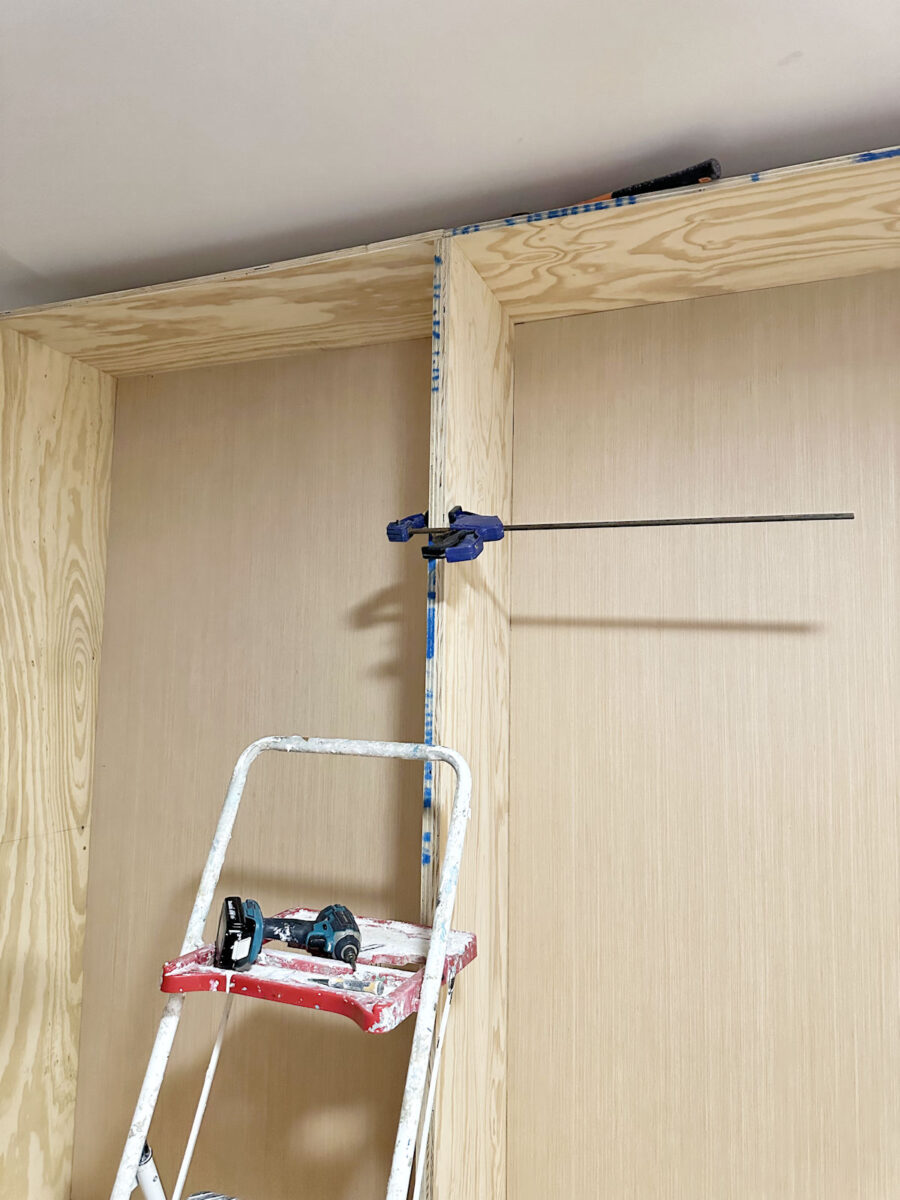
I actually started at the bottom because it was easier to get the bottom corners to line up. Once I got the bottom corners lined up and flush on the front with each other, I screwed the cabinets together at the bottom using the Spax cabinet screw. With the bottom corners secured to each other, I was able to get the top corners lined up and clamped so that I could add more screws to secure them to each other.
So that’s as far as I got yesterday. I have two more units to build for this side of the room, and I’m hoping I can at least get those done today. I do have to leave the house for a couple of hours this afternoon, so it won’t be an uninterrupted work day. That means my progress might be a bit slower today, but I’m going to do my very best to get the other two units for this side of the room finished before I go to bed tonight.
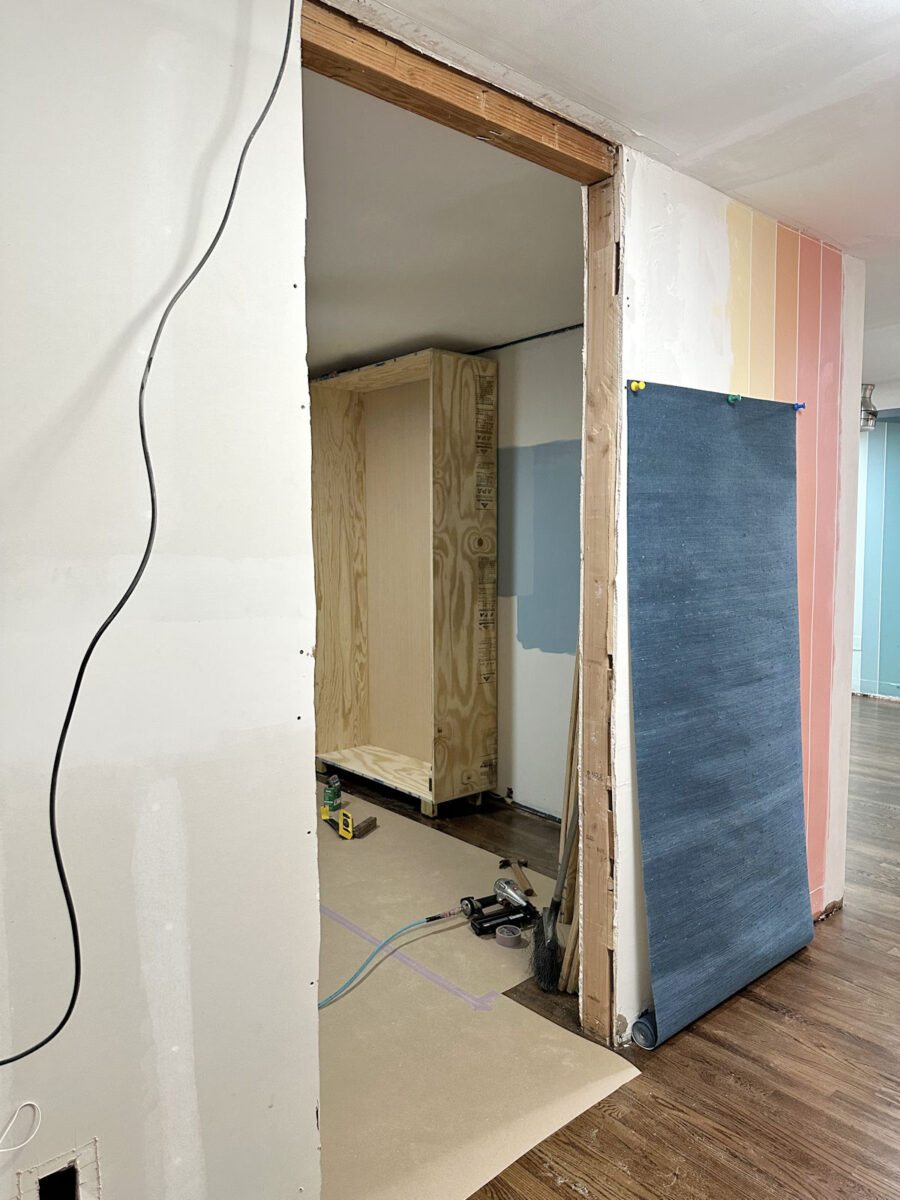
And here’s a glimpse of what you see when standing in the doorway to our bedroom suite. I love it when a plan comes together. My whole goal was to have the wallpapered unit visible from the bedroom suite doorway, and there it is. I wanted it placed so that it wouldn’t be obscured by the side of the cabinet on the doorway wall and so that the pretty wallpaper would be seen from the bedroom suite doorway. We’ll have to wait and see how it looks once that doorway wall unit is in place, but I think I may have accomplished my goal.
So that’s the progress. More to come tomorrow. We’re finally to the fun stuff, y’all! Of course, the magic happens when I start attaching all of the trim and molding, but I’m just so happy to finally be to the building stage!
The A2D Daily:

Addicted 2 Decorating is where I share my DIY and decorating journey as I remodel and decorate the 1948 fixer upper that my husband, Matt, and I bought in 2013. Matt has M.S. and is unable to do physical work, so I do the majority of the work on the house by myself. You can learn more about me here.