")
Are y’all as tired of this walk-in closet project as I am? I’m so proud of how this closet is turning out, but at the same time, I’m so ready to be done with it and move on. Doing a project of this scale by myself always takes longer than I think it’s going to take at the outset, and I always find myself getting frustrated and anxious to move on when I start to see the finish line. And that’s where I am today. It’s always that “90% finished” syndrome, where I’ve gotten enough of it finished that I can see it’s going to turn out pretty great, I can see the finished room in my mind, and I’m ready to move on. It happens with every big project, and in fact, I wrote about it when I was building the walk-in pantry. (You can see that post here.)
Anyway, last night as I was wrapping up my work for the night, I took inventory of what still needed to be done to finish this room. Those lists, on one hand, are always motivating to me because I can see, on paper, what still needs to be done, and it keeps me focused. Plus, I just love lists. 😀 But they’re also a little bit deflating because the actual written list always ends up longer than the list I had been filing away in my mind. But I’m going to try not to let it get me down or stress me out. I’m going to use it to motivate me as I get to check off each item on the list.
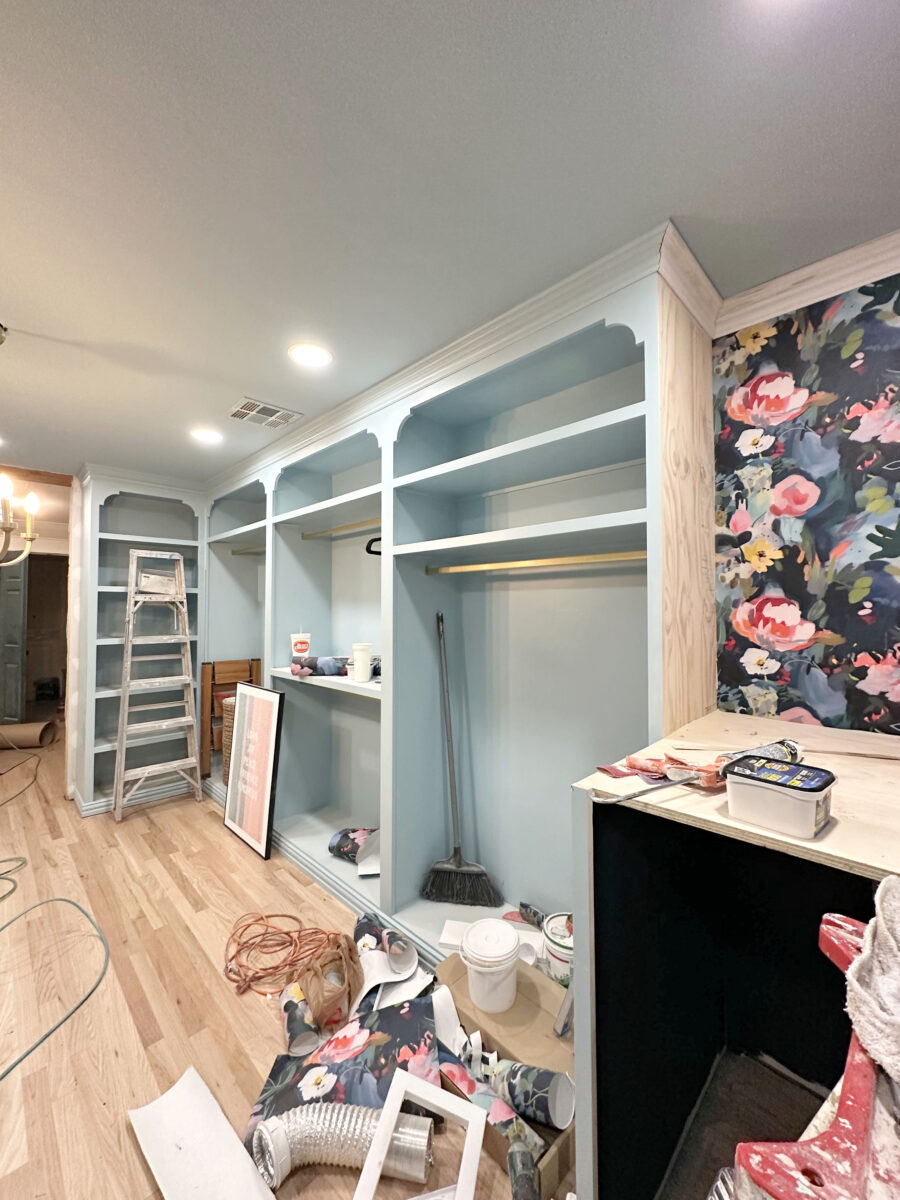
First, I got the rest of the crown molding up around the washer and dryer areas, and I got all of the nail holes wood filled and sanded. The cuts in the corners aren’t great because none of these corners are perfectly square, and I didn’t take the time to accurately measure each angle and cut precisely. I just cut everything at a 45-degree angle. But that’s why we have caulk, right? 😀
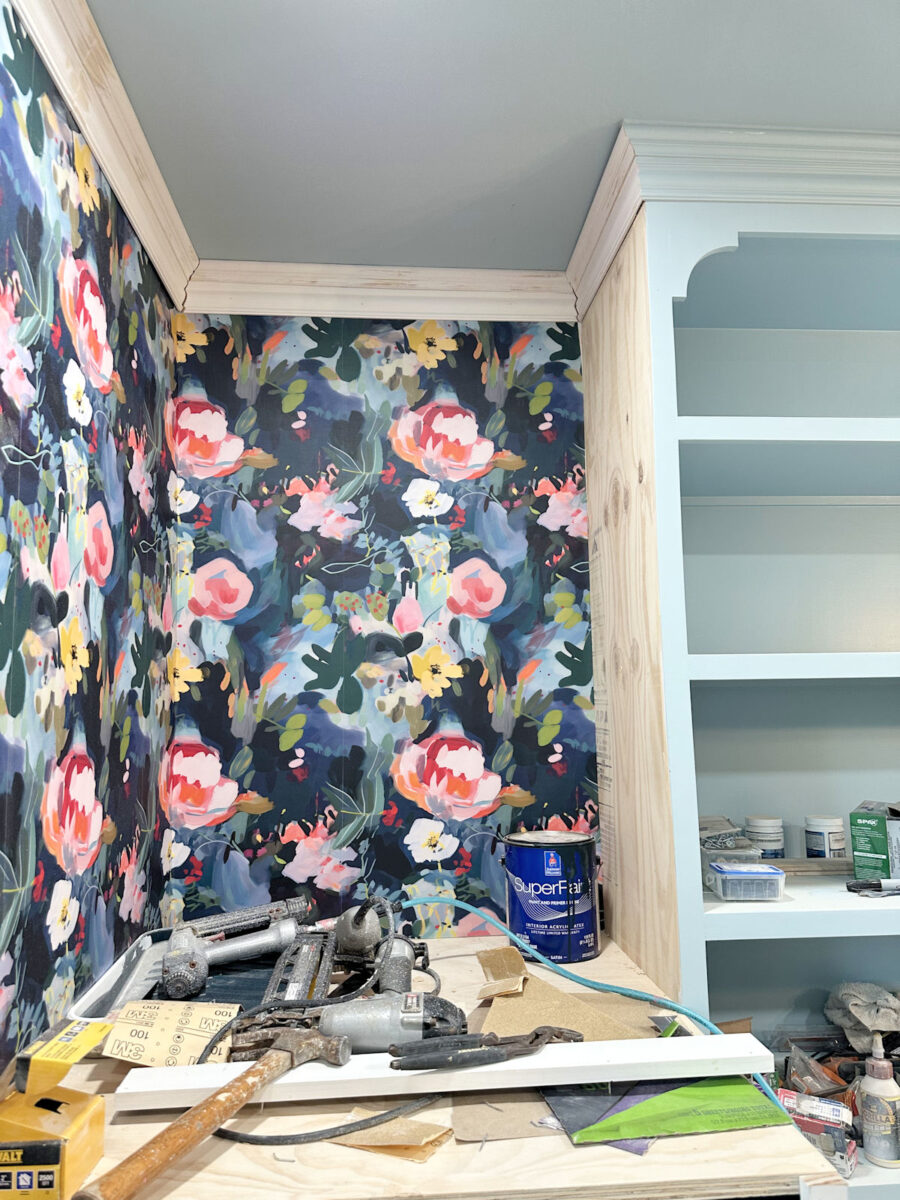
So all of the trim on these walls — crown molding, baseboards, window trim — still needs to be caulked and painted.

One item that I had completely forgotten about was that this doorway still needs to be framed out. Ugh. I had gotten so used to seeing it this way that my mind stopped seeing it as unfinished. Have you ever had that happen?
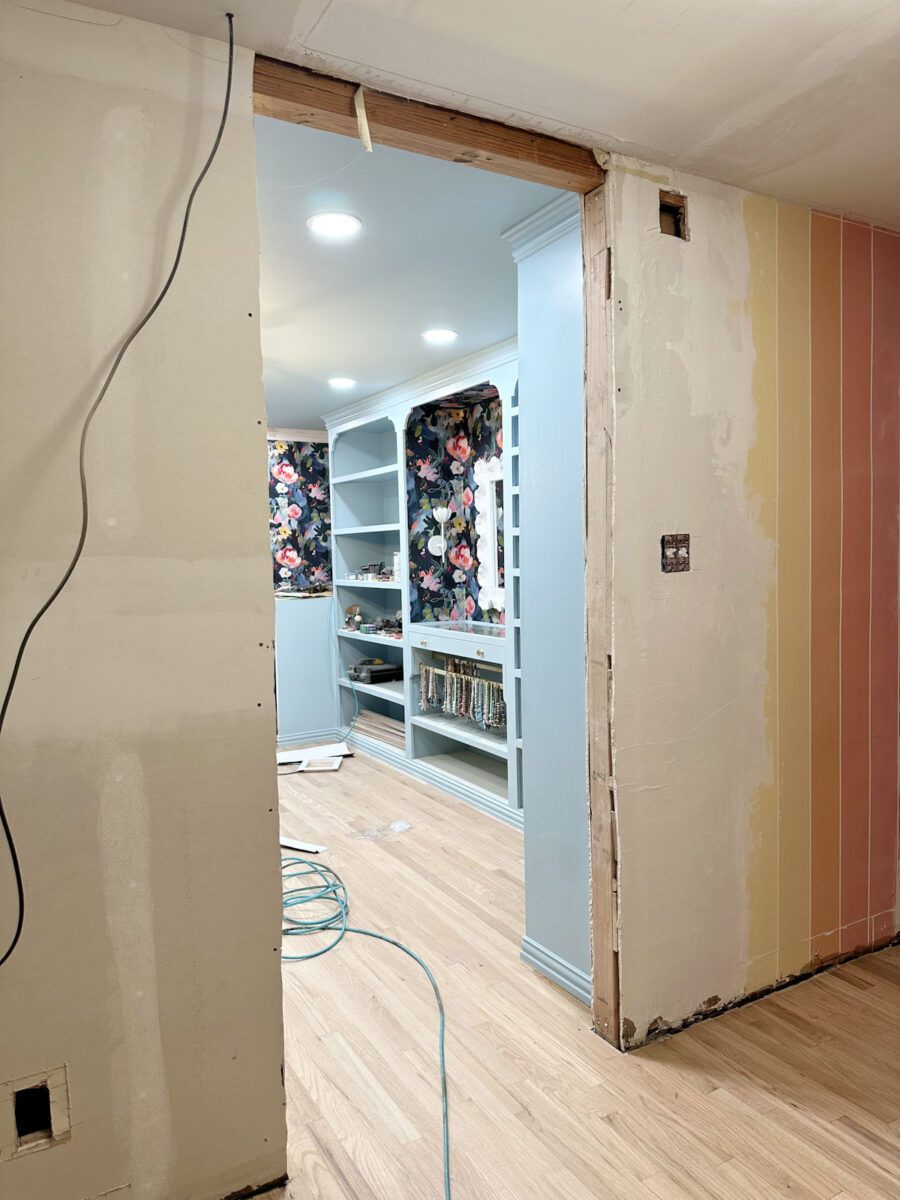
It’s like when you set a box of something in the corner to take somewhere, and then you forget about it. Then your mind gets so used to seeing it there that you don’t “see” it anymore. But obviously, the room isn’t finished until the doorway is framed out and finished.
Once the doorway is framed out, I’ll need to add this one remaining piece of crown molding across that wall above the doorway. Plus, I need to add small pieces of trim where the cabinets meet the wall.

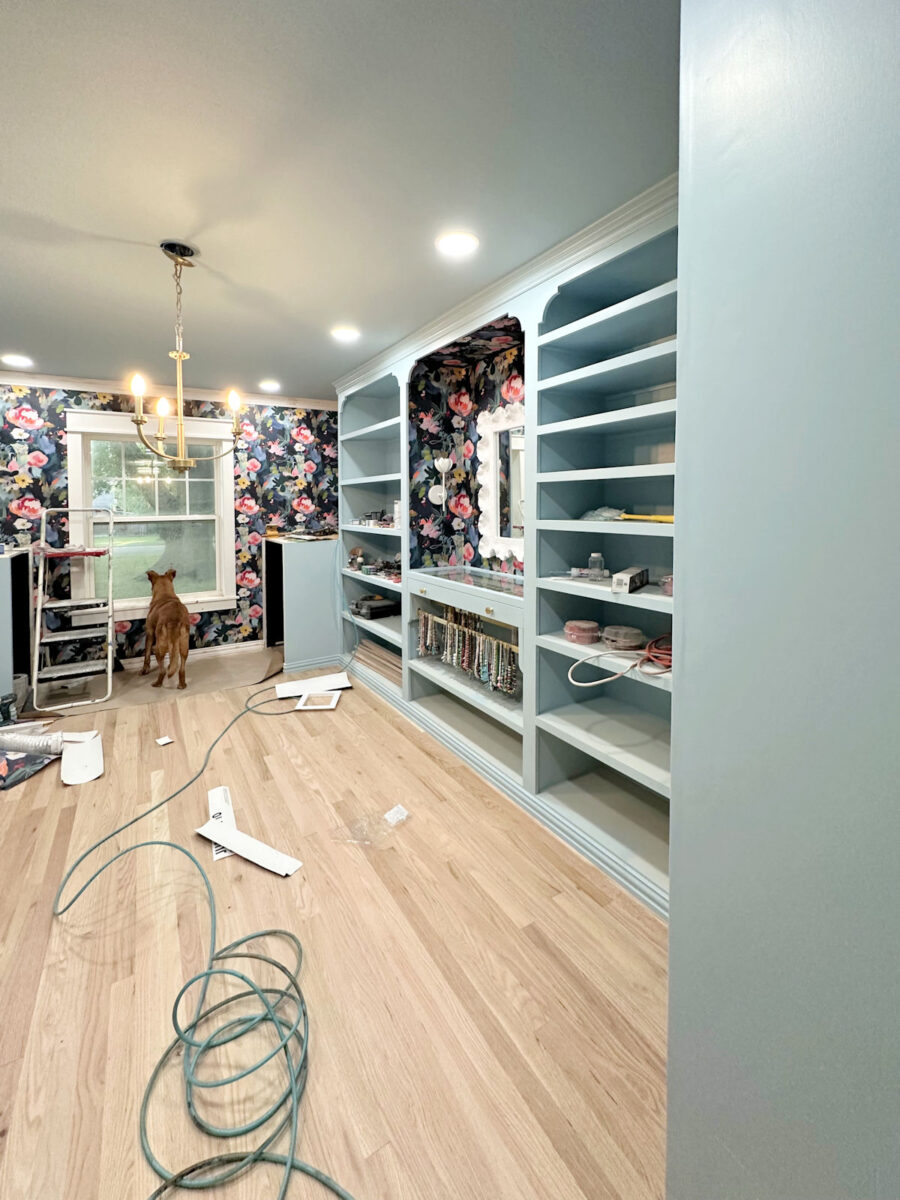
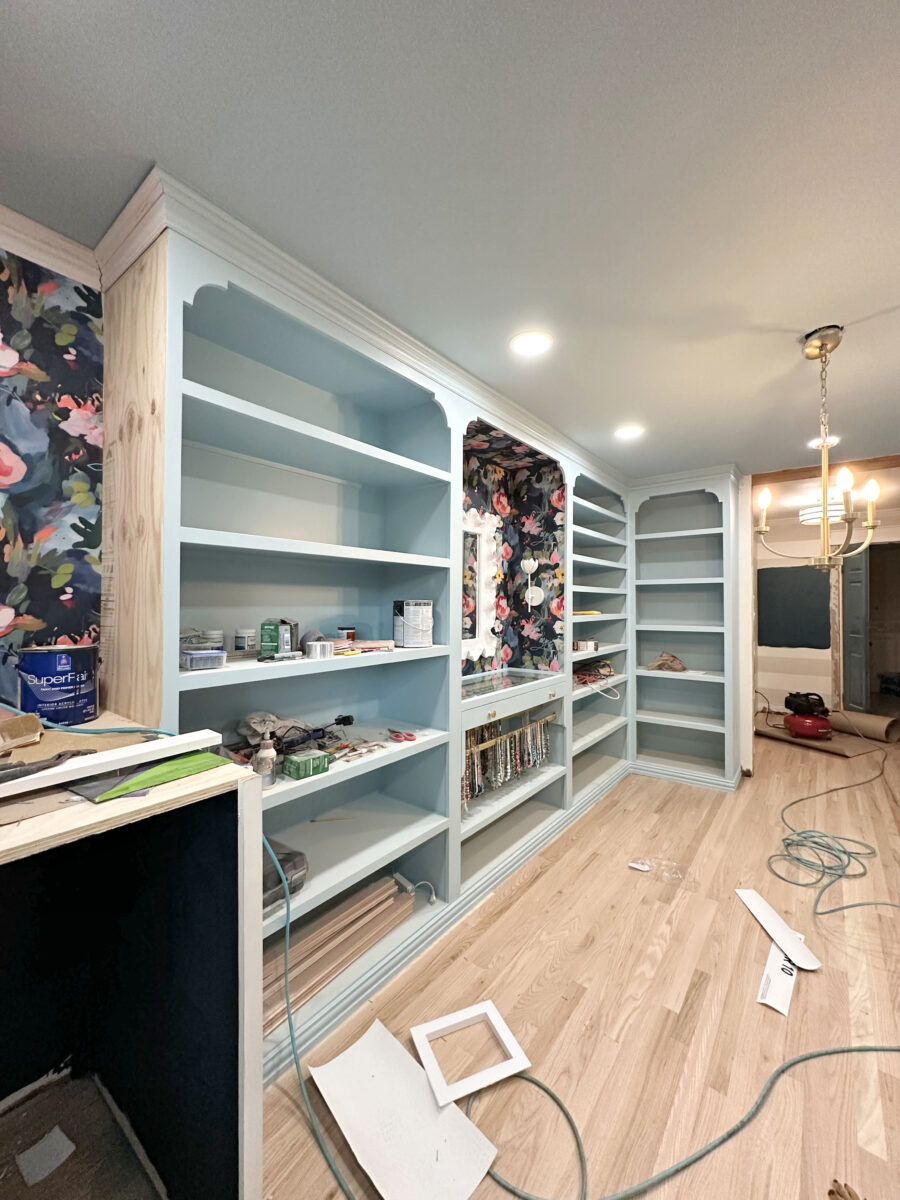
As far as I can tell, the three sections of cabinets on the right side of the room are finished with the exception of the shoe molding that needs to go right at the bottom on the baseboards.
I really need to get the doorway framed out before I add the shoe molding since that shoe molding will wrap around the side of the cabinets flanking the doorway and end at that wall on either side of the doorway.
The same goes for the cabinets on the left side of the room. Those are completely finished except for the shoe molding.
When I say that the right and left side cabinets are finished, I’m not including the ends, which obviously still need to be primed and painted. I consider those areas part of the washer and dryer areas in my mind. 😀 But those areas will also need some small vertical trim added where the cabinets meet the walls.
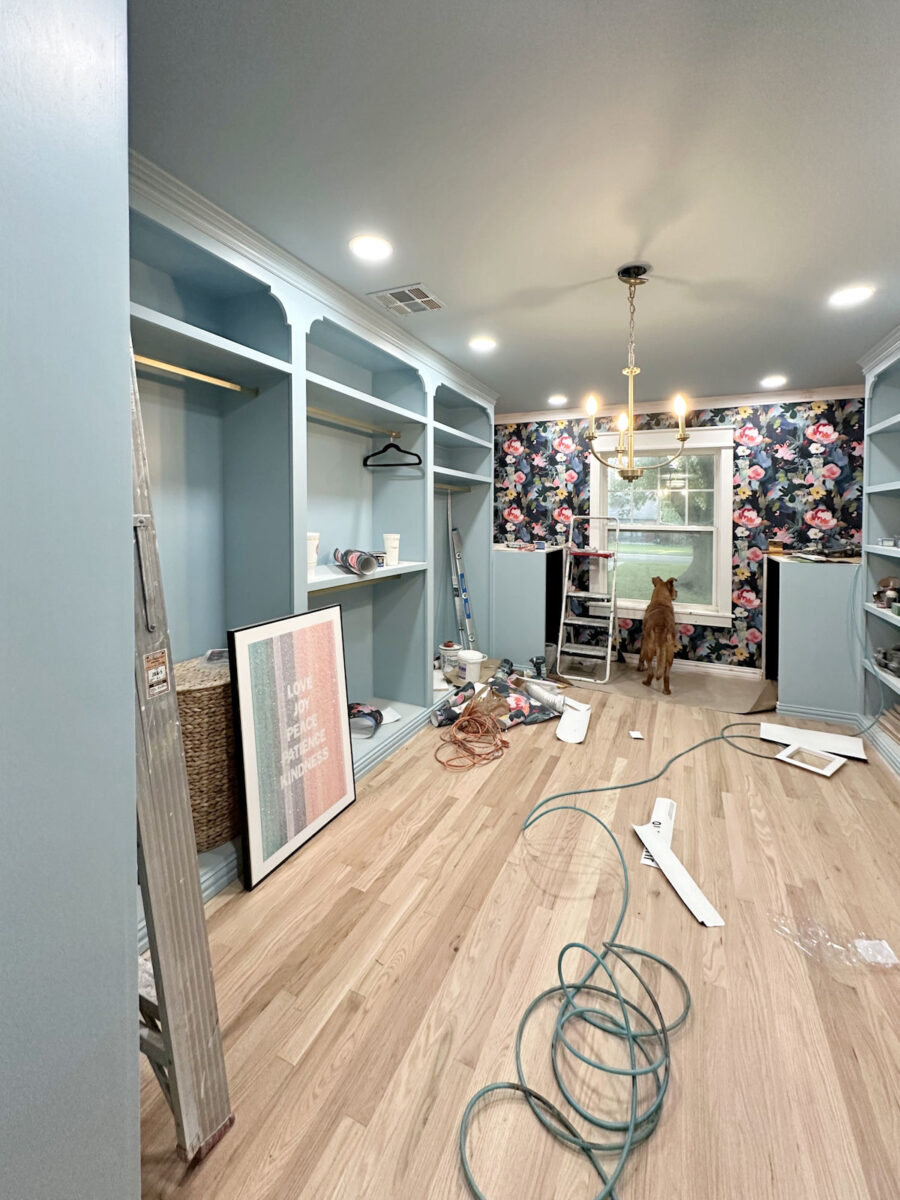
I won’t add that trim until after the countertops are done. And of course, I still need to build countertops for the washer and dryer cabinets. I also still need to add that top piece of trim to each of those cabinets (you can see the raw edge of the plywood top in the picture below) and install baseboards around the walls inside the washer and dryer cabinets. All of that trim needs to be wood filled, caulked, and painted.
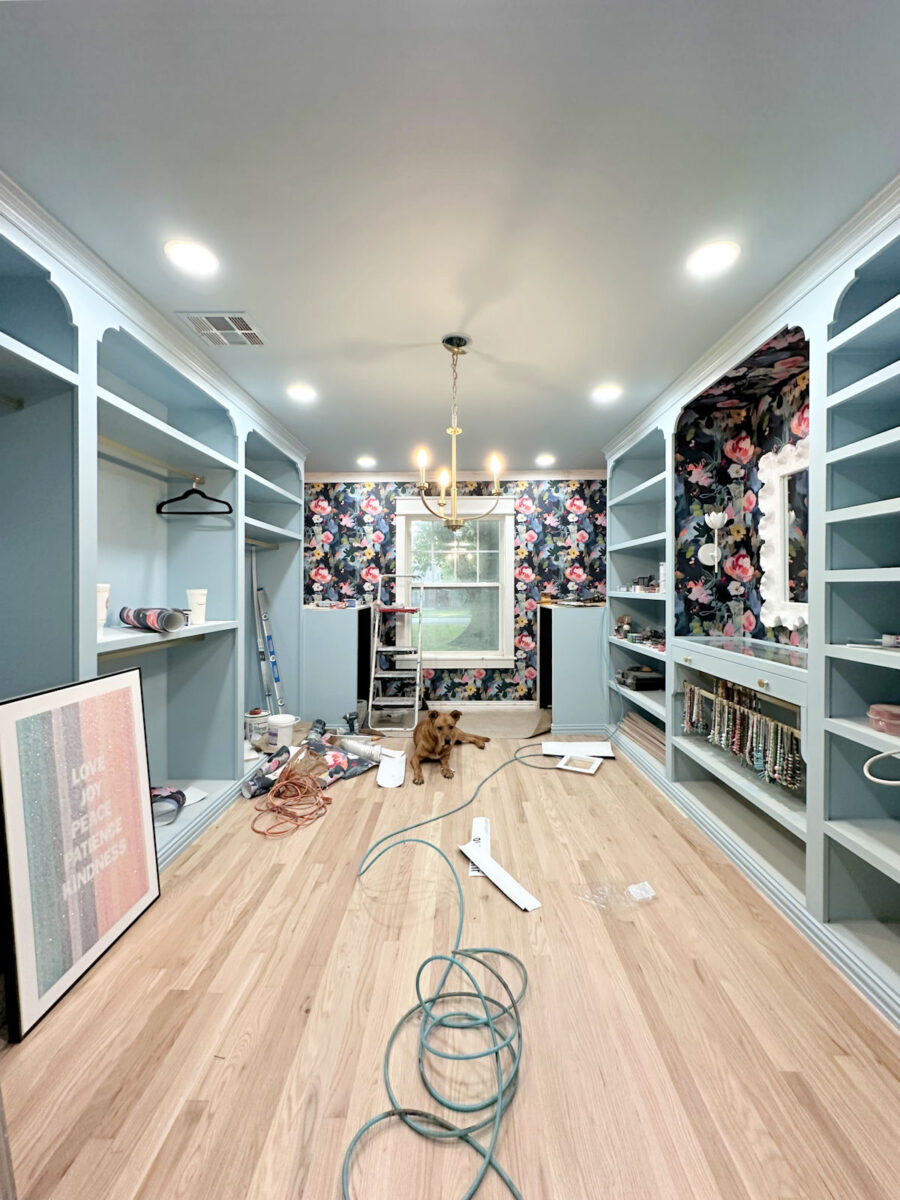
I still haven’t figured out what I’m going to do with the window. I’m still reading through your comments from yesterday’s post, and I’m sure once I’m finished reading your ideas, I’ll know which direction I want to go with that. It may be as simple as reinstalling the original shade (which is a top down/bottom up, fully lined shade), or it may require an extra step or two so that I can have privacy in this room.
And that brings me to the last two big projects that I think will take the most time. First, the chandelier makeover. I’m still not 100% sure how I’m going to do it. This may be one of those projects that I figure out as I go along. But somehow, I’m going to transform the chandelier from this rather simple brass-colored chandelier…
…into something inspired by this beauty that will coordinate with my white flower sconces…
I’ve never tried my hand at soldering, so this may be my opportunity. I bought a soldering gun last year, thinking that I’d use it when I made the pendant light above my desk in the studio, but I ended up not needing it. So this might be the time for me to learn a new skill.
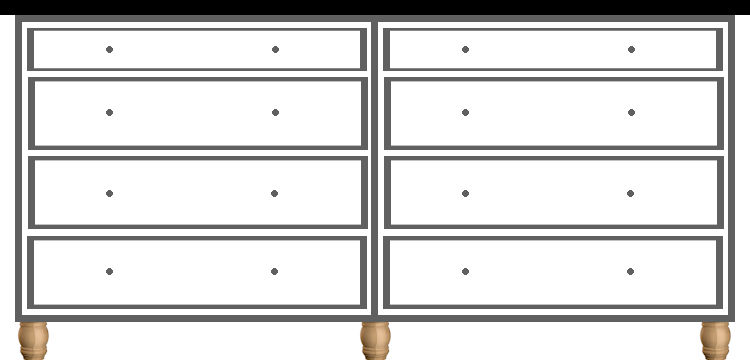
And then that leaves the last big project — the closet island. I’ve gone back and forth on this design so many times. I’ve tweaked the design, changed my mind, tweaked it again. But this past weekend, I decided that I’m just going to keep it simple. I’m going to keep all of the drawers and cabinets on the long sides of the island. The side that faces my jewelry/wallpapered cabinet section will have four drawers and two cabinet doors. The cabinets will be close to the washer, and that’s where I’ll keep extra detergent and whatever else needs to be close to the washer and dryer.
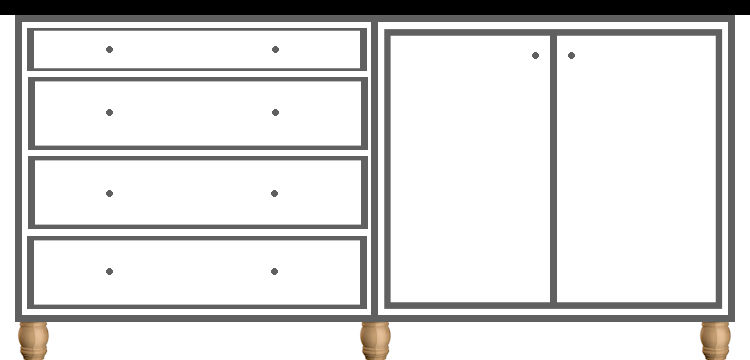
And after considering all of the options for keeping the island moveable (in case I ever need to get the washer and dryer out of the room), I’ve decided to design it like a double-sided dresser with turned wood feet. That way, if it ever needs to be moved, it’s not attached to the floor. If it’s too heavy, I can just remove the drawers, and then it’ll be easily movable. And I like the idea of it looking like a separate piece of furniture rather than being something built into the room. The side facing the hanging clothes will be all drawers.
It’s still quite a list, which is a bit depressing. But again, I’m going to try my hardest to use this list as a motivation rather than get discouraged. I’ll just keep my nose to the grindstone, stay as focused as I can, check off one project at a time, and hopefully soon, I’ll have a finished closet!
If you like to see lists in actual list form, this is what my punch list looks like:
- Caulk and paint the rest of the crown molding, window trim, and baseboards around the washer and dryer,
- Prime and paint the ends of the cabinets by the washer and dryer,
- Install and paint the baseboards inside the washer and dryer cabinets,
- Finish the trim around the washer and dryer cabinets — wood fill, caulk, and paint,
- Figure out how to move the washer and dryer into the room and get them hooked up,
- Figure out what to do with the window for privacy,
- Frame out the doorway,
- Trim out the doorway — wood fill, caulk, and paint,
- Add the crown molding above the doorway — wood fill, caulk, paint,
- Make the countertops for the washer and dryer cabinets,
- Add the vertical trim where the cabinets meet the walls (by the washer and dryer, and by the doorway)
- Install all of the shoe molding and paint,
- Paint and install the wall sconces above the washer and dryer,
- Hang the artwork above the washer and dryer,
- Transform the chandelier into flowery goodness,
- Build the center island,
- Find storage baskets for the shelves on the end cabinets (that don’t cost a fortune).
I think that’s it. That’s a lot, but I can do it!

Addicted 2 Decorating is where I share my DIY and decorating journey as I remodel and decorate the 1948 fixer upper that my husband, Matt, and I bought in 2013. Matt has M.S. and is unable to do physical work, so I do the majority of the work on the house by myself. You can learn more about me here.