
For some reason, I had this idea that adding skirting to my back yard workshop would be a fairly easy, one-day project. My goodness, was I ever wrong! The project isn’t difficult at all, but it’s definitely not a fast, one-day project, at least not for an 18′ x 27′ building, and especially when I’m working alone.
I contemplated many different types of materials to use as skirting for my workshop. The problem I kept running into was that very few materials are rated for ground contact. My initial thought (and the plan which would have been the cheapest) was to use the same siding material that’s on the building, and just carry that down as the skirting. But then I read that that siding material isn’t supposed to be any closer than six inches from the ground.
After perusing the aisles of Home Depot and Lowe’s looking for every other possibility and googling various materials for ground contact information, I finally realized that my best option was going to be PVC boards. We know that PVC is perfectly fine touching the ground because we put it in the ground. Plumbing these days is mostly PVC and PEX, and so if PVC can be under the ground, it can certainly be touching the ground.
So that’s what I used. And purchasing enough PVC boards to complete skirt an 18′ x 27′ building wasn’t cheap, either. But hopefully, because it’s PVC, this is a one-and-done kind of project. I won’t ever have to deal with anything rotting and having to be replaced. So the upfront cost is worth it.
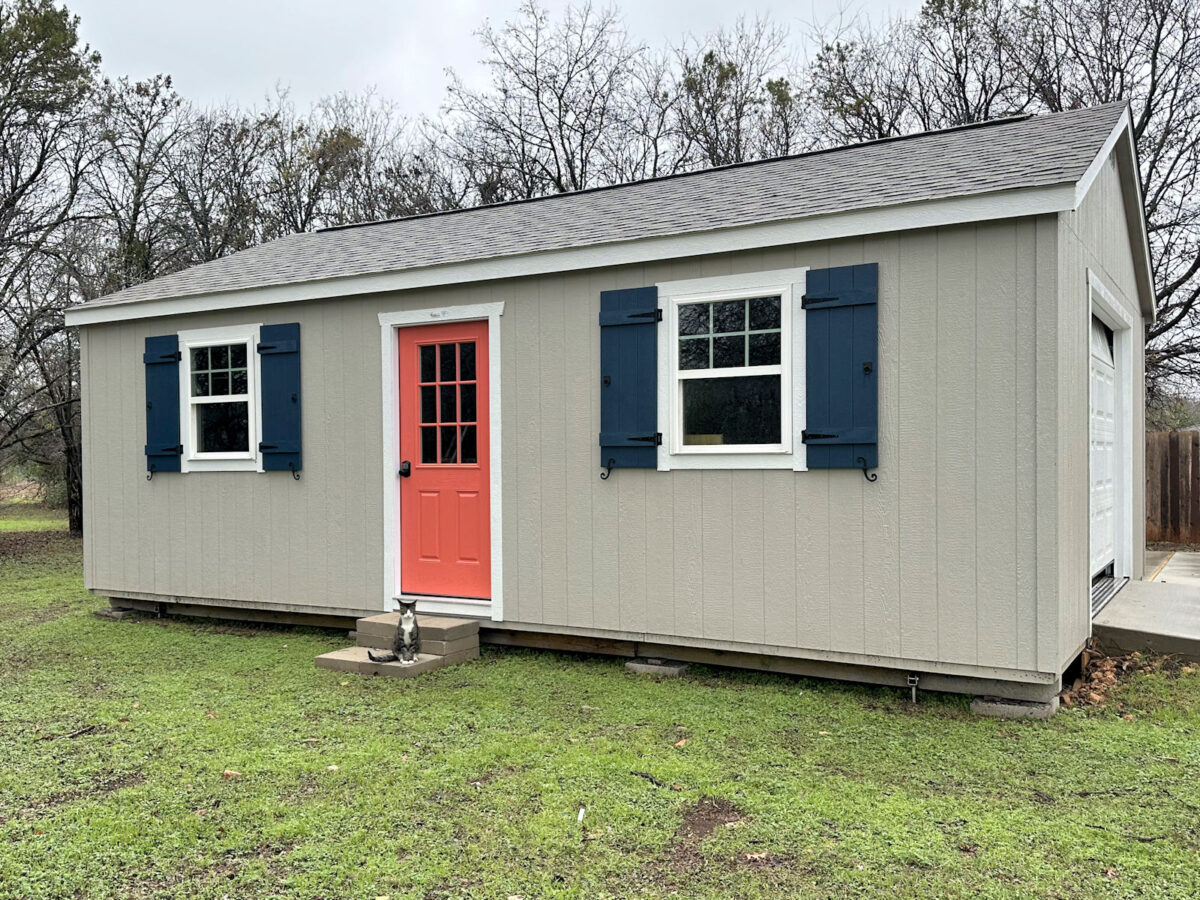
Before I show you the process and progress, let me first remind you what the workshop looks like after the first two projects — building the shutters and painting the front door.
My building is built on four thick wood skids, so the plan was just to nail the skirting right to those skids just under the siding.

But I didn’t want the skirting to go behind the steps to the front door, which will be my next project. So before measuring and attaching any skirting, I wanted to mark off the width of the steps. I decided to make my steps extend 16 inches from the trim on the door on each side.

And then I measured from the corner of the skid to the mark I just make. That width on my building was 122 inches.

I didn’t want to put the skirting boards right up against the siding. I thought I needed some sort of transition board first. So I cut lengths of 1″ x 2″ PVC boards, mitered them for the corners of the building, and attached them flat (i.e., face up) just underneath the siding.

Before I attached that, I had to cut away about 1/4-inch from the bottom of one of the corner trim pieces on the building because it was too low and in the way of where that transition piece needed to be attached. I used my Dremel Multi-Max for that.

Once that excess was cut away, the transition board fit perfectly underneath the siding all the way to the corner.

I used 2.5-inch 16-gauge nails for this.

Then I was ready to attach the skirting boards. I wanted these boards to run horizontally, and it took two boards to fill in that 12-inch height between the ground and the siding. So I decided to attach the boards together using PVC glue and pocket screws, and then attach them at one piece to the building. So I marked and drilled all of the pocket holes, keeping them to about 12 inches apart.

And the I used a liberal amount of PVC glue on the edges of both boards.

And then I screwed them together using the pocket holes and Kreg 1.25-inch exterior screws.

When I got the boards over to the building, I realized that there wasn’t quite enough room on the right end for the boards to fit into the skirting area. But I didn’t want to cut the boards.

So instead, I dug out a trench for the boards to fit.

And here’s what it looked like when it was attached.

Here’s what the workshop looked like with both sides attached on the front of the building.

I decided to do the back of the building next because I knew this one was going to be the biggest challenge, and I wanted to get it over with. This side is an uninterrupted 27-foot run of skirting. So I started by attaching the transition piece.

The longest PVC 1″ x 2″ boards only come in 12-foot lengths, so I had to have two joints on this side. I cut the end of the first board at a 45-degree angle…

And then cut the next board at that same angle…

That helps to disguise the joint way more than if the boards had straight cuts.

Next up was the skirting. This was the most challenging part of the day because I had to pre-assemble a 27-foot run of skirting. I decided to stagger the boards, similar to how you install hardwood flooring, so that I didn’t have joints in the top row lining up with joints in the bottom row.

I drilled the pocket holes in all of the boards first, and then assembled them on the driveway. The most challenging part was working quickly enough with the PVC glue to get the boards together before the glue started to dry.

And once it was all together, I had to figure out how to drag that 27-foot length of PVC board skirting over to the building. PVC boards are very bendy, unlike real wood. And I didn’t want to drag it on the concrete face down because it would scratch up the face of the boards. So I finally realized that I could use the furniture dolly on one end and then pick up the other end and pull it over to the building.

And by the time I got it to the buidling and lined up, not only was I completely out of daylight, but I also realized that this entire 27-foot length is going to need trenching for the skirting to fit.

So it definitely wasn’t a one-day project. I didn’t realize how much digging and trenching would be necessary, and then just trying to figure out how to do that long run of skirting on the back of the building too way longer than I thought it would. But it’s a good start, and I think the white skirting looks so good on the building! So, hopefully it’ll only take one more day, but I have a feeling it might be two or three. I guess it depends on how much trenching is needed.

Addicted 2 Decorating is where I share my DIY and decorating journey as I remodel and decorate the 1948 fixer upper that my husband, Matt, and I bought in 2013. Matt has M.S. and is unable to do physical work, so I do the majority of the work on the house by myself. You can learn more about me here.