")
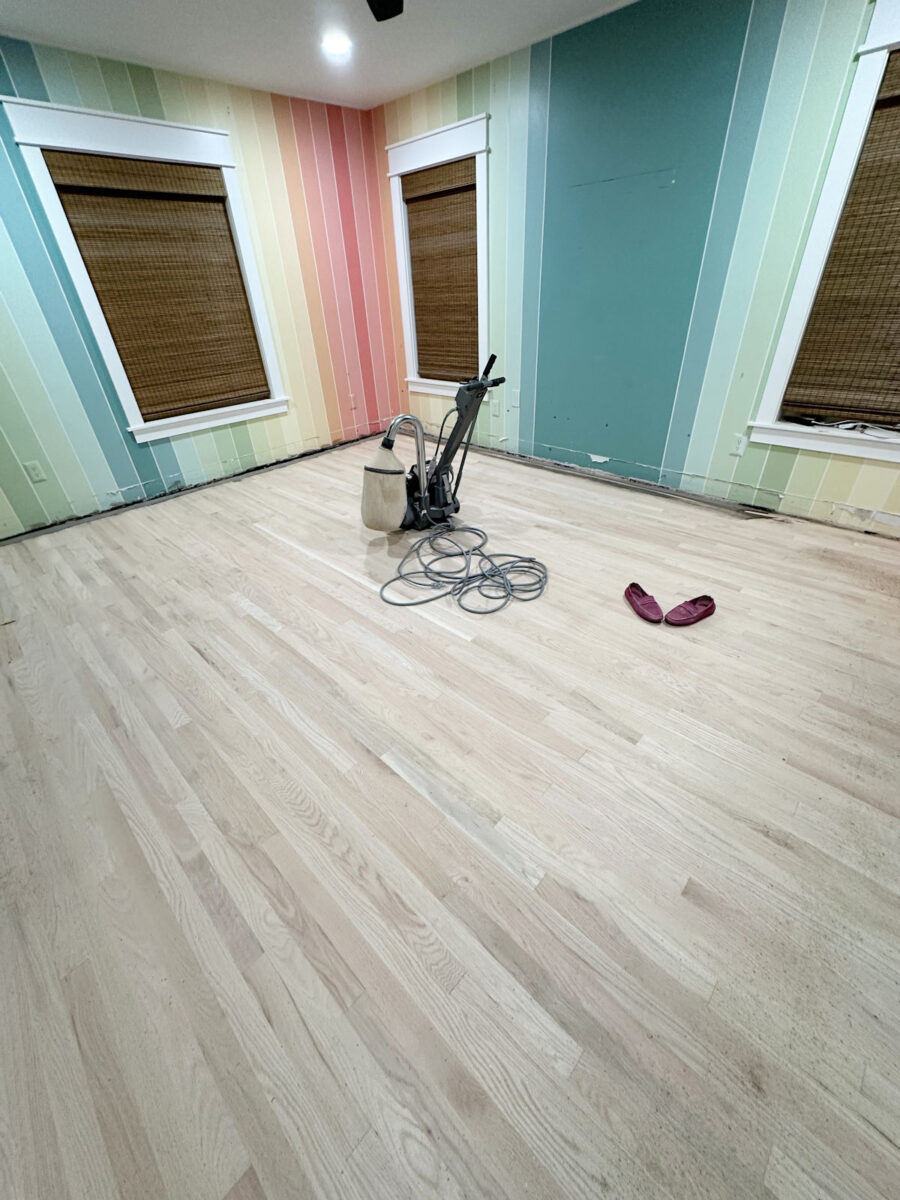
I made a ton of progress yesterday on sanding the red oak hardwood floors in our bedroom suite! I didn’t get them finished. I’d guess that I’m about halfway through with the whole process. I started with 36-grit sandpaper since I’m removing a really dark finish, and I didn’t even get through that whole process yesterday. But that’s the hardest part (I’ll show you why in a bit), so the rest should go so much faster. Once all of the original finish is off, I’ll follow up with 60-grit, 80-grit, and then end with 100-grit.
This kind of feels anticlimactic at this point. After all, it was just over two months ago that I had these hardwood floors installed, and at that time they looked like this…
And then I stained and polyurethaned them, and they looked like this…
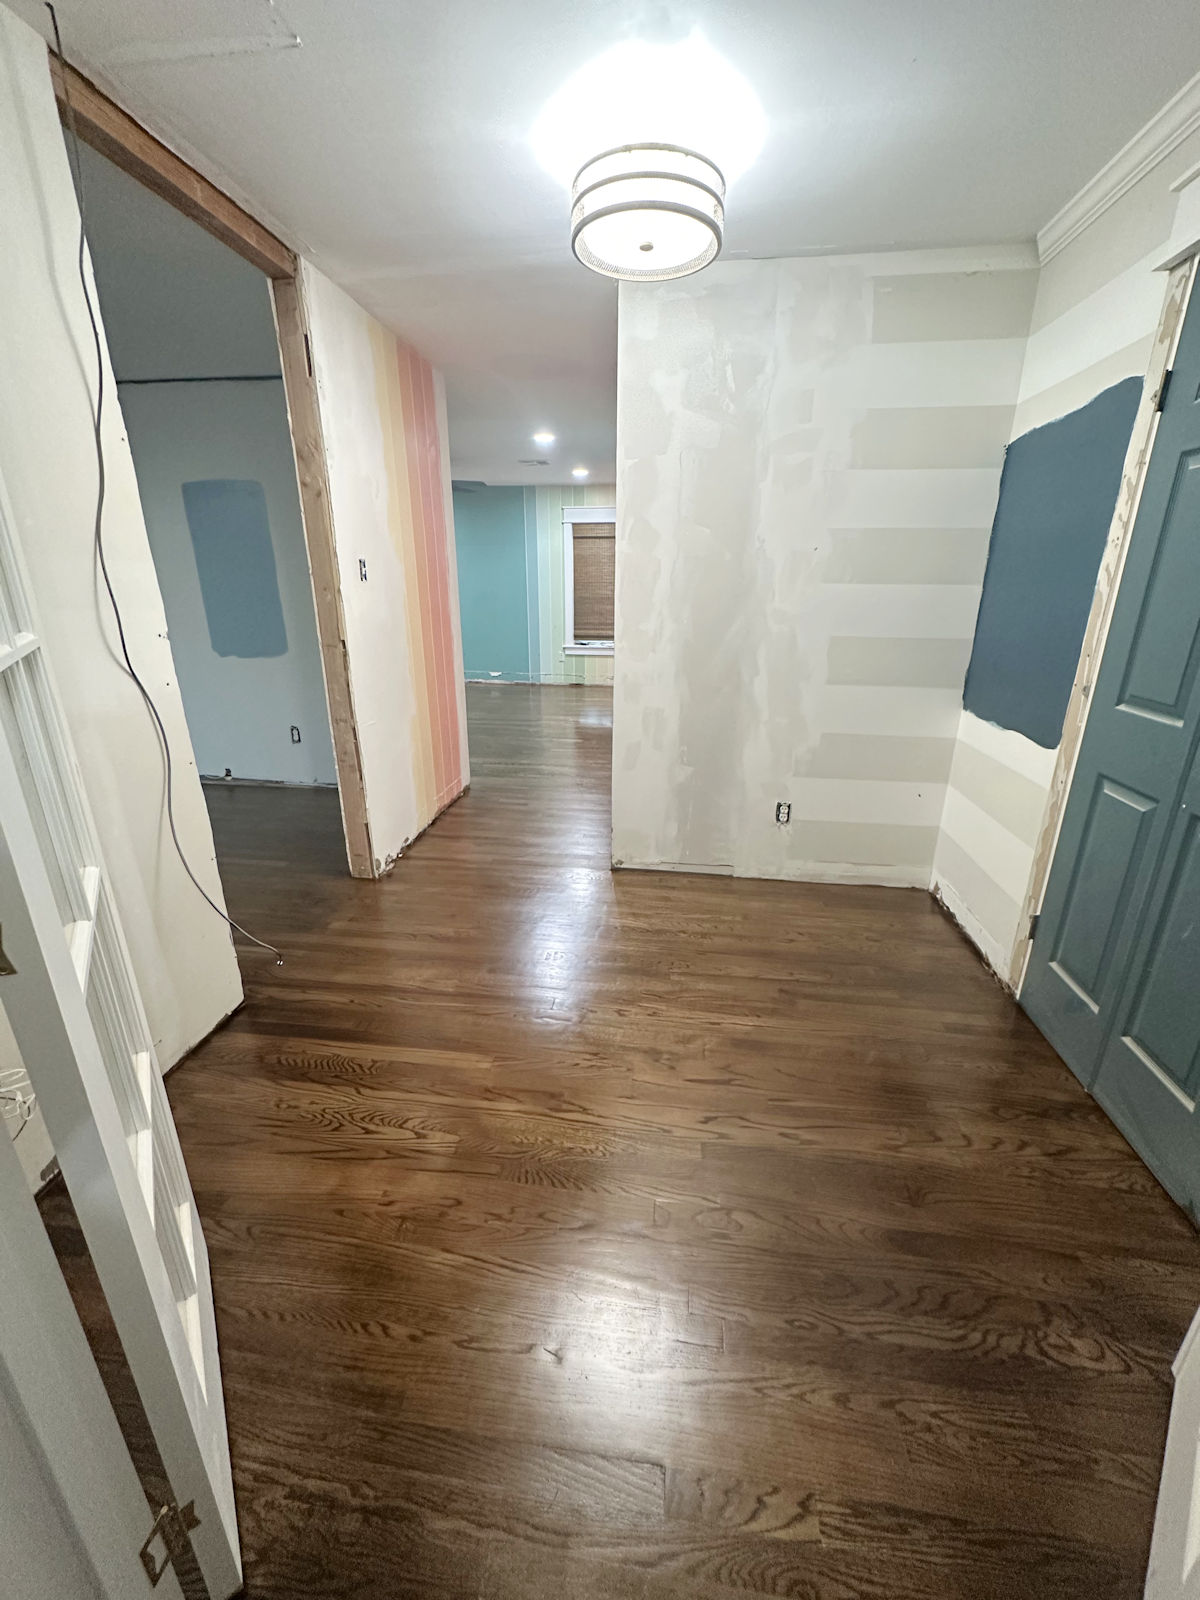
So undoing all of that hard work and going back to the point where I was just over two months ago doesn’t really feel like progress. But I know when all is said and done, I’ll be so happy that I took this opportunity to change the floor color, not only in our bedroom suite, but throughout our entire house.
Anyway, I rented two floor sanders from Home Depot. Our Home Depot rental department is fairly new, so this was my first time to rent from Home Depot. And I’m so glad I did! The reason I didn’t sand my own floors the first go ’round (when the flooring was installed earlier this year) is because I remembered sanding the floors in the rest of the house years ago, and it not a fun process. I rented those sanders from a place called Sunbelt here in Waco, and the drum sander was hard to use and created a ton of dust that was thrown into every nook and cranny in every room. The edge sander was awful and almost impossible to use, with the sanding disc flying off and across the room after going only a few feet. I remember being in tears over that edge sander.
I didn’t want to go through that again, so earlier this year, I hired out the sanding of the hardwood floors. But had I known how awesome Home Depot’s sanders were, there’s no way I would have hired out that job! These American Sanders floor sanders are easy to use, and I was especially impressed with the edge sander. (Tiger seemed impressed as well. 😀 )

Speaking of Tiger, he’s doing really well. I put a collar with an air tag on him so that I can keep tabs on him. 😀 He pretty much spends all of his time in our back yard, and I’m out there very often to give him lots of love and cuddles.

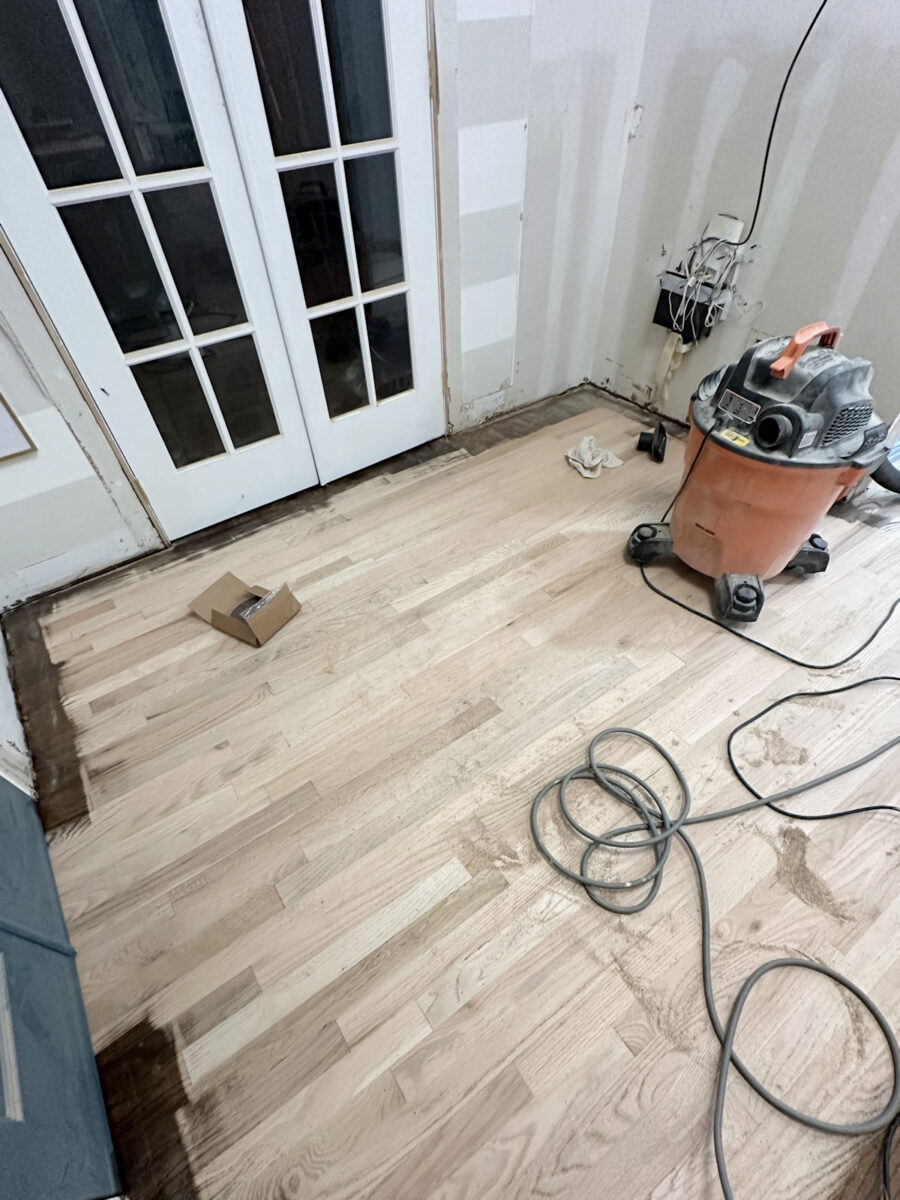
Anyway, here’s the sanding progress. I got all of the sanding with the 36-grit sandpaper on the drum sander done in all of the areas. And then I got about halfway done with the edge sanding with the 36-grit sandpaper.
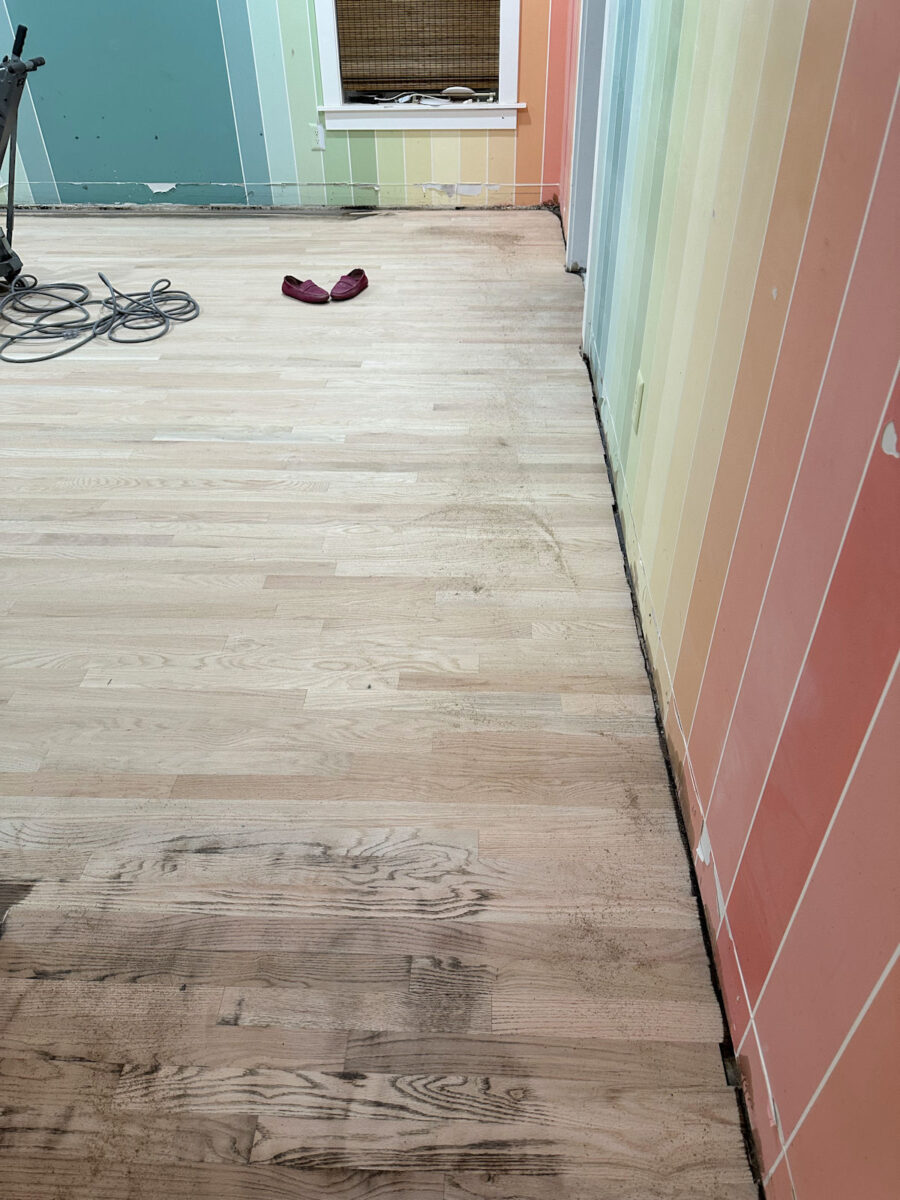
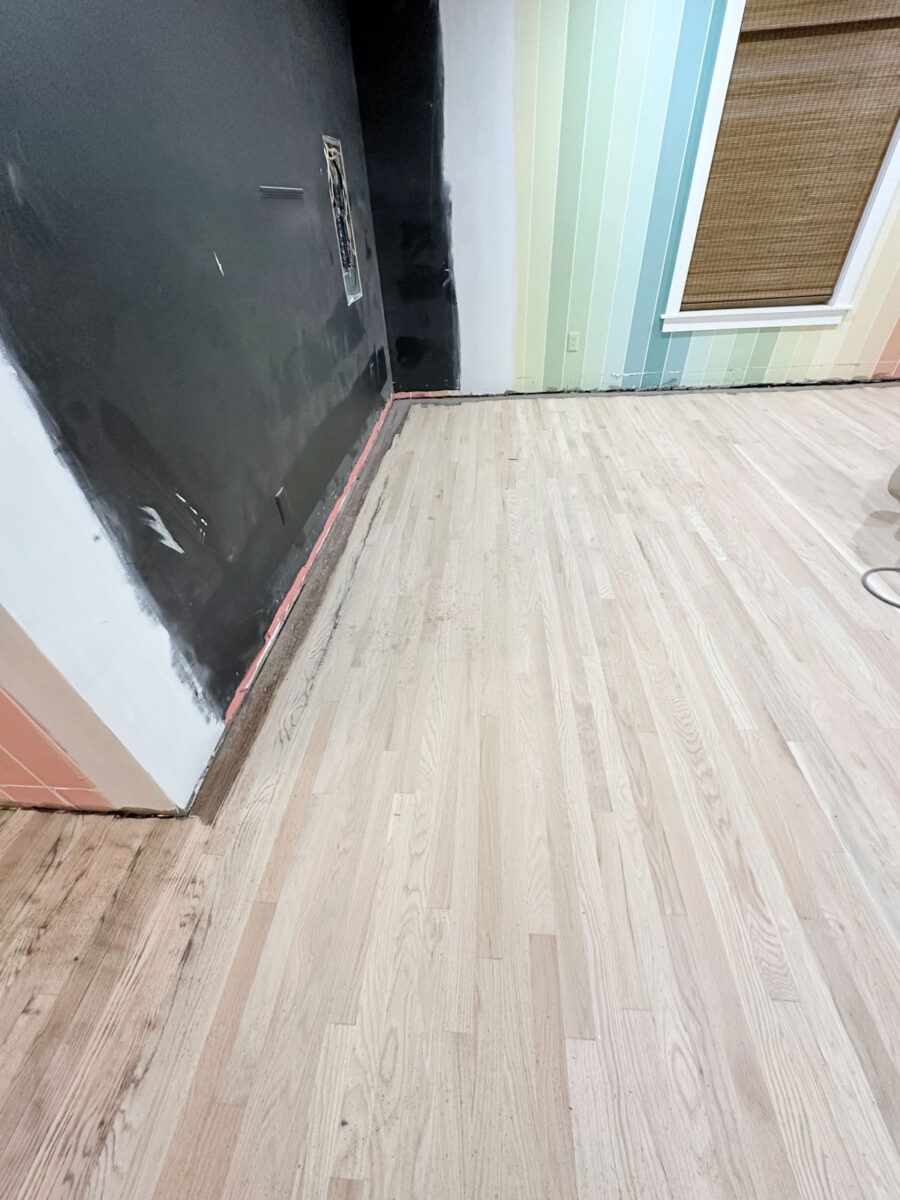
The areas around the doorways are obviously the most challenging parts, and I will need to get new blades for my floor scraper in order to get right up to the door jambs. Since I’m going from really dark floors to a really light finish, I obviously want every single bit of that dark finish gone as much as possible. And I’d like to do that without removing any additional trim pieces, if possible.

Thankfully, with the awesome edge sander, the areas right up against the walls are much easier than I anticipated. I’ll still have to use a floor scraper in the corners, though, since the round edge sander can’t get into those corners.
But I got all of the main area of the foyer done. My biggest concern is the transition between the bedroom suite foyer and the music room. That needs to be a clean, straight line for now (until I refinish the rest of the floors in the future), and I’m not quite so confident in my ability to get a clean, straight line, even with a floor scraper. I’ll do my best, obviously, but I might have to live with a not-so-perfect transition for a while.
Anyway, the reason that the first sanding takes so long is because that dark finish has to be removed from all of the wood grain. With just one pass, it looks like this…

And obviously, that won’t do. When I was trying to figure out what finish and which products to use to get a light finish on red oak hardwood flooring, I watched as many videos as I could find on YouTube, Instagram, and TikTok. I came across one video of a young woman who DIYed her floors, and she didn’t sand enough to remove all of the finish from the grain. The result wasn’t great. I thought maybe she just didn’t know what red oak floors were supposed to look like when they’re sanded. Maybe she thought that red oak floors just naturally have really dark grain, but they don’t. If they’re sanded properly, red oak floors have pretty light-colored grain. Any really dark grain is leftover stain, and it needs to be removed.
So getting all of that up is the biggest challenge on the first sanding. Once all of that is up, the rest of the sanding (the 60, 80, and 100-grit sanding) should go pretty quickly.
I’ll be using Bona NaturalSeal on the floors, and that sealer has a bit of white pigment added to it. So once they’re completely done, the finished floors should be just a bit lighter than they appear in their completely natural, unfinished state.
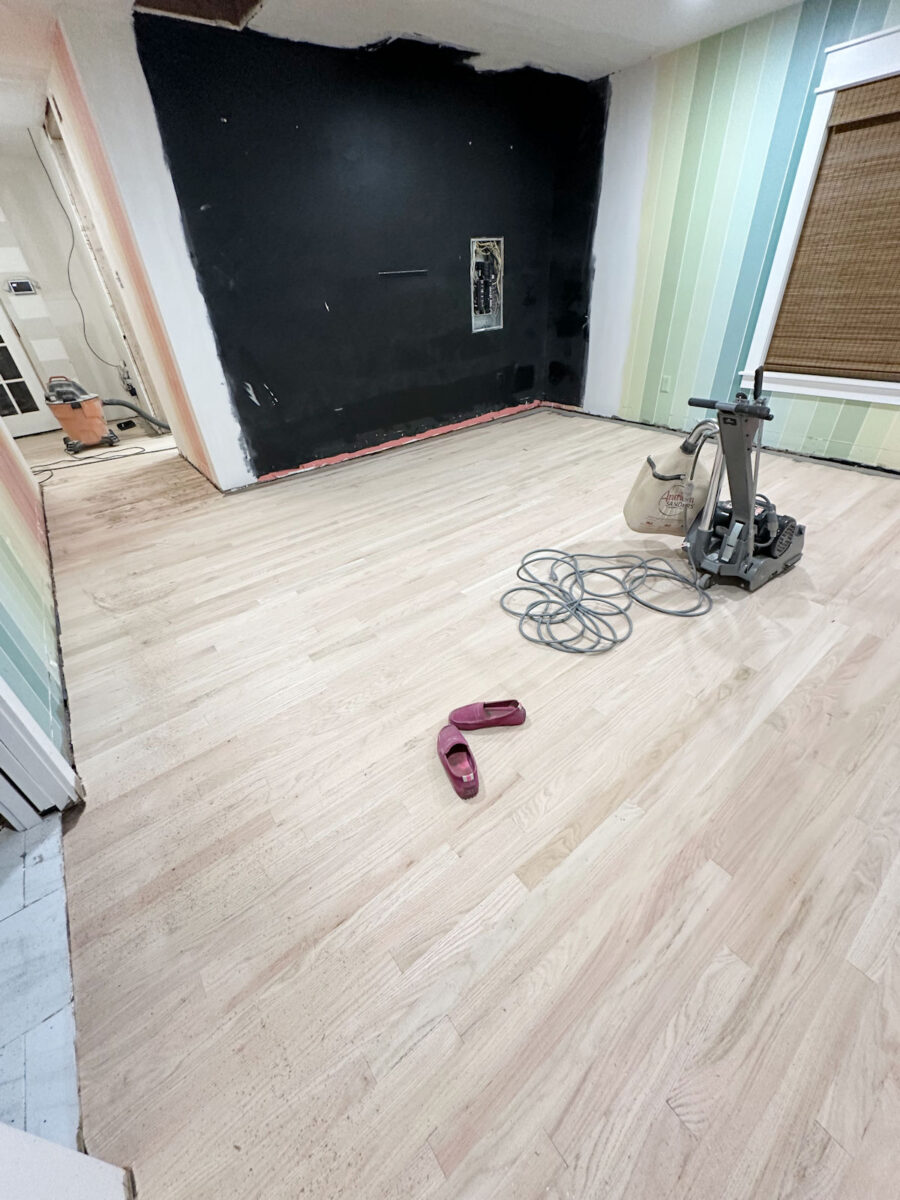
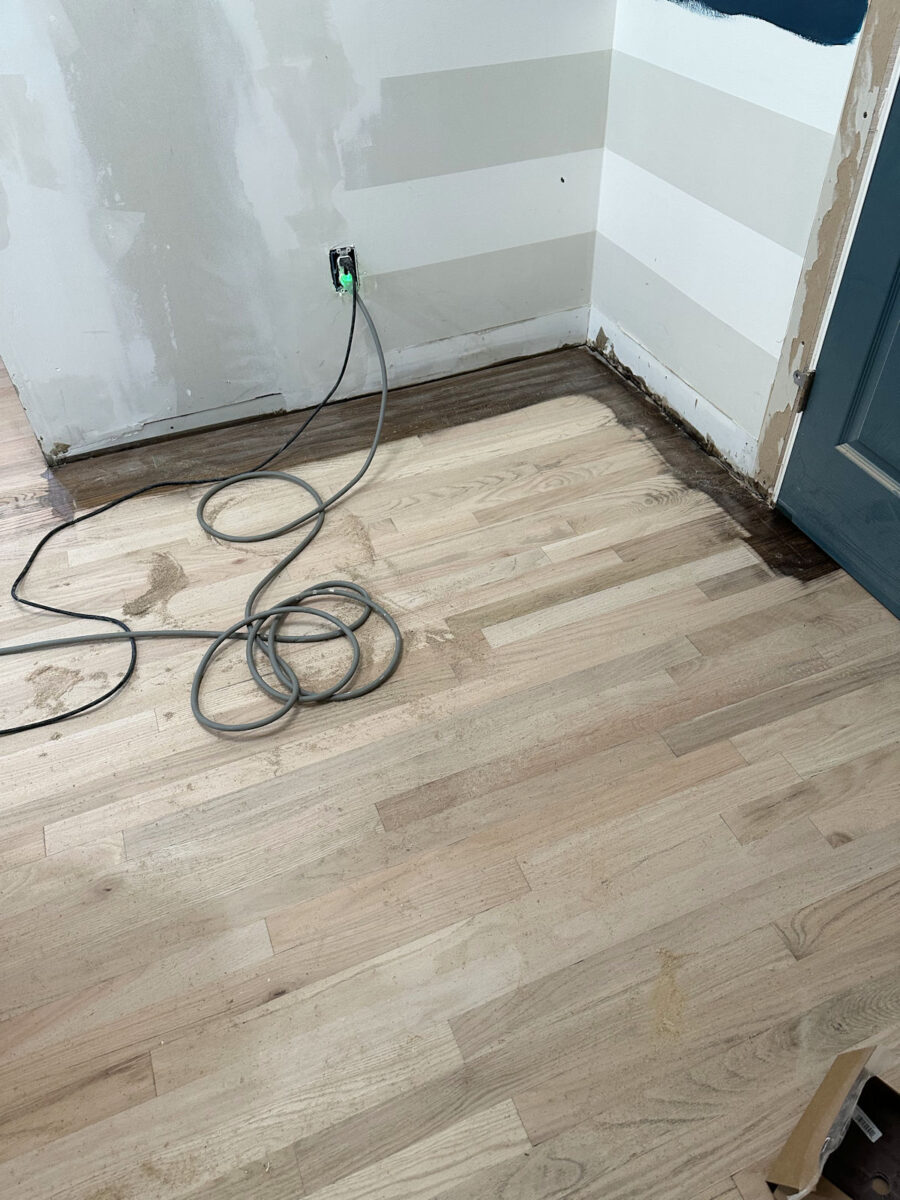
Another challenge is that this whole little hallway between the foyer and the bedroom has to be done with the edge sander because there’s not enough room to use the big drum sander there since I have to sand with the grain of the wood. That doesn’t seem like a big hallway at all when you’re looking at it, but when you’re bending over and using a powerful edge sander to sand the whole thing, it seems much bigger than it is. 😀


I also noticed that I have several areas that I already sanded, but clearly I didn’t do enough. So once I finish up with the 36-grit sanding, I’ll give all of the floors a once-over and go back and hit the areas that I missed before moving on.

I estimate that I can get through all of the sanding with the other three grits of sandpaper, up to 100-grit, in the same amount of time that it took me to do all of the floors with the 36-grit. So the hardest part is almost over.
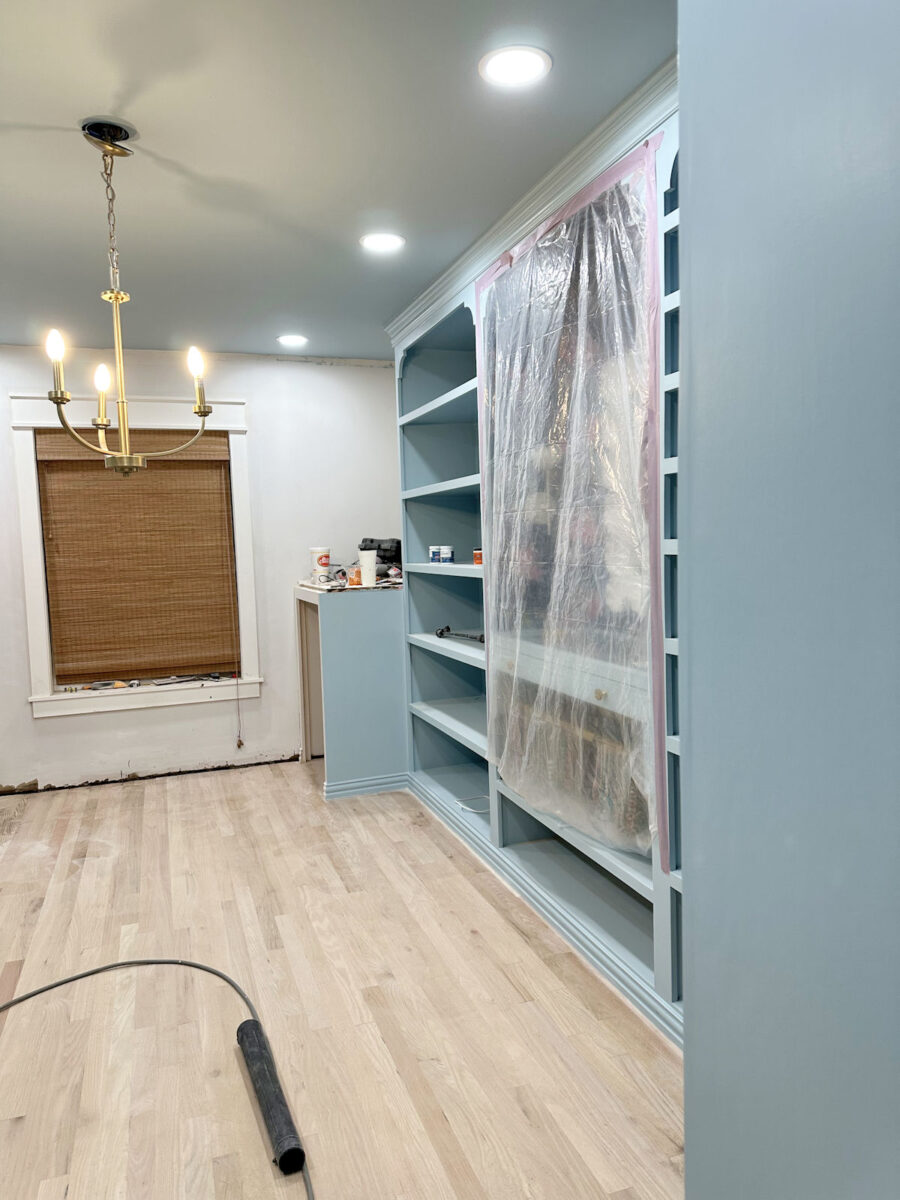
But here’s the fun part. We can finally get an idea of what my blue walk-in closet will look like with light hardwood floors. Again, the finished floors will be a tiny bit lighter than what they look like here, but just look at this huge difference the light floors make!
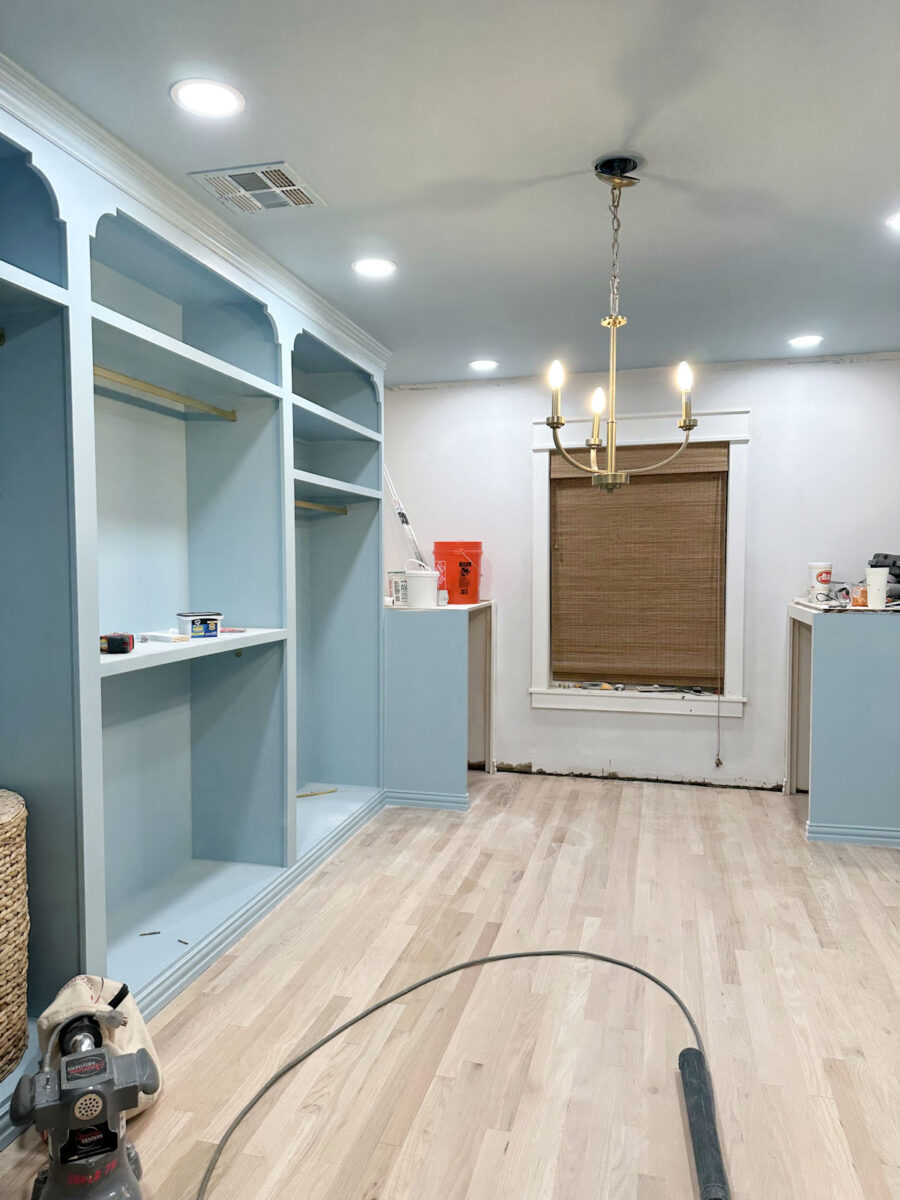
Isn’t that going to be pretty?! I’m so glad I decided to take this opportunity to change the floor color! Here’s a reminder of what it looked like with the (very dusty) dark floor.
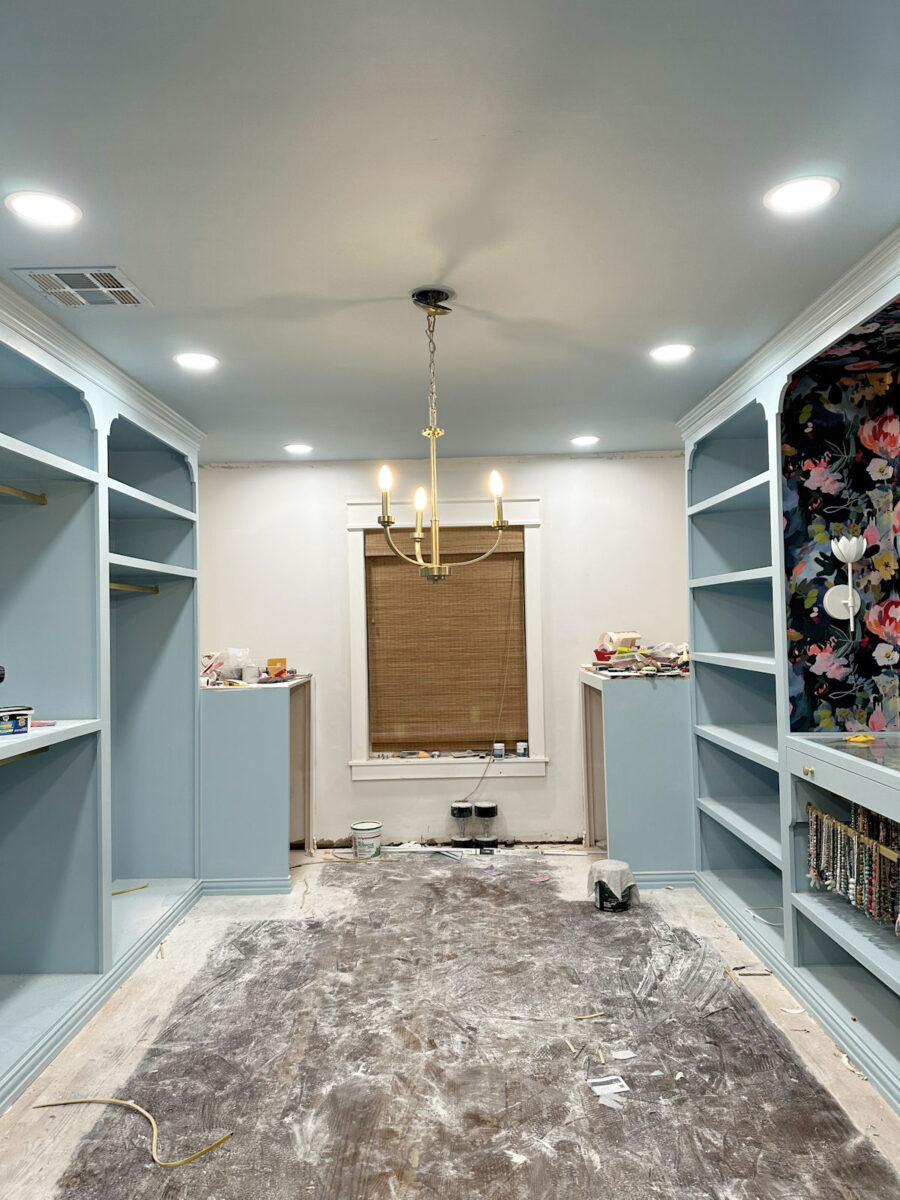
I mean, the light floor makes such a huge difference in the room!
And this time around, I’m also going to take time to fill in areas like this with red oak wood filler. I didn’t do that the first time around because they didn’t show with a really dark stain color. But with a light, natural floor color, they’ll definitely show.

As anxious as I am to get these floors finished, I want them done right, and I want them to be as perfect as possible when they’re finished. I have the sanders for one more day, so I need to get through with all of the wood filling and sanding before I go to bed tonight. And then I’m hoping to get started on the sealer tomorrow morning, and then topcoat tomorrow afternoon. If all goes as planned, I should have finished floors to show y’all on Monday!

Addicted 2 Decorating is where I share my DIY and decorating journey as I remodel and decorate the 1948 fixer upper that my husband, Matt, and I bought in 2013. Matt has M.S. and is unable to do physical work, so I do the majority of the work on the house by myself. You can learn more about me here.