")
My walk-in closet is starting to take shape! We’re finally getting to the exciting stuff as my drawings and mockups are starting to become reality. I still haven’t installed any trim or molding (which, of course, is when the room will really start to go from ugly basics to pretty), because I realized that I was kind of getting ahead of myself. Before I can start adding trim and molding, I first have to get all of the shelves and dividers in place.
So I spent my entire weekend cutting plywood for shelves and then doing all of the wood filling and sanding on those shelves (which I have to do because I used a lesser grade of plywood in an effort to save money).
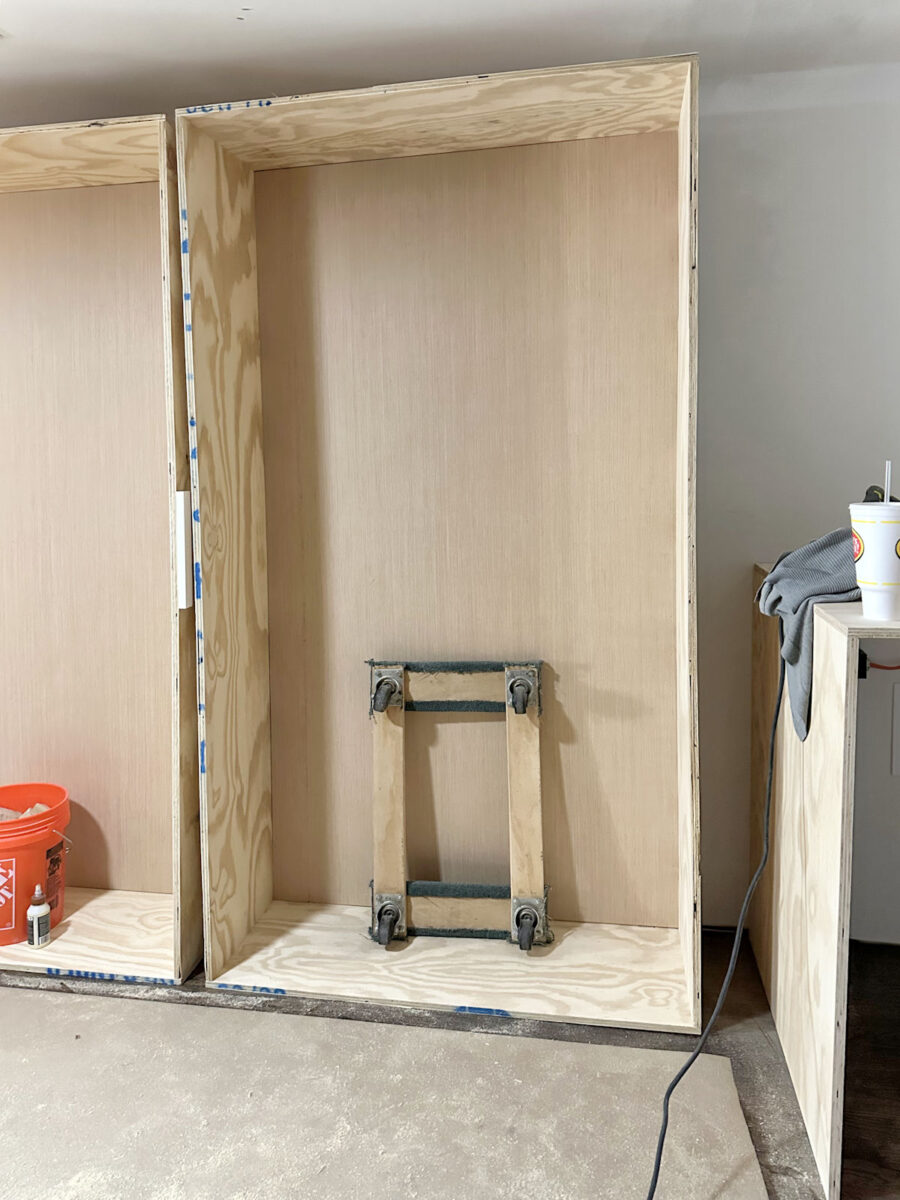
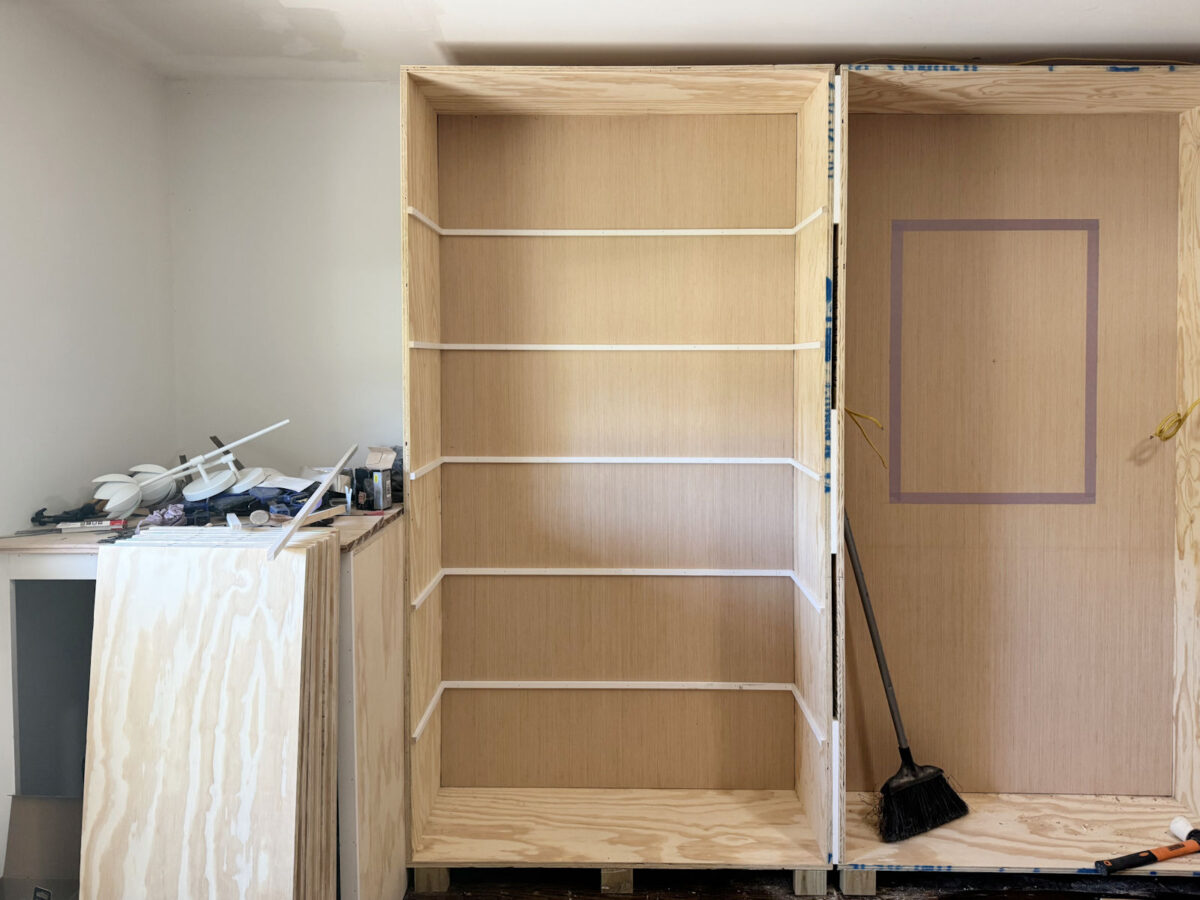
Last Friday, which was the last update I showed y’all, I had all but two of the cabinet boxes built. On the right side of the room, I had two of the boxes in place and screwed together, but the other two looked like this…
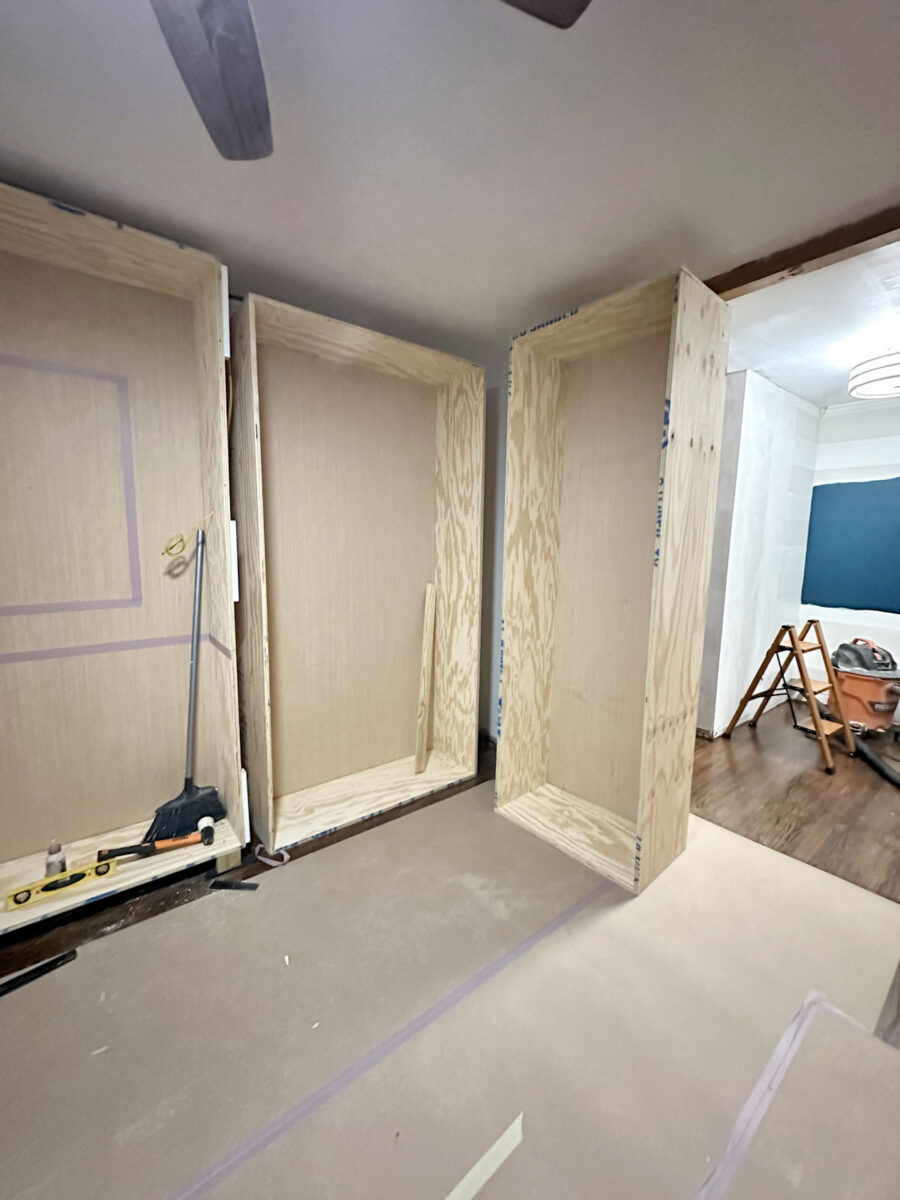
And then I got the final two cabinet boxes built for the left side of the room.
So now all of the cabinet boxes are built. I still don’t have feet on several of them, and the cabinets on the left side are still not screwed together. But at least they’re built and in place for the most part.
With all of the boxes built, I was ready to start adding all of the shelves. I started with the right side of the room because that’s the side that has the most shelves, so I wanted to tackle that side first.
I started with the cabinet closest to the washer. To hold the shelves in place, I ripped strips of 1″x2″ lumber (which is actually only 3/4″ thick and not 1″ thick) to 3/4″ x 3/4″ using my table saw, and then I cut them with my miter saw to the right lengths. I attached those strips using 16-gauge 1.25″ nails to form the supports for the shelves, and I spaced these 14 inches apart. These shelves will be for handbags and folded clothes. By this point, I had already designed my center island (which you can see here: Designing My Closet Island), so I had already decided that the bottom section would not have drawers. This cabinet will be all shelves.
And then with the supports in place, I added the plywood shelves and nailed them into place using the same 16-gauge 1.25-inch nails, starting with the bottom shelf and working my way to the top. I nailed the shelves in place by nailing through the top of the plywood and into the supports at a slight angle towards the sides and back of the cabinet.
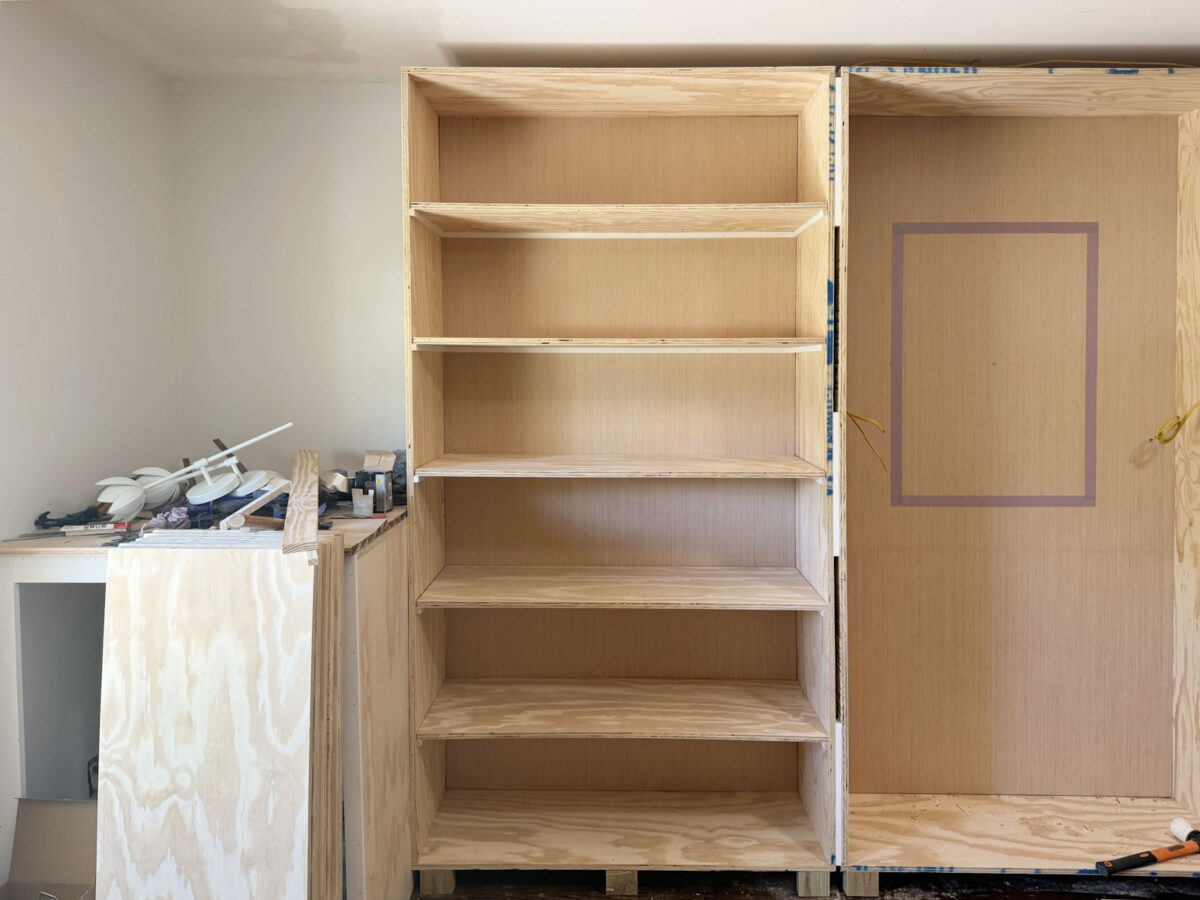
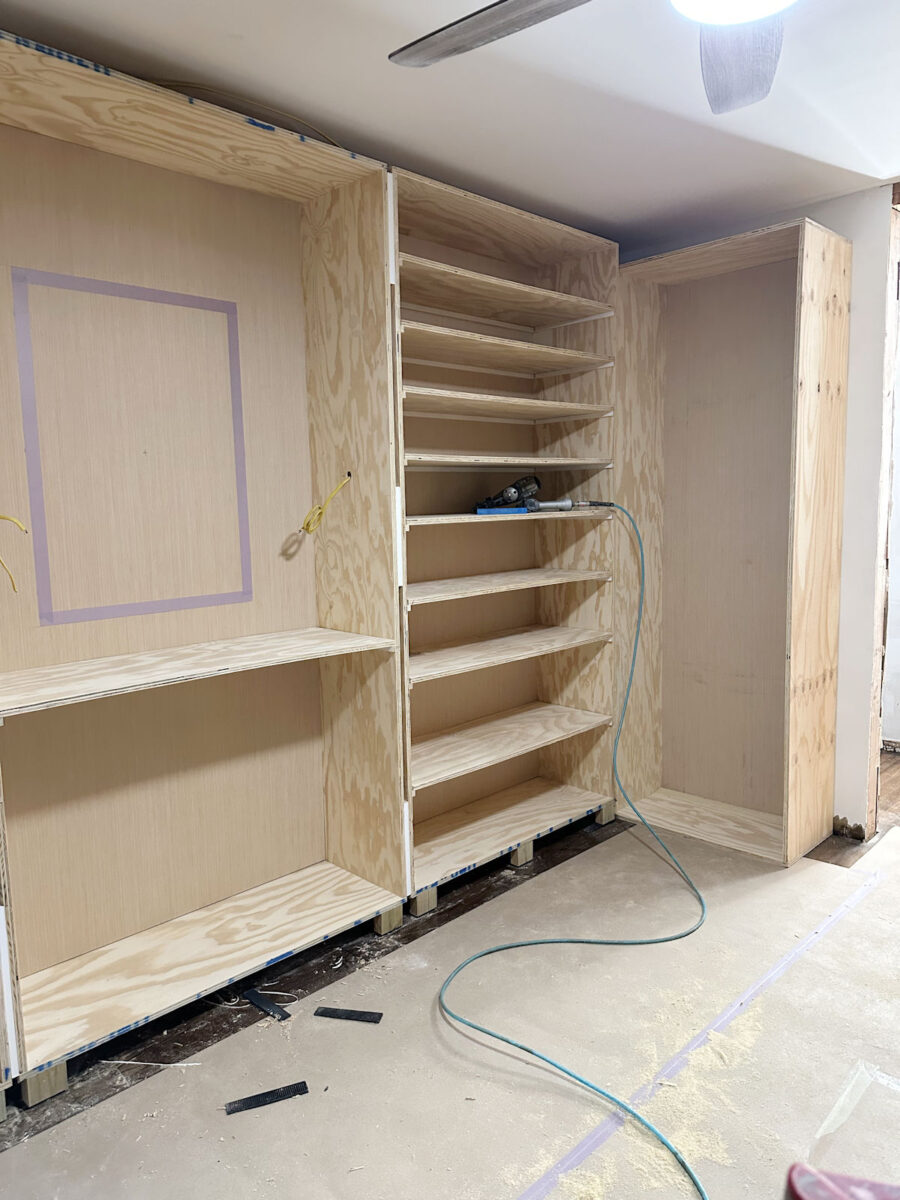
Next, I added the plywood for the countertop in the middle section, and then I added the feet to the third cabinet, got it screwed into place, and added the shelves to that cabinet in the same way.
That entire right cabinet is going to be shoe storage, so after taking lots of measurements of my shoes, I decided to put two taller 14-inch shelves on bottom for taller shoes like boots, and then I did two 10-inch shelves for shoes with higher heels, followed by two 8-inch shelves for shoes with smaller heels, and then three 7.5-inch shelves for flats. Once the trim is on the top of the cabinets (and if I did my math correctly, which is always questionable 😀 ), those three shelves at the top will look much more equal in height.

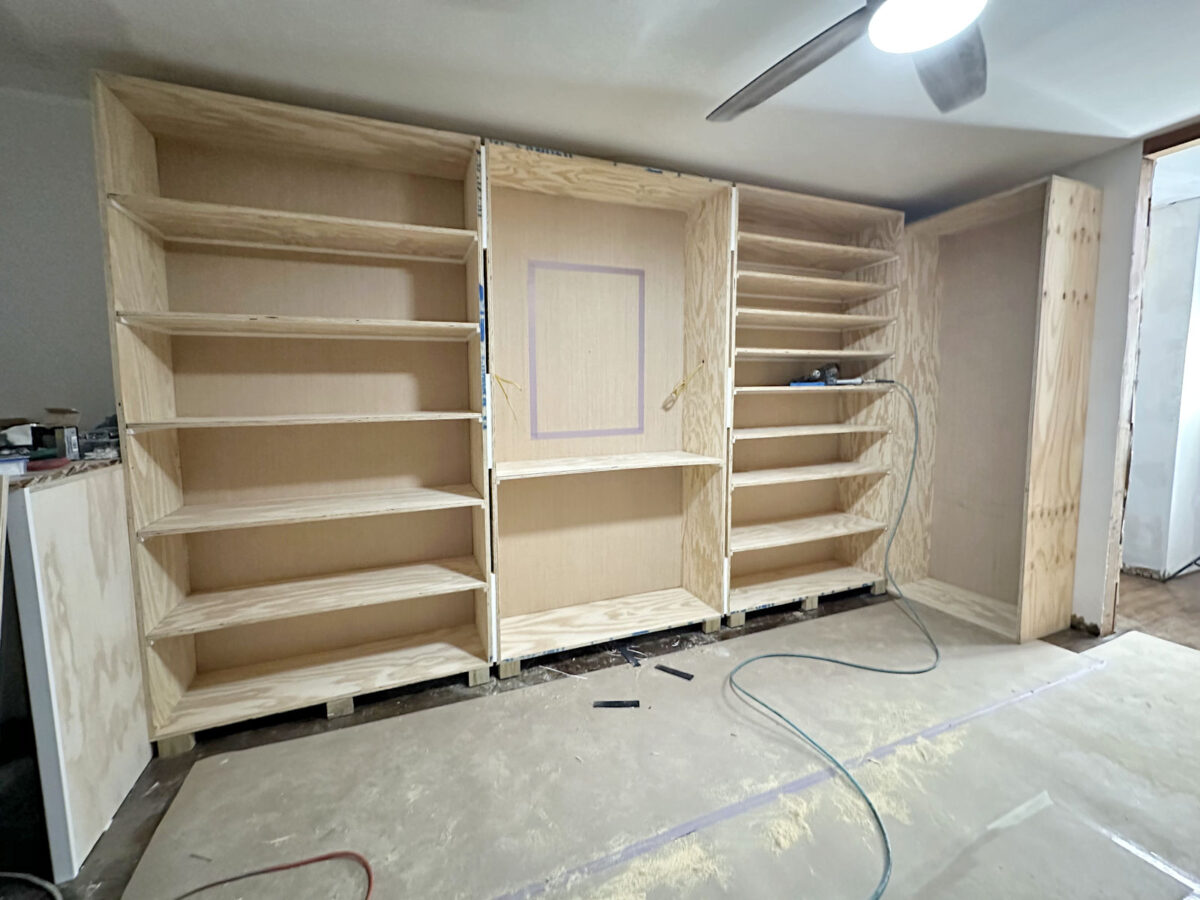
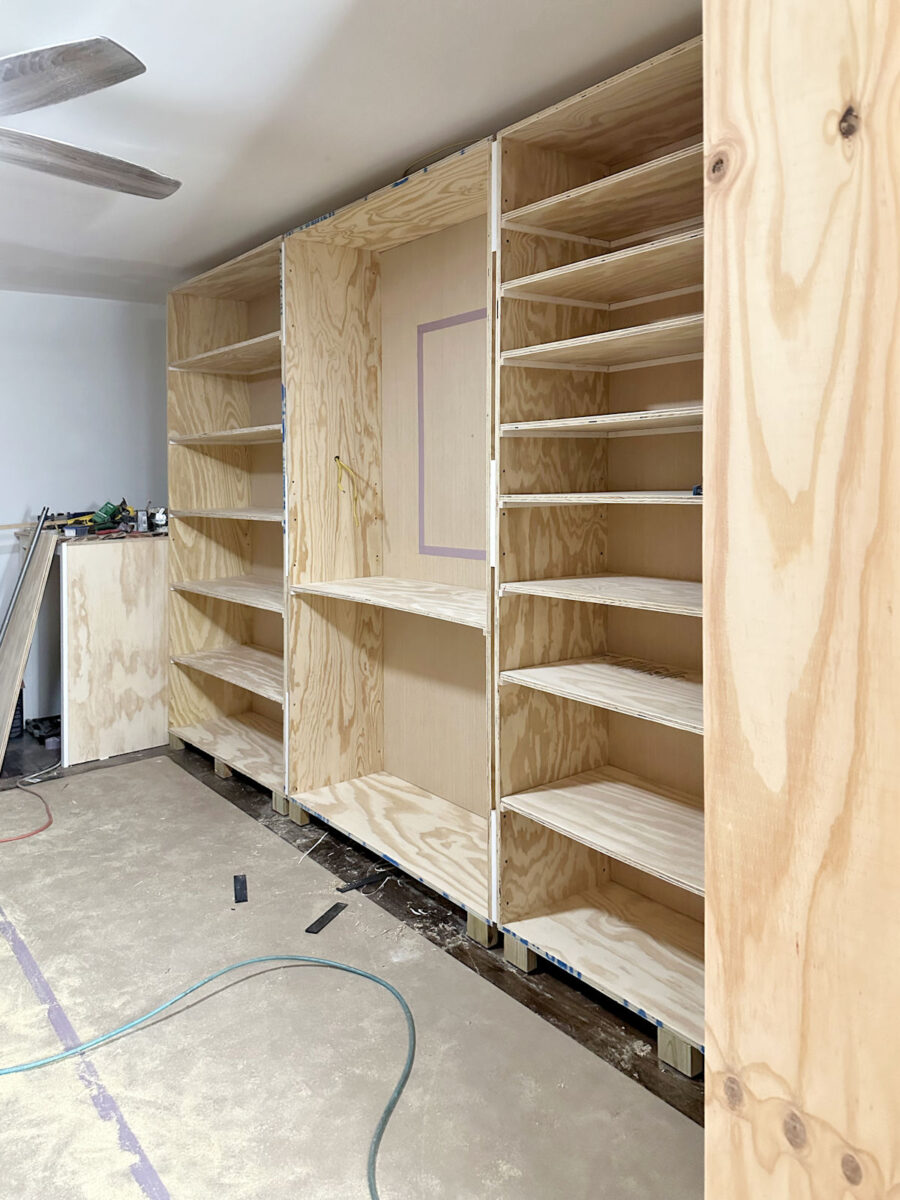
So here’s how that wall looks as of last night…
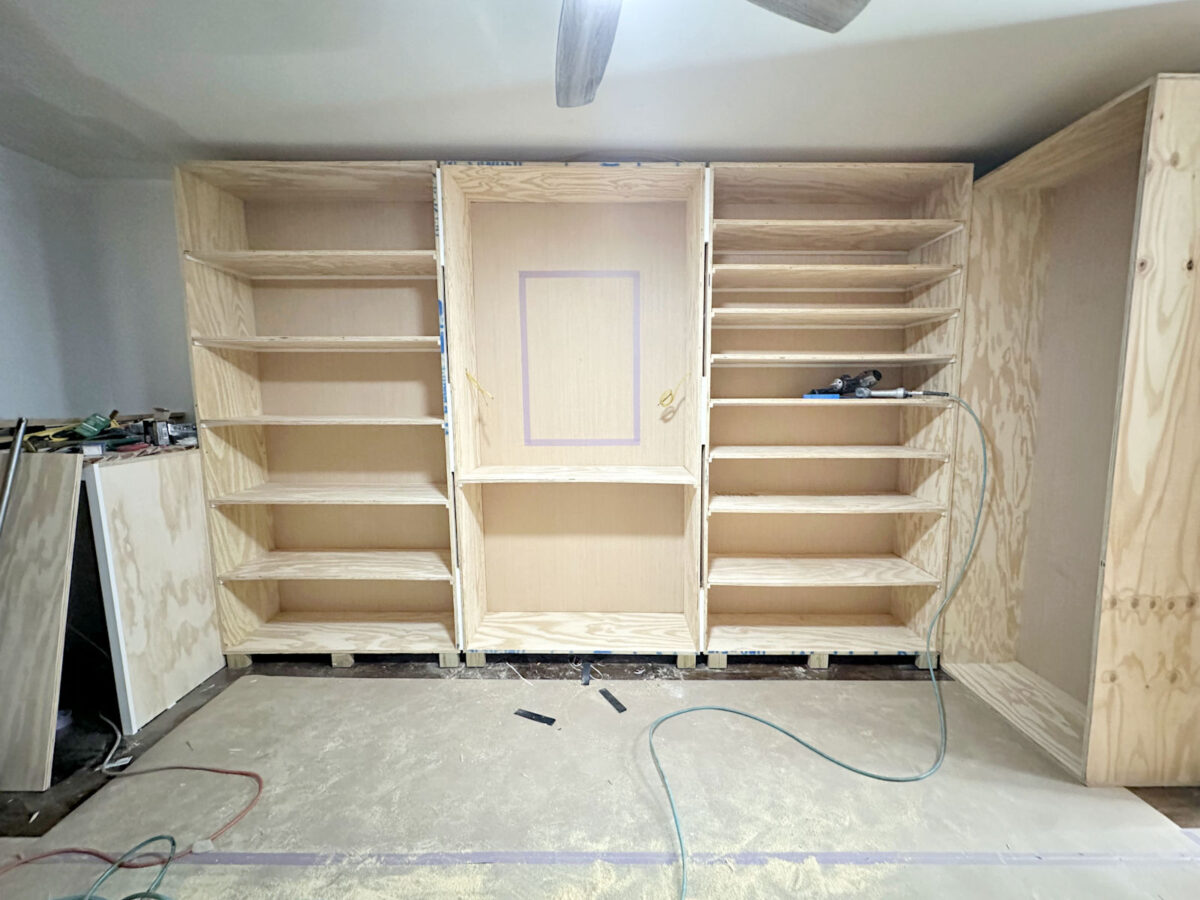
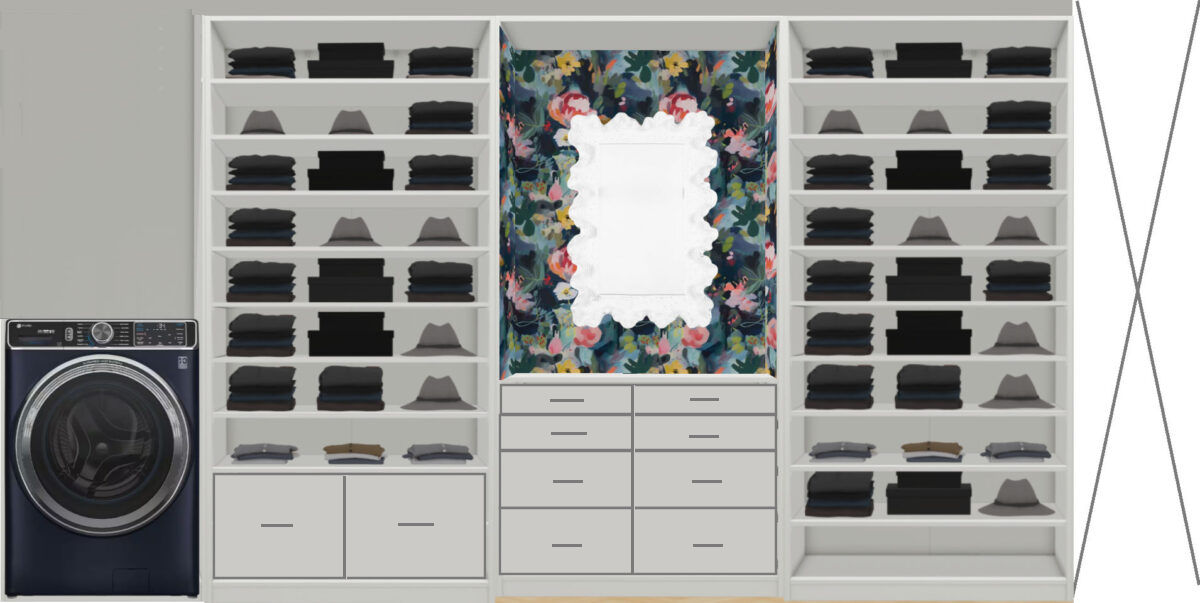
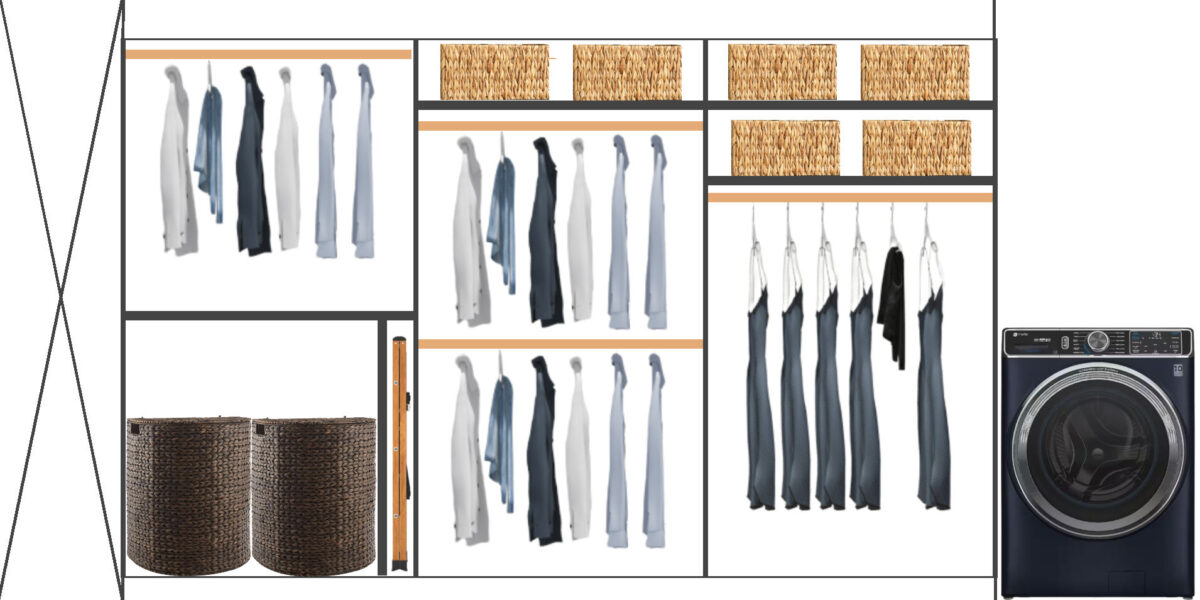
But in the meantime, I was reading all of your comments on yesterday’s post about the closet island design, and I’ve decided to remove that shelf in the middle section where the mirror and wallpaper will go, and add my glass top jewelry drawer in that section with my necklace bar just below it. The necklaces still won’t be at eye level, but I do think some of you made a very compelling argument that having them on that wall with the mirror makes much more sense. And I’m very short, so having them just below the very shallow earring/ring drawer won’t be a problem for me.
And since I’m going to have that earring/ring drawer there with the necklace storage/display just below, I’m just going to add a shelf at the bottom of that section also. So basically, every bit of the drawer storage in the room will be concentrated to the island, and all of the side walls will be hanging and shelf storage.
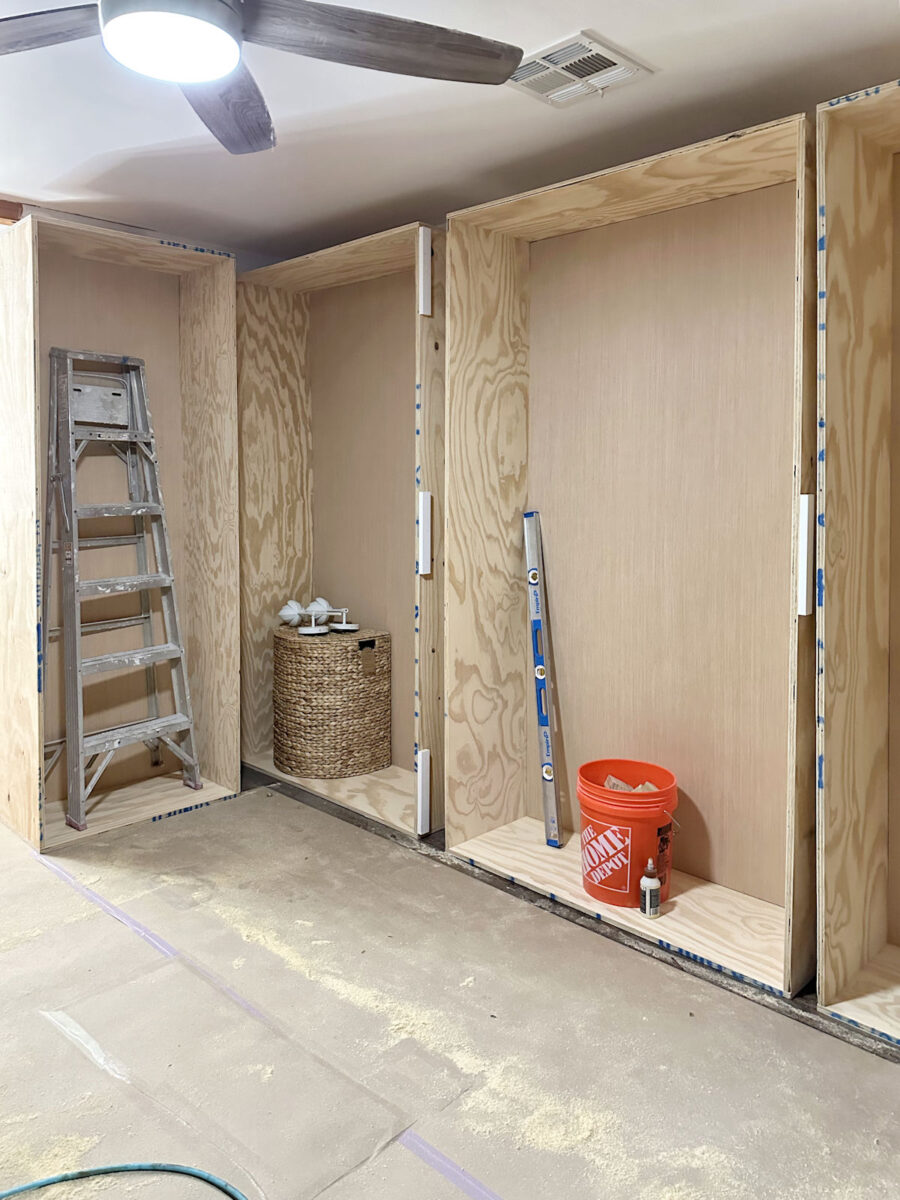
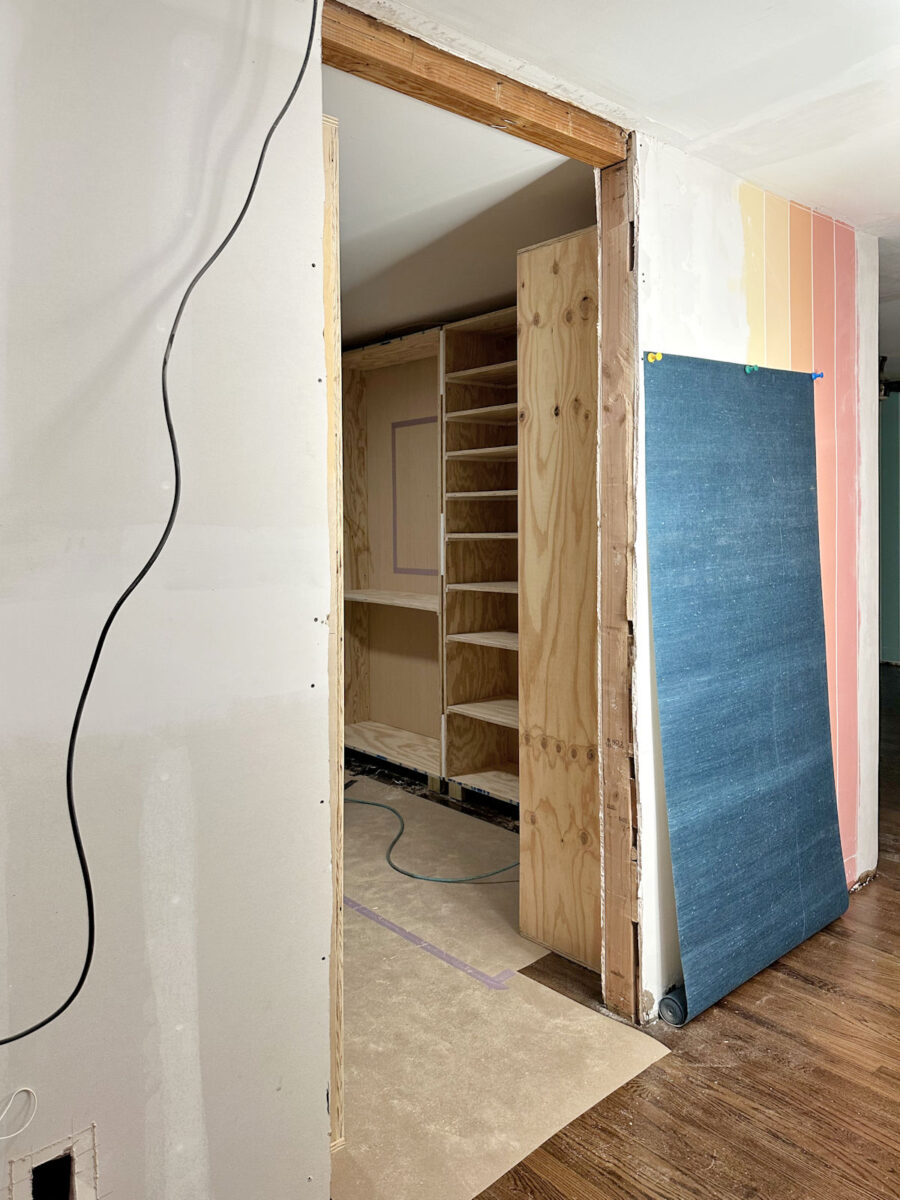
Here’s a peek at what it looks like so far from the doorway of the bedroom suite.
I’m pretty excited about the progress, and it’s so exciting to see this room become a reality. I have lots more shelves to cut, wood fill, and sand before I can get to the trim. But thankfully, the left side of the room only needs four shelves and one vertical divider. That will take a lot less time than the 14 shelves required for the right side of the room.
And then I’ll need to cut and finish 12 shelves for the two cabinets flanking the door. Those two cabinets will have doors on them so that I have some closed storage in the room.

So I’m only about halfway finished with adding the shelves, but I have another uninterrupted workday ahead of me. Hopefully I can get through those pretty quickly. I may not get them completely finished by the end of the day, but I’m going to try my hardest to get as much done as possible.
I’m tired, y’all, but I’m also feeling quite motivated to get to the pretty stuff. I’m so close! But part of me wishes I could trade places with this sweet girl for a day and just lounge around the house and eat and play. 😀 But there’s no time for that right now.
The A2D Daily:

Addicted 2 Decorating is where I share my DIY and decorating journey as I remodel and decorate the 1948 fixer upper that my husband, Matt, and I bought in 2013. Matt has M.S. and is unable to do physical work, so I do the majority of the work on the house by myself. You can learn more about me here.