
I’ve had a few people ask me about my tools lately, and specifically about the tools required to build my dream built-from-scratch DIY walk-in closet. So today, I want to show you every single tool that I’ve used (so far) to build my closet. Once I start building the island, I may use a few more that aren’t shown here today. If that happens, I’ll add those to this post as well.
Also, rather than showing you product pictures from websites like Home Depot or Lowe’s, I’m going to show you photos that I’ve taken of my own dust-covered, much-used, well-loved tools. While I will provide affiliate links for all of these, I want you to see that I’m not just trying to sell you products. I really am showing you products that I use, love, and vouch for myself.
Dewalt Portable Jobsite Table Saw
I don’t have my workshop set up yet, but once I do, I hope to have a big table saw with a large outfeed table. In the meantime, I have this DeWalt portable jobsite table saw (affiliate link).
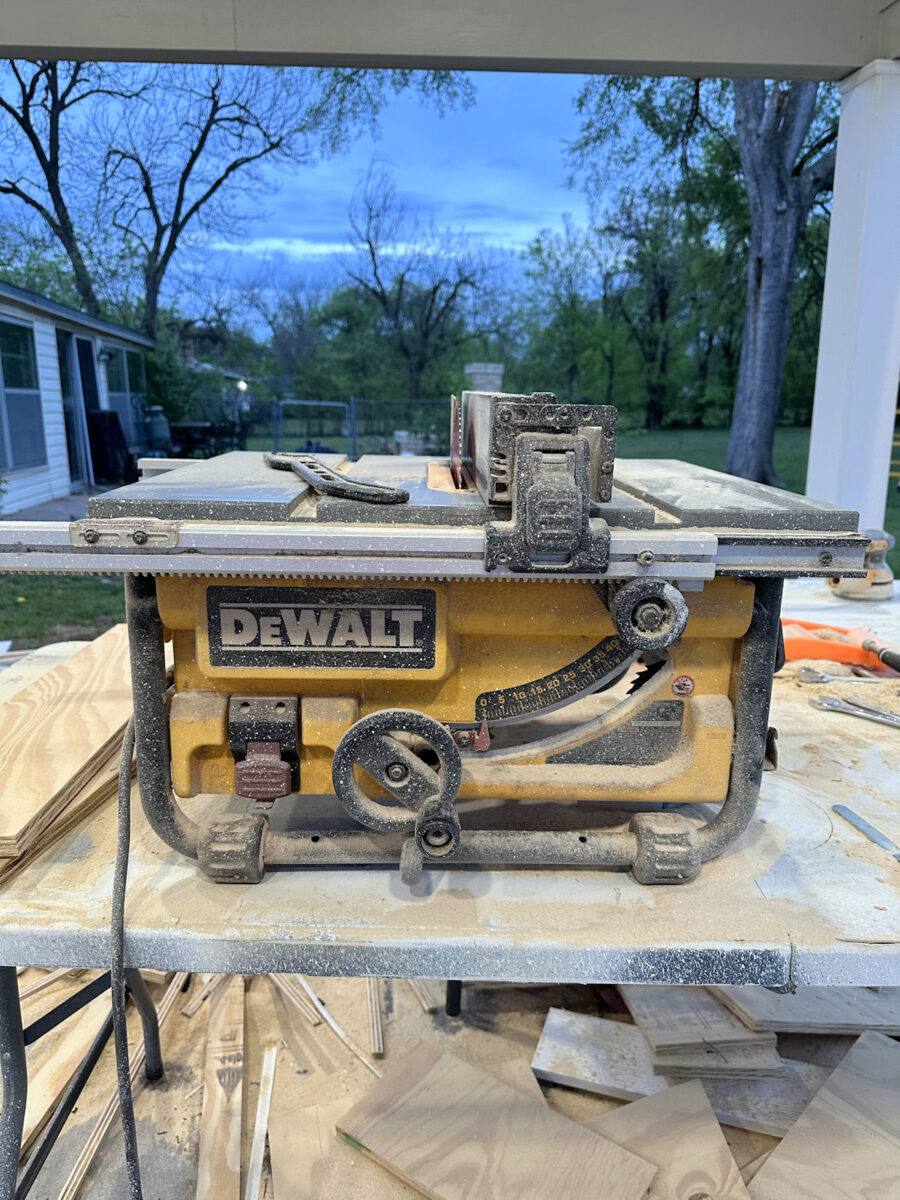
This thing has been amazing. Even when I get my workshop set up, I’ll probably continue using this table saw and just build a large table with an outfeed table to fit this saw. Once I do that, I can bolt this saw to the table and use it to rip full sheets of plywood.
For my closet, I have used the table saw to cut all of the shelves to size, which I cut from pieces of plywood that I had already cut down with my circular saw and miter saw. I used the table saw to square up the edges of the plywood and cut them to the exact size I needed for the shelves. I’ve also used it to rip the pieces of 1″x2″ and 1″x3″ lumber for the shelf supports. Once I get to the island, I’ll also be using it to cut the pieces that I use to build the drawer boxes, drawer fronts, and cabinet doors.
Dewalt 12-Inch Sliding Compound Miter Saw
Over my years of DIYing, a miter saw has been my most-used tool. It was the first tool I bought when we lived in our condo, and it’s one I couldn’t live without. My first two miter saws were small, and while I could do a lot with them, I always wanted to upgrade to one with a 12-inch blade. This Dewalt 12-inch sliding compound miter saw (affiliate link) changed the game for me.

For my closet, I have used this to cut all of the plywood (that I had ripped down with my circular saw) to the right lengths. I also used it to cut all of the shelf supports and the 2″x4″ lumber that I used for the cabinet box feet. I’ll be using it to cut all of the trim and molding, a lot of which will have to be mitered on the corners.
Of all of my tools, this is the one I use the most. And this particular miter saw has been the best one I’ve ever owned. If you’re in the market for a miter saw, and a 12-inch miter saw is in your budget, I highly suggest going for it over a smaller 10-inch. And be sure to get a sliding miter saw. You can do so much more with a 12-inch sliding miter saw than you can with a 10-inch non-sliding miter saw.
Ryobi Circular Saw
Since I don’t have a table saw with an outfeed table that I can use to rip down full sheets of plywood, my circular saw has been invaluable for my closet project. I specifically bought this Ryobi circular saw (affiliate link) because it came with a rip fence, which you can see attached to the front of the saw. This little saw is a real workhorse at a great price.

Every single piece of plywood that I’ve used to build my closet was cut with this circular saw, and even choose another brand, I highly recommend getting one that comes with a rip fence.
Kreg Rip-Cut Circular Saw Guide
While my circular saw did come with a rip fence, you can see that the widest cut I can make with that smaller rip fence is about 6 to 8 inches. For my closet, I needed to rip pieces of plywood that were 17 inches, so for that, I had to swap out the smaller rip fence for my Kreg rip-cut circular saw guide (affiliate link).

For my closet, I used this Kreg circular saw guide to cut down that entire stack of 29 pieces of 3/4-inch plywood into 17-inch-wide pieces.
Dewalt Variable Speed Rotary Sander
Every DIYer needs a good sander, and this Dewalt variable speed 5-inch rotary sander (affiliate link) is the best one I’ve ever owned. Over my 30+ years of DIYing, I’ve used several brands, but this one is my favorite. You can probably tell that I tend to favor Dewalt brand tools anyway, but it’s the variable speed option in particular that makes this one so great. I’ve had this thing for years, and it just keeps on going.

It has especially gotten a workout on my closet project because, in my effort to save money, I bought a lesser grade of plywood to build all of my closet cabinets. So that plywood needed a lot of wood filling and sanding to get it ready for paint. I’ve used this sander to sand every single piece of plywood that has gone into my closet.
Porter Cable Air Compressor and Nail Guns
I have only ever used small air compressors because they’re so portable and I can lug them around wherever I need to work with ease. This Porter Cable pancake air compressor (affiliate link) is my favorite one I’ve ever owned.

Makita drill
My Makita drills are the only tools I have that run on batteries. I generally prefer corded tools (that’s just a personal preference), but when it comes to drills, cordless are much easier and handier to use. I bought this set with two drills, and they’re amazing.

For my closet, I used these to screw the cabinet boxes together, and also to screw the cabinet boxes to each other and to the walls.
The other tools I’ve used on my closet are (1) clamps, (2) a pry bar, (3) a hammer, (4) a nail punch, (5) a tape measure, (6) a level, (7) a speed square, and (8) a rubber mallet.

I really don’t have any brand preferences on these types of tools. I just buy whatever I need at the moment, and I try to find what I think is the best quality for the best price.
So that’s every single tool I’ve used so far to build my dream closet. I can think of a couple of additional tools that I might use when it comes to building and installing the drawers in the island, but I’ll wait until I get to that project to add those tools to the list.
I want to end with a note about table saws and circular saws for any new DIYers or aspiring DIYers…
My suggestion for those who have never used a table saw before…
A couple of days ago, I had someone ask about table saws and circular saws. Specifically, she asked how a person who has never used these tools can get comfortable with them if they’re intimidated by these tools and are scared to try them.
I thought that was an excellent question, and after giving it some thought, this is what I told her. I thought I’d pass this along to the rest of you as well since others may find this helpful.
Here are my suggestions for getting comfortable using a table saw:
- Start with using a table saw that has a brand new finishing blade on it. Finishing blades have more teeth and cut cleaner and a bit slower than blades with fewer teeth that are intended for fast, not-so-clean cuts, like those you would use to cut through lumber used for framing.
- If the table saw has a blade guard, make sure it’s attached before turning the saw on.
- Start by cutting scrap pieces of MDF just to get a feel for the saw. Because MDF is basically glorified particle board and has no knots in it, I’ve never had any kind of kick back with MDF. With a brand new finishing blade on the saw, it should cut like butter.
- Once you’re comfortable cutting MDF and have a feel for the saw, try cutting plywood. It should also cut like butter with a new finishing blade on the saw. Don’t cut thin 1/4-inch plywood because it’s floppy and that makes it harder to control. Start with 1/2-inch or 3/4-inch plywood that is already cut to a size that’s small enough to handle, like a 2′ x 2′ piece. You’re just wanting to get a feel for the saw and get a feel for how it cuts these materials. With a brand new finishing blade, I think you’ll be surprised at how easily it cuts.
- Once you’ve had lots of practice with MDF and 3/4-inch plywood, then work your way up to cutting solid lumber. I suggest starting with something like primed finger joint boards i.e., the pre-primed white boards in the lumber aisle of Home Depot or Lowe’s, which tend to be a softer wood and have almost no knots in them. This will give you an opportunity to feel the difference between cutting plywood and solid lumber without having to worry about cutting through a lot of knots that you’ll get with the cheaper pine lumber. With that new blade, it should still cut very smoothly, but you’ll probably feel a difference between the plywood and solid lumber. So get used to that before you move to cutting solid lumber that has knots or solid hardwood lumber.
- Make sure you don’t get your fingers anywhere near the blade. Once you have to push any material to the end, make sure you’re using a push stick so that your fingers stay clear of the blade. Always be aware of where your fingers are in relation to the blade!!!
- Never stand directly behind the material you’re cutting, especially when cutting solid lumber. Kick backs happen in a split second, so stand to the side as you’re pushing the material through.
I think if you practice in that order — MDF, plywood, solid softwood lumber, and then solid hardwood lumber — and give yourself time to get a feel for the saw and how it cuts through these various materials, you’ll start to feel comfortable with it. But the main key is to never get TOO comfortable with a table saw. Always be aware and on guard. When you get too comfortable is when accidents can happen.
I would suggest that same process with a circular saw. Make sure it has a brand new blade on it and start by cutting MDF to get a feel for the tool. Once you feel comfortable with it, then try out some plywood. With a circular saw, if you’re cutting down anything smaller than a full sheet of plywood or MDF, make sure your material is clamped to your work table so that it doesn’t shift as you push the saw across the material. With both of these tools, it just takes practice to get comfortable with them.

Addicted 2 Decorating is where I share my DIY and decorating journey as I remodel and decorate the 1948 fixer upper that my husband, Matt, and I bought in 2013. Matt has M.S. and is unable to do physical work, so I do the majority of the work on the house by myself. You can learn more about me here.