")
We are wrapping up phase two of the backyard (which is admittedly a pretty large phase) and I wanted to give you an update, show you the plans, and give you a sneak peek into the new RTA outdoor kitchen (which went from a little “grill area” to full blown kitchen really fast – it’s incredible). I couldn’t be more grateful to all the contractors and partners on this one – it went seamlessly, dare I say “stress free”, and everyone not only did a fantastic job, they even met our deadline – a big backyard community event. Last weekend, we had 150 of our neighbors from school over. That was about 50 families for a fundraiser playdate. Getting to see them all over the property, enjoying it all with kids and music, and pizza/beer was just incredible, and I felt so full of gratitude. The pickleball court wasn’t finished (our scheduling snafu not helped by some rain), and we didn’t exactly grill for them all (we just ordered pizza), but it was a great test run to see the potential of this property. Everyone came up to me (many I had never met) and told me how awesome it was to be able to gather outside of school with all the neighbors. I was incredibly special, and I’m really really excited to show you the full reveal soon (we shot last week, so stay tuned). It’s ultimately a frat house for families 🙂
Where We Started… A Quick Recap
We lived here for two summers before deciding where the kitchen should go, and felt really confident that it should be where the shed is. It was a central location, and near the big shade tree we love to eat under – essentially it’s where we all tend to gather (not crazy far from the house, but also not another structure in the middle of our pretty views out to the pasture or pool). The shed was falling down and not worth salvaging (probably 80 years old, the entire foundation crumbling), but the location was firm. You can also see here how big the cement pad is for the future sports court – it was just huge and looked like a parking lot.
But Where Do We BBQ? And Why Didn’t We Do It During Phase 1?
This was the big question. We were drained financially and emotionally, so we always knew that we’d want a proper BBQ area, but we wanted to wait a couple of years to be SURE of where it would go (and save up for it). So last summer, Brian just wheeled around a basic grill onto the sports court, and it became clear that near this tree, at the edge of the court, was the spot.
The Plan Via Dennis 7Dees

We hired Dennis’ 7 Dees to help lay it all out, within some pretty strict confines, and then to replant where the old/bigger sports court is. When we first bought the property, the tennis court extended all the way past where the Soake pool is now, then we reduced it in 1/2, but after living with it for almost two years, we knew that it was still too big. So while we were doing construction back here, building the outdoor kitchen, we hired a crew to redo this area (yes, it’s painful to “redo” anything, but at this point it’s a sunk cost).
Removing A Section Of The Future Sports Court

Eric from Dennis’ 7 Dees (a famously great local fantastic landscape design, garden center, and maintenance company) was the designer to lead the job, and we couldn’t be happier with everything they did. I wanted a real pro on this one because it dealt with a lot of hardscape and irrigation work, which is obviously not something we could DIY. In addition to fixing the cement (before we resurfaced it), we wanted it to be turned into a more park-like vibe with picnic tables and lots of greenery.
Buh Bye Cute But Broken Shed!

Then I hired my brother’s company, Afore Construction, to demo out the shed and build a covered gazebo for the kitchen. The foundation was crumbling, and it was all rotted, so my dreams of turning it into the kitchen stopped making sense. As you can see, we had limitations on the width of the future kitchen – the tree on the left and the well house on the right (yes, it has our newly recommissioned well that serves as water to all our irrigation and pasture animals). So the width of the new structure really couldn’t be more than 12′ wide (which was the size of the old shed’s roof, btw).
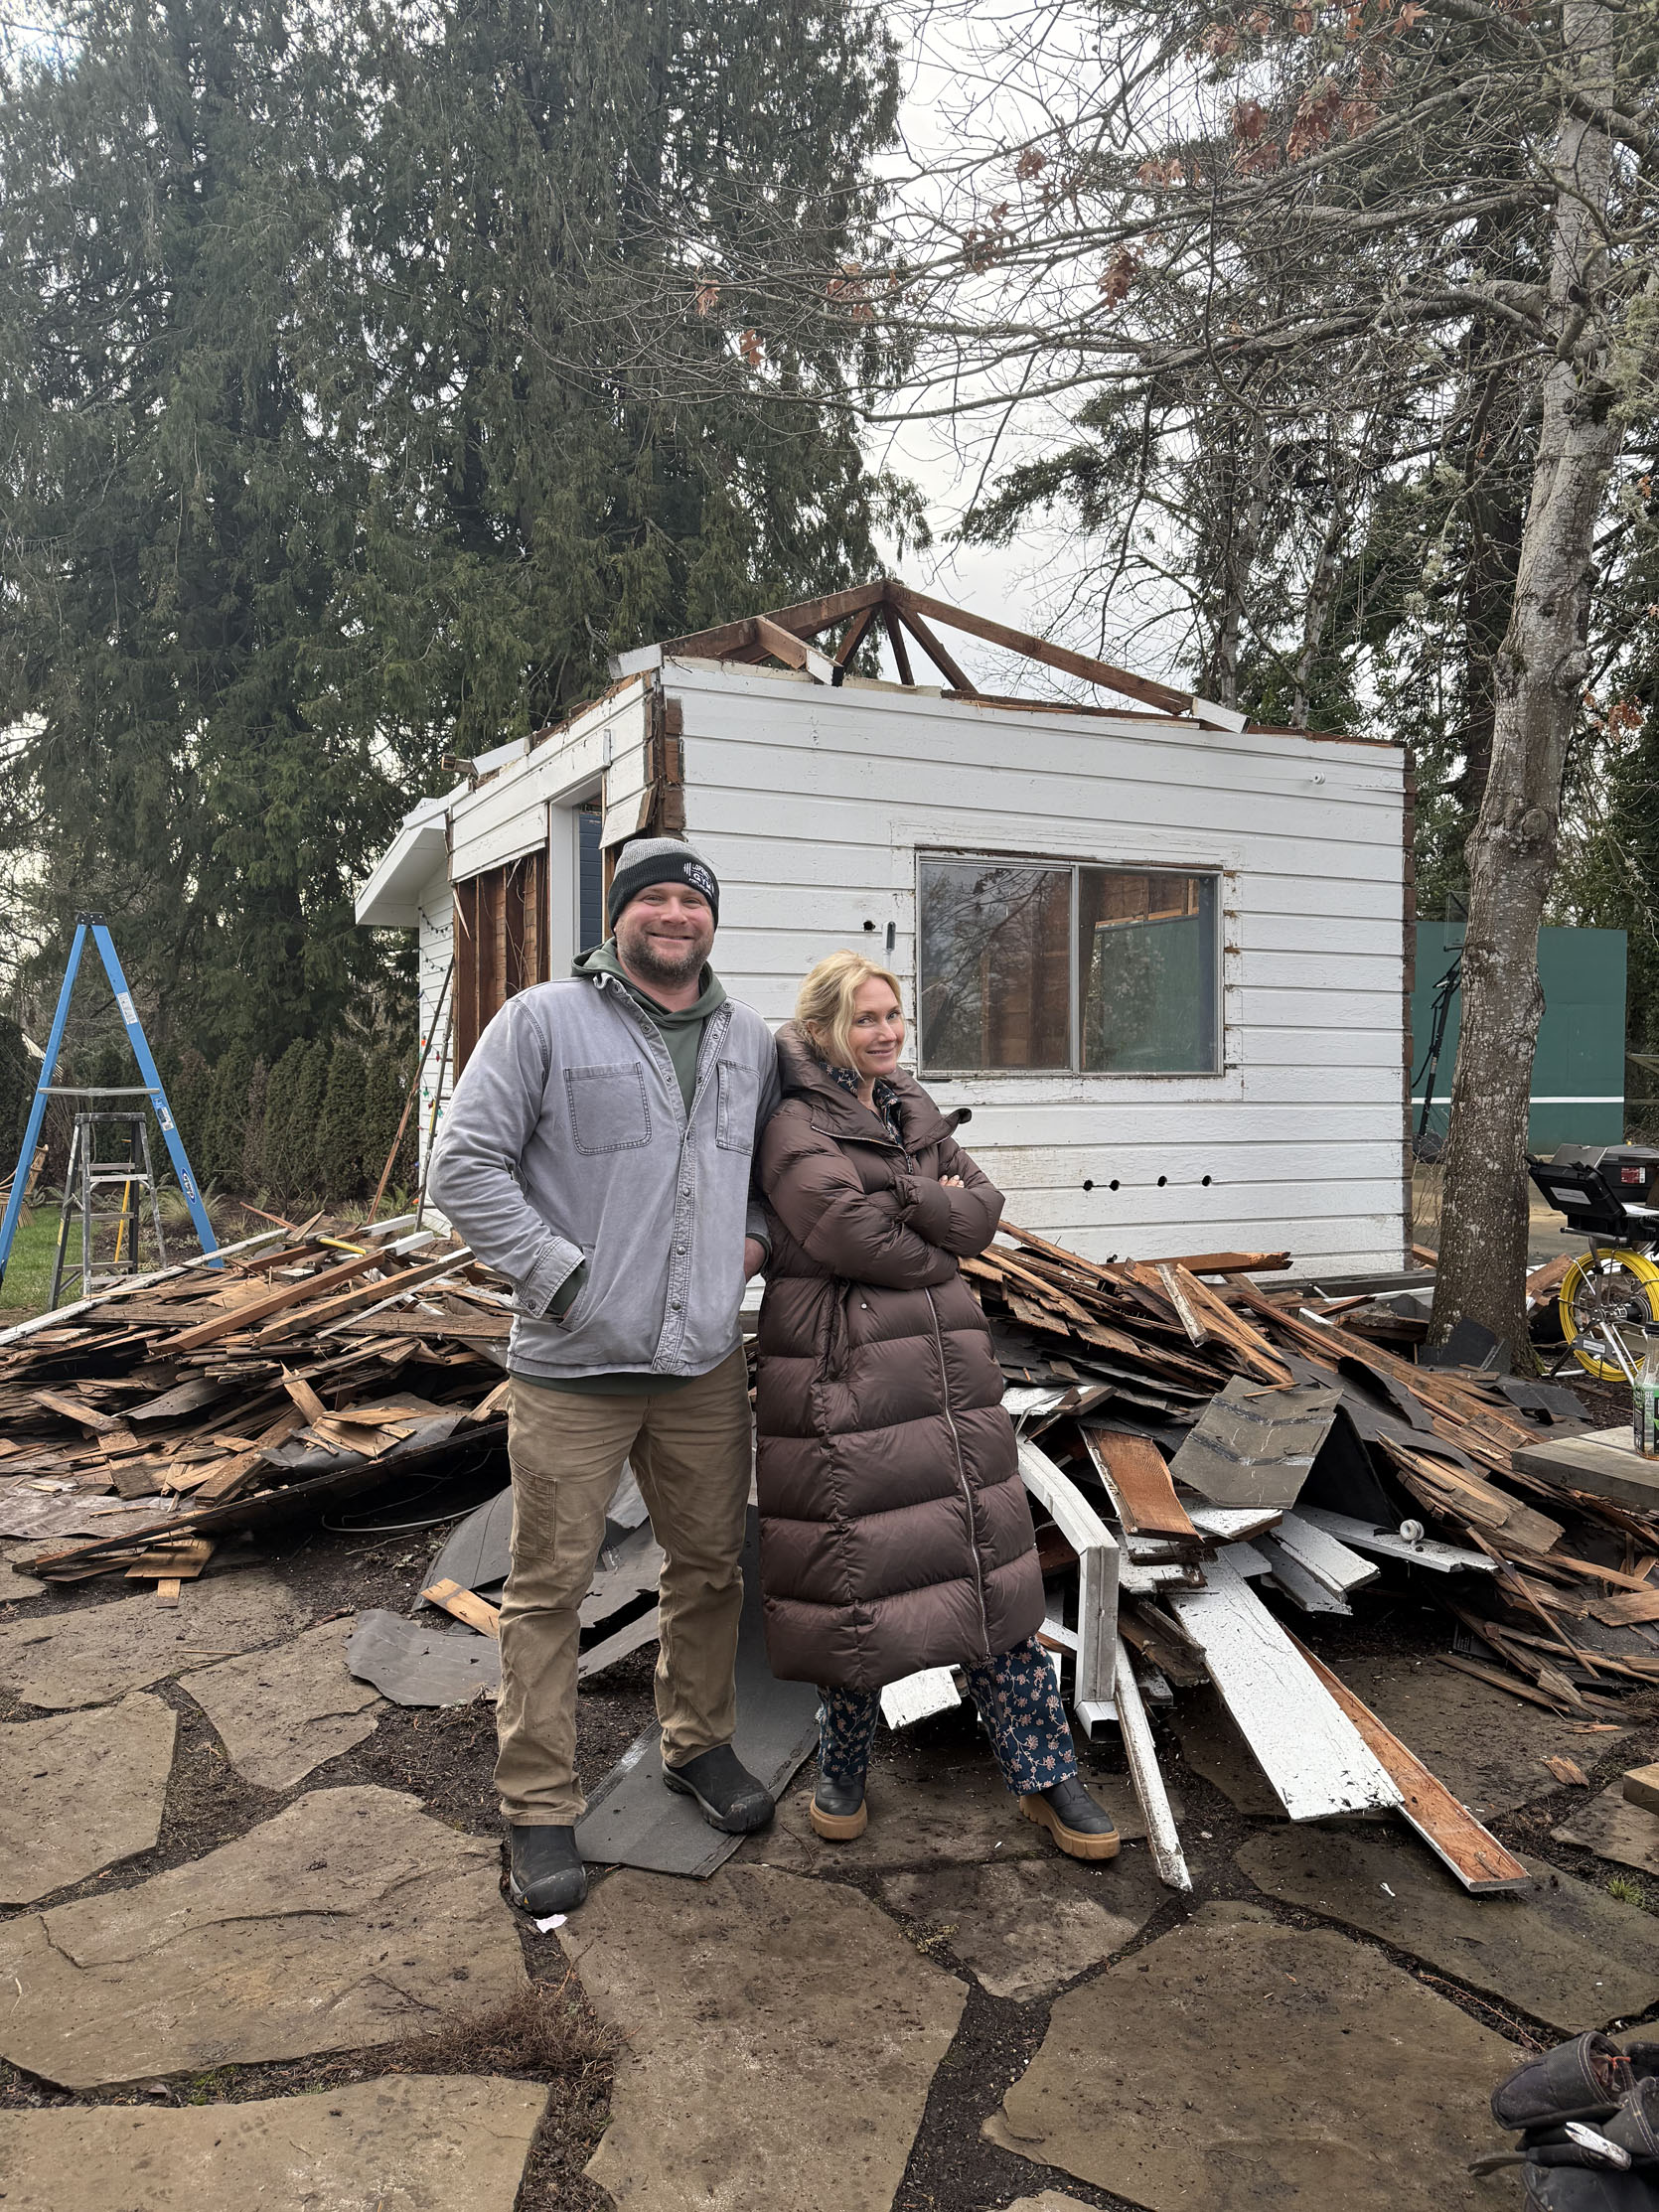
The whole project took off in Jan/Feb and frankly went really fast. Ken’s crew demoed out the shed while 7 Dees prepped to demo the sports court and replant.
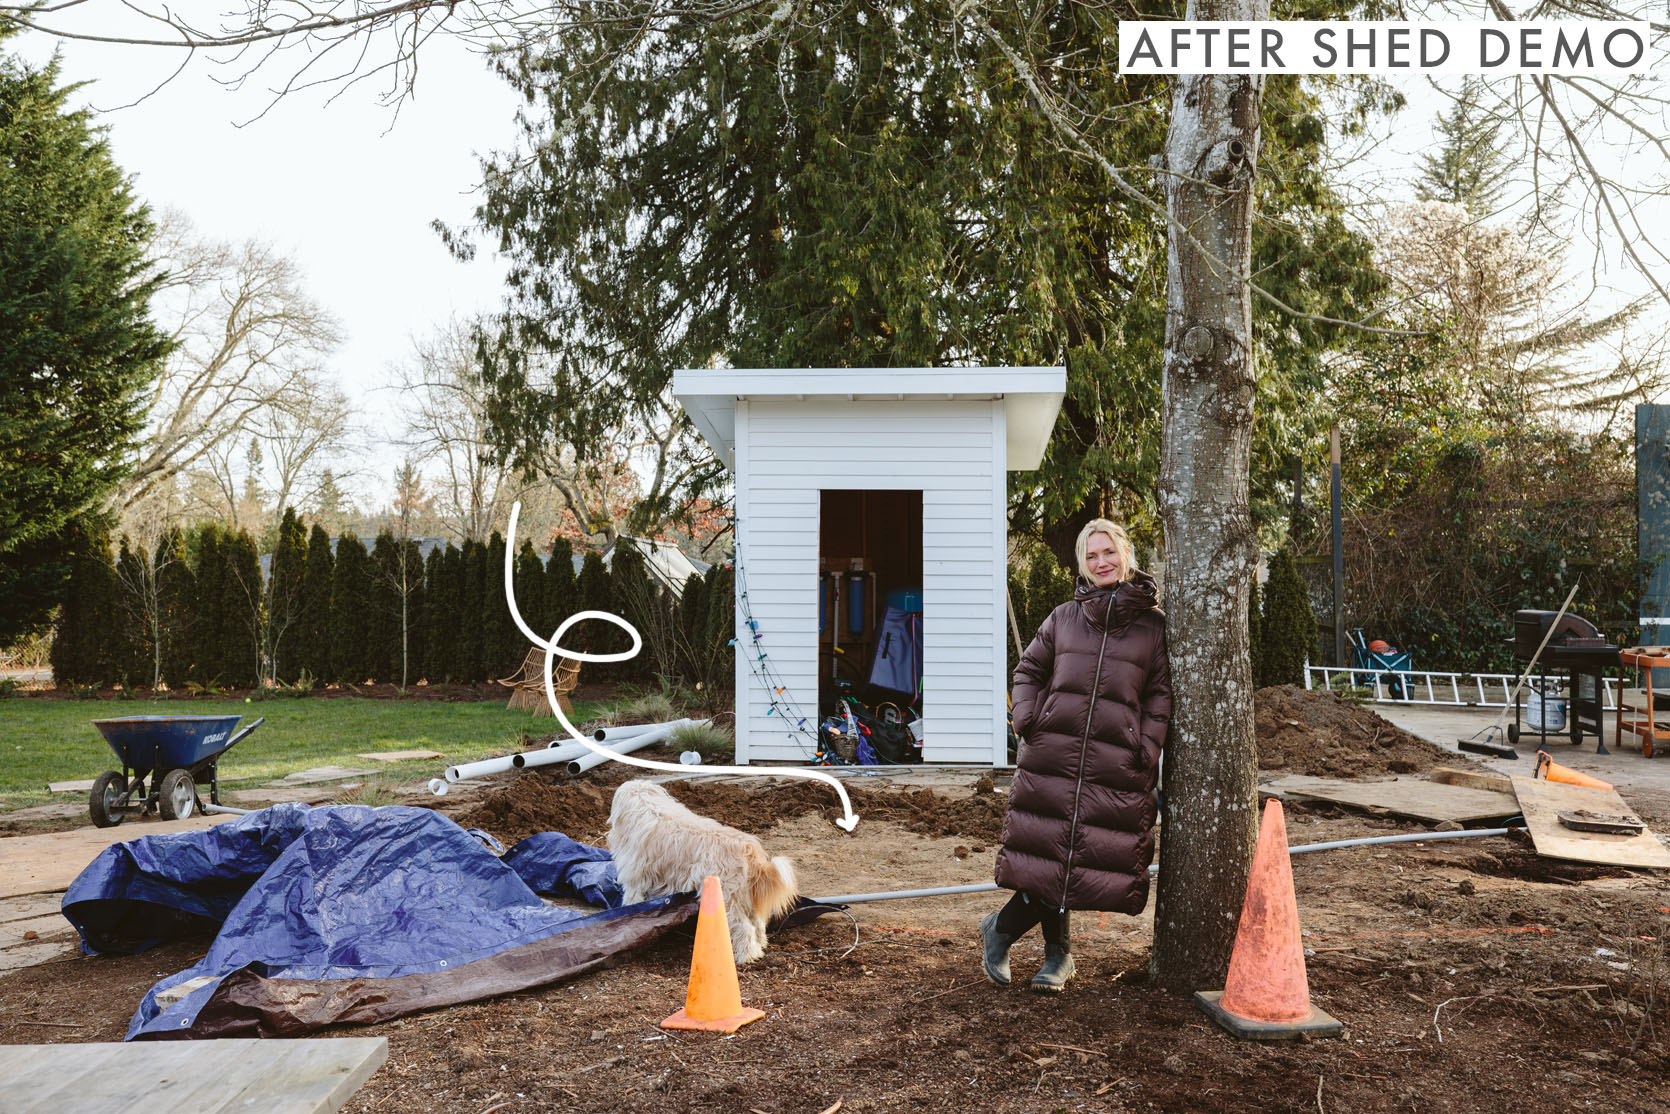
It was a whirlwind of activity, and our yard was a mudpit again, but it was going so fast and they thought we’d be done by spring (we were!).

This view is so different now – full of layered greenery and a beautiful new kitchen, but I wanted to give you the sense of space. It’s pretty big, open, and flat, which is fantastic because it’s just so usable.


The deck and gazebo went up quickly, although y’all, a lot more prep goes into building these than they look 🙂 Lots of planning, leveling, and thinking about where the future mechanics would live (electrical, plumbing, gas, etc). It’s a whole thing, and Ken and Nick did an awesome job staying on top of it and predicting everything they could.

If you are wondering why the gazebo is half on the future sports court, that’s an awkwardness that is fully on me, and it’s going to be fine. We thought about cutting cement exactly where the gazebo ended, but it would have been too small for a pickleball court (plus cutting it at a cement “section” was less of a chance of it all cracking/breaking, I think). Point is – sometimes things are awkward and you do the best you can to mask that awkwardness through other elements (i.e. trees, greenery, etc – you’ll see!). We couldn’t have moved it more left without taking out the tree, and again, the shed on the right is our well house and has a lot of crazy mechanics in it (and below it). Of course, we could have made it a lot smaller, but we wanted more function from our kitchen than a small space would allow, so we really went for it.

The structure itself was built big enough to accommodate the size of the kitchen (with counter seating) that we wanted, but inside the limited footprint that we had (between the tree and the little well house/shed). We also didn’t want to move the irrigation mechanical box on the left of the gazebo or have to redo all the flagstone, so we were definitely shoving this covered deck into a small footprint.
The Kitchen Plan

In the fall, I was approached by RTA (Ready To Assemble) to partner on the kitchen. I didn’t know much about them, but after a lot of research and reading reviews, I became really excited (and now I’m a massive fan. It’s a pretty unique and specific company where they design, manufacture, and ship your semi-custom outdoor kitchen in a matter of weeks. I basically gave them the appliances/function that we wanted, within the 12′ footprint, and they laid it all out with their expertise on what is best to go where. I chose the materials – a leathered granite, and I was torn between the white brick or the white plank (brick shown in plans), but there are a lot of options. They really did the rest (shout out to my designer, Daniel – THANK YOU!). Of course, we had to tackle things like where we were pulling the plumbing, electrical, gas, etc, but between Ken and RTA, it was troubleshooted without me (which is best).
RTA Kitchen Install Day

Our goal with this one was to create a full kitchen so that I didn’t have to run laps to the kitchen, back and forth, since it’s not very close. Brian’s priorities were the grill, griddle, and kegerator and my priorities were a sink (dishes out here so we don’t mess up inside!), refrigerator (salad prep and all condiments already ready to go), and the burners (I’m always in charge of corn and baked beans, and then historically stuck inside while everyone is hanging outside). These are not real problems, but the volume of BBQs and people we feed is so huge that we wanted to design this kitchen for long-term solid function and to keep everyone outside, avoiding messing up the house with endless running to the fridge for ketchup or looking for a serving platter.

We ordered the RTA kitchen in late February, and it arrived a few weeks later along with the appliances (they partner with Coyote, which is a fantastic outdoor appliance brand that I’ll get into later). That’s us ready for the ONE DAY install of the kitchen (not including hooking up all the mechanical, BTW). Now we had someone from RTA (Pete!) come since this was for a marketing partnership, and I wanted it to go smoothly, so if we didn’t have that, it likely would have taken a bit longer. But regardless, we were all shocked at how easy it was to assemble.

The bases are molded concrete made to look like white siding (or brick, there are other options), which means that they are they are solid, won’t rot or rust, and are honestly just really simple and basic in the best of ways. They come boxed by the cabinet and with a few hands, they are simply drilled together with brackets.
The Kitchen Cabinet Bases

I wanted to show you this so you can see how simple the inside is, which means not a lot of places for water intrusion or rot – there aren’t a lot of bells and whistles intentionally to withstand all the elements. They test these kitchens in hurricane weather, and they even put a car on top of one to test the strength – they are SOLID. They are drilled together with brackets and screws – so simple.
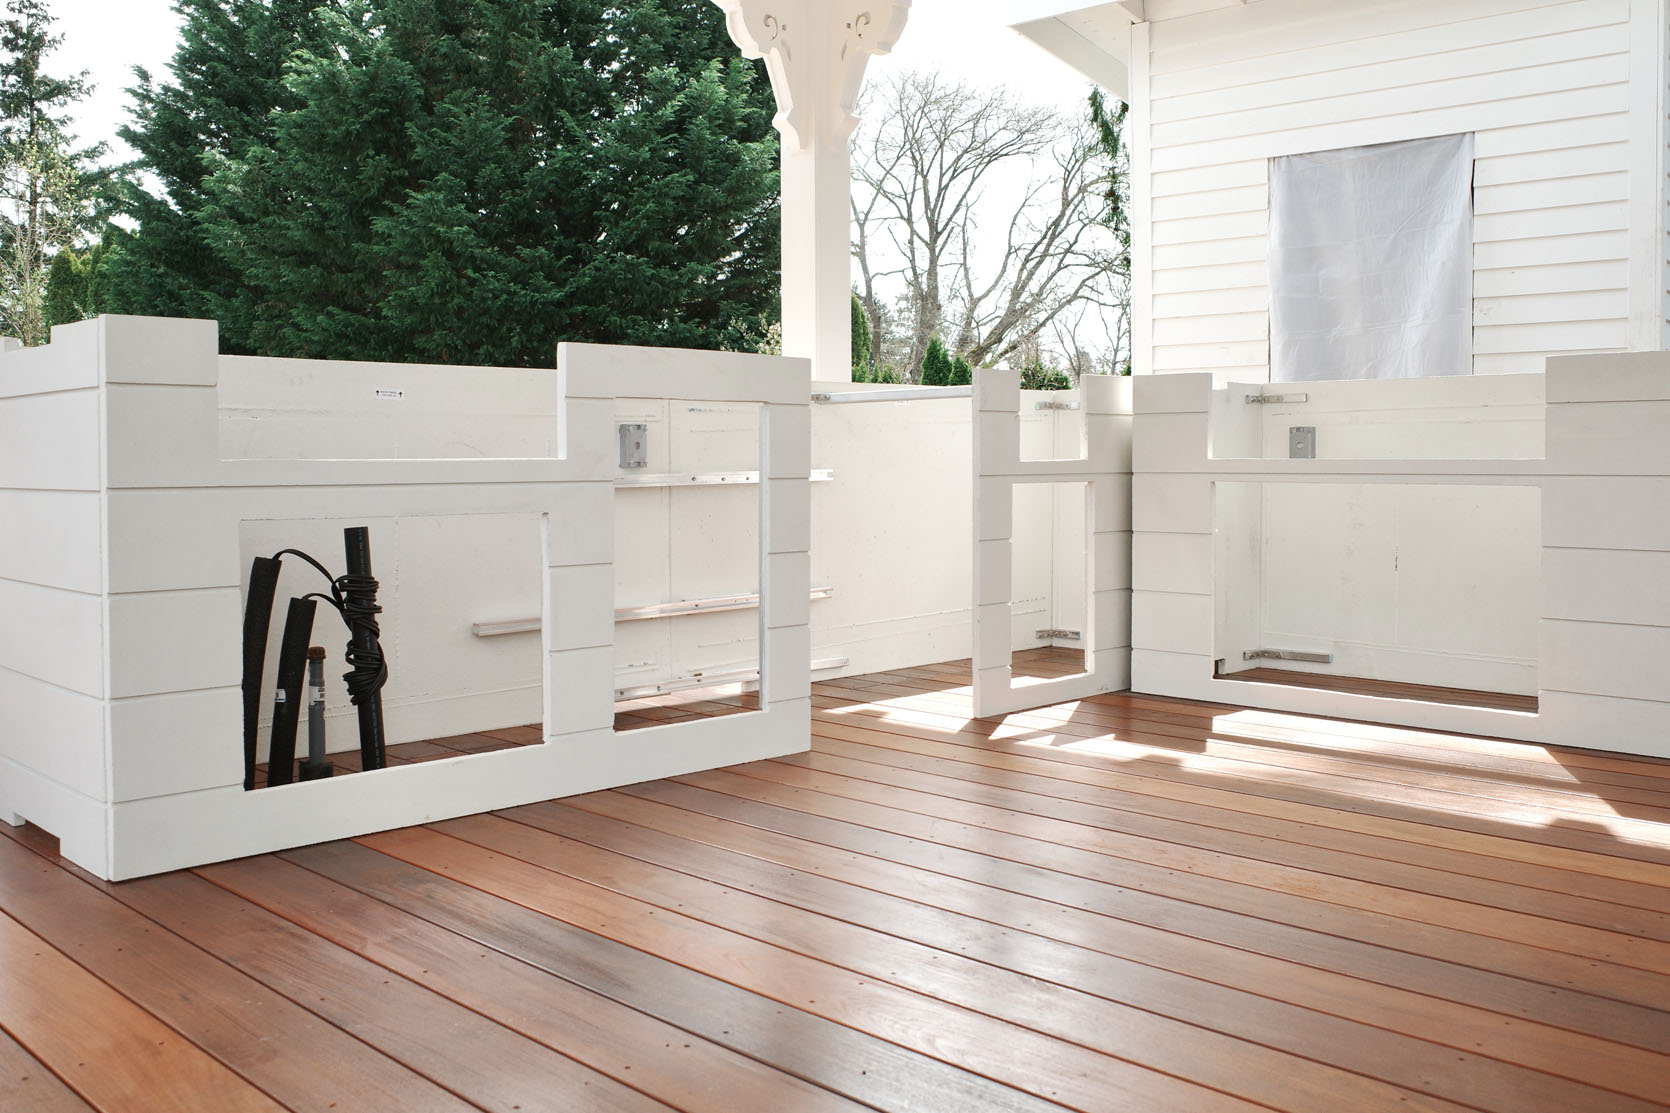
This might be boring information, but those of you in the market might wonder how to get the electrical and gas to the appliances. We stubbed up in one location and then the cabinet boxes are big enough that you can run all your stuff inside of the cabinets – i.e. you don’t have to know exactly where each thing is going to go, you just need to make sure your initial holes are inside a cabinet box (we chose under the sink).

There she is – I really did help a lot on this one, it was easy and fun and extremely rewarding.

The cabinets are attached together with steel braces, and they are not attached to the deck – they are simply that heavy. So you could put them on a stone patio or a deck, as long as it’s level (or use shims), it’s not going anywhere (again, they are concrete and crazy heavy).

We built one cabinet box at a time, five total, and they simply sit next to each other with the stone on top. There will be cement pieces that cover the seams.

Next came all the Coyote appliances and stainless steel storage, which I modeled here 🙂 I’m going to give you the full rundown in its own separate post, but they are so beautiful and high quality.
The Stone Countertops

There were a few countertop stones to choose from. I ordered samples and chose this leathered granite almost immediately (loving the color variation and texture – it’s extremely forgiving). I didn’t want something that would show a lot of staining, as I knew that there would be many nights that we didn’t clean up well until morning, so this felt really safe and smart to me (and is super pretty).
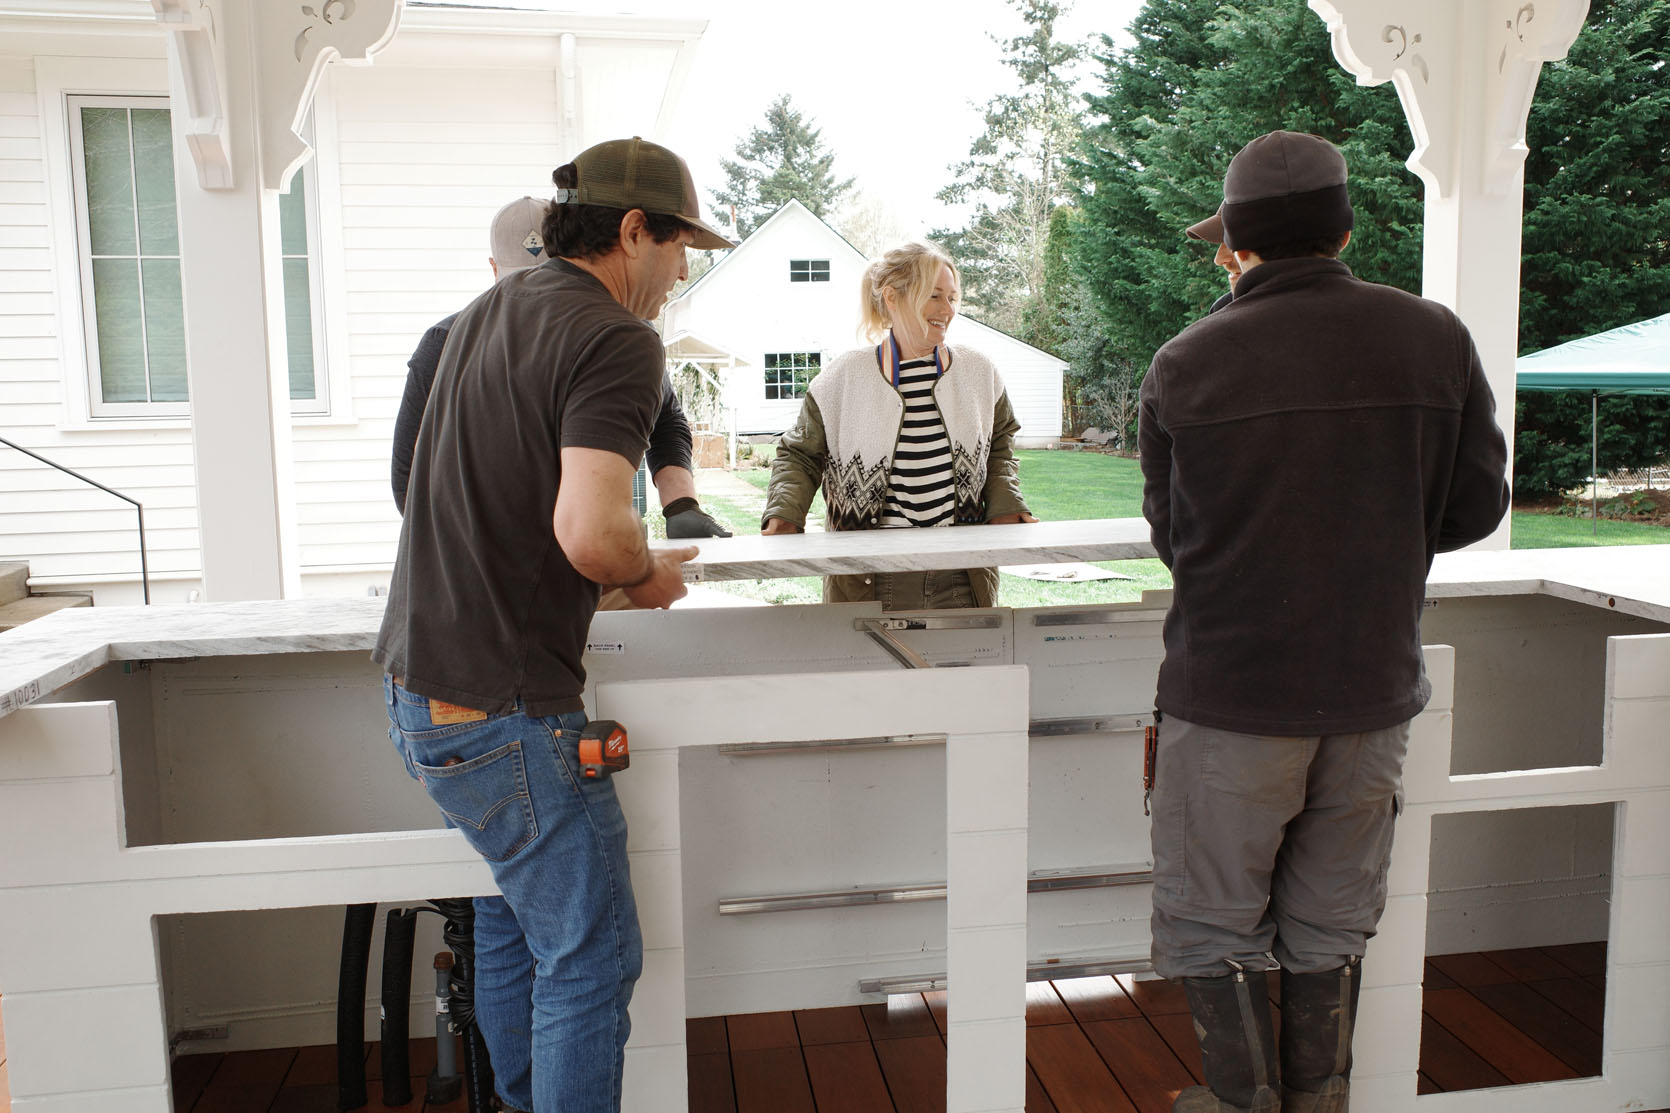
Many hands make light work 🙂 Now, our kitchen is big with a lot of bells and whistles, so it took us 1 day with 5 people to assemble. Should you be interested in this and want a simpler kitchen, it would be smaller and even faster to assemble.

Here it was a the end of day 1 – just incredible. The trim pieces were being glued on, the electrical/plumbing or gas wasn’t hooked up yet, and some of the drawers weren’t fully installed (so we could remove them to finalize the above), but I couldn’t believe that this all happened in one day. Over the next couple of weeks, we dialed in the landscaping, put a door on that well house, repaired all the flagstone around the kitchen, and planted a ton. While it’s not completely plug and play, you do need to plan, prep, and hire out some of the mechanical, RTA makes such a simple and high-quality product that really works, and most importantly, will last decades. It’s still an investment; it’s not like it’s a cheap kitchen, but I’m so thrilled by the simplicity and longevity of this product. The fully styled out reveal is coming next week 🙂 We seriously could not be happier with how our family (and like 150 of our friends) have been able to enjoy it – AND IT’S ONLY MAY!!!!!!
Kitchen by RTA
General contractor – Afore Construction and Consulting (my brother’s company with Nick!)
Appliances – Coyote
Landscape Design – Dennis’ 7 Dees
*Photos by Kaitlin Green