
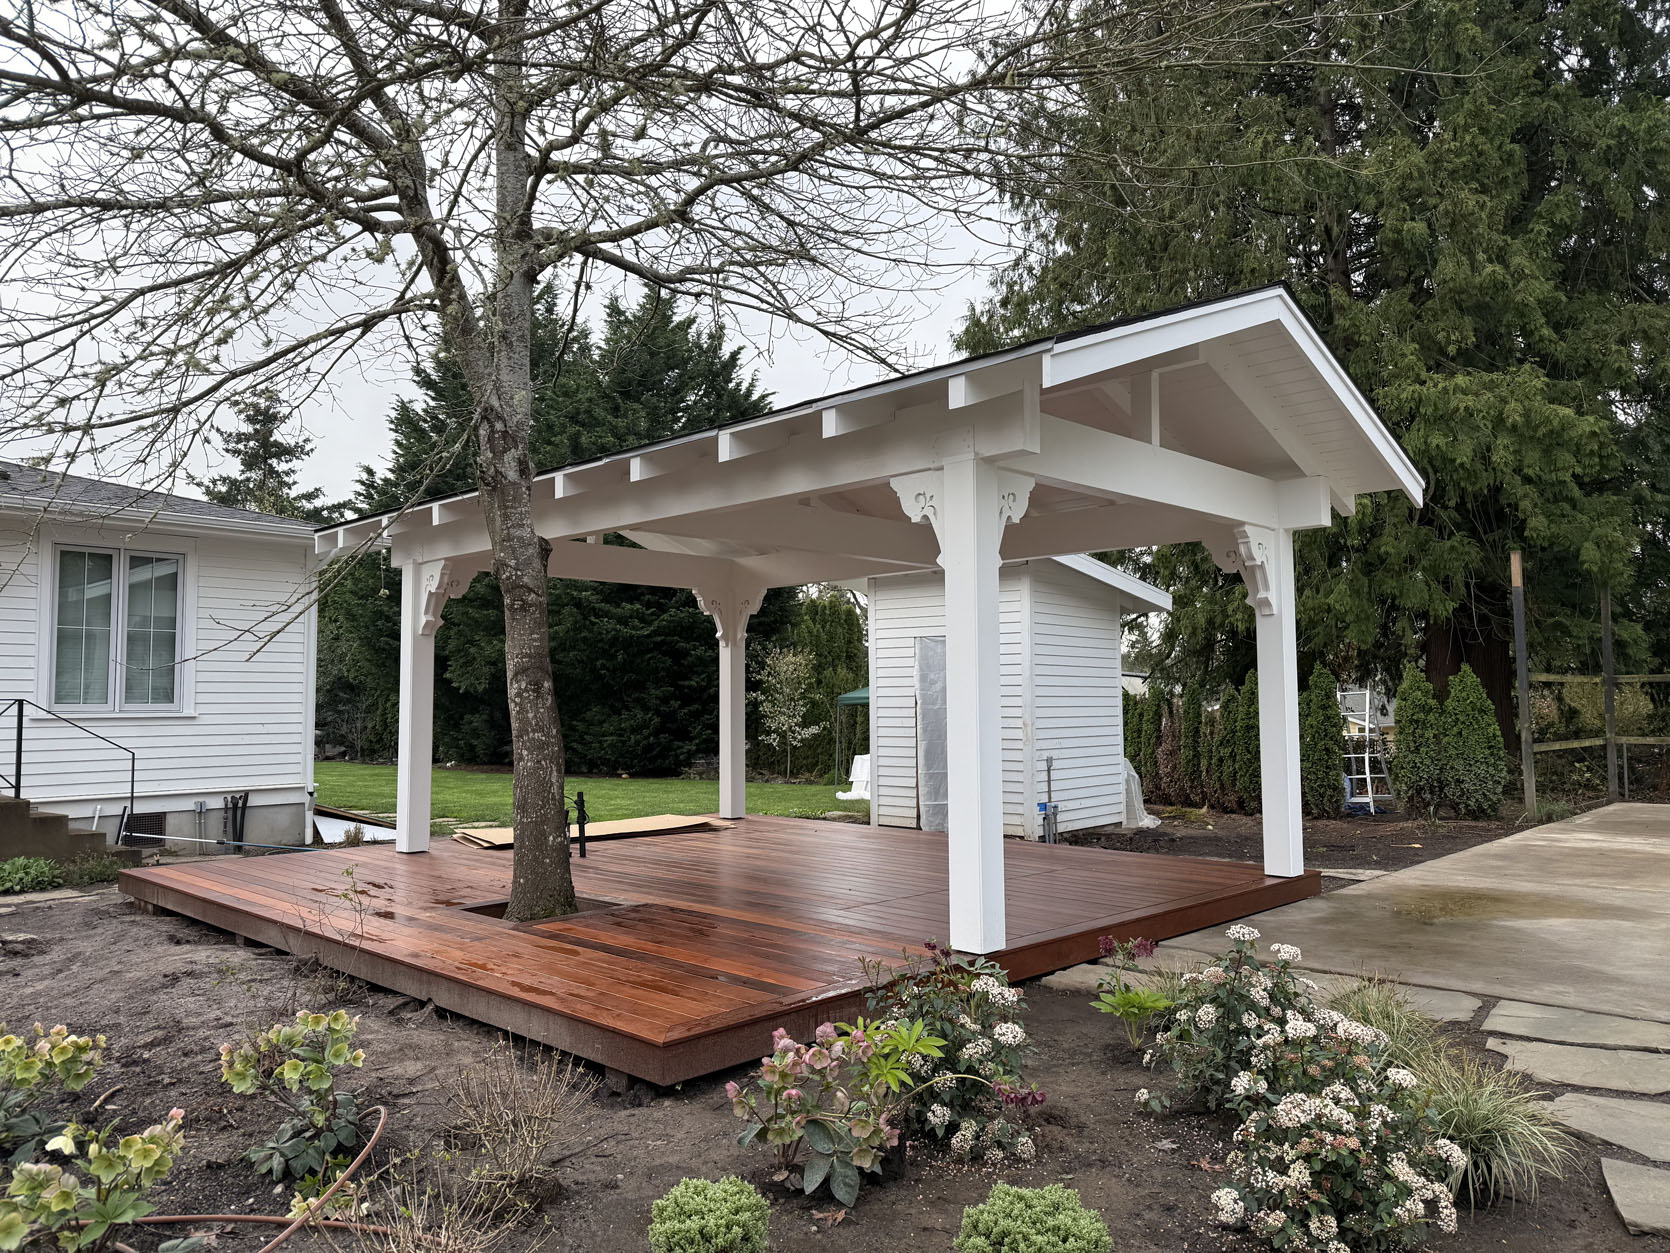
As I was designing this “kitchen gazebo,” I found almost no inspiration that looked and functioned like I wanted ours to look/feel. They were mostly big boxy McMansion-looking Texas-style structures or hexagonal sweet old timey gazebos, but I found almost no images of rectangular covered structures that looked charming and pretty. So I knew that it would have to be done in the details – i.e., custom rafter tails, or in today’s case, vintage-inspired corbels.

A corbel is a structural and decorative bracket that connects the beams to the posts in the corners, creating a stronger structure and, for me, softening the harshness of the strong lines. It was a perfect opportunity to add some sweet charm and make this structure less boxy.
The Original Corbels On The Covered Walkway

I got the idea for them from our very own covered walkway that had corbels between each post and beam, as you can see above. I loved the sweet scrollwork and wanted to mimic that, but bigger for the gazebo (we also had four small ones leftover from the part of the walkway that didn’t make it that we put on the island – I’ll show you later).
Time To Shop…

So I went down to Aurora Mills, my favorite architectural salvage place, 1/2 hour outside of Portland, and shopped. My hope was to get 8 large corbels that matched, but of course, we had specific dimensions we had to stay within, and obviously, stylistically, I had my dream corbel in mind. I knew it would be a shot in the dark, but I didn’t know where else to start. If nothing else, I’d come back with some inspiration and firmer ideas.


Aurora Mills had a ton of antique corbels, saved from vintage Victorian houses. It was super inspiring, and I got to really dig into their whole inventory to see if I could make anything work.

I collected every single option that would fit size-wise (we needed them to be at least 4-5″ thick, at least 11″ deep, and the height had some flexibility, but the structure was big, so I was hoping for a 12×16-sized corbel. I was obsessed with all these carved out details – we just don’t do this anymore (OR – spoiler – DO WE???? :))


We tried hard to find four that matched and couldn’t. Then we were like, what if we found some that were close enough and when painted, would work together? Could 8 different corbels, all painted white, look charming and eclectic? Or just really amateur?

I also took note of other architectural design elements that I liked – this is the best thing about shopping vintage, you are forced out of a box because you are beholden to what is available.

I LOVED the floral design on this salvaged piece of gingerbread, and tried to make it work a few different places on the property.


I LOVED the one on the left, with that sweet and simple little cut out and there were a few that were similar to it, but they were in pretty bad shape, meaning they would need repair on their own before they were even painted (this kind of work can cost a lot of money in my experience). The simpler brackets on the right were strong (and there were tons of them), so we even thought about combining the two – see below.

I think the (desperate) thought here was to buy vintage/reclaimed, do something creative to make it work by taking the floral cutout and pasting it inside the simpler bracket. This is where you start realizing that you are complicating your life so much just to use something vintage (I’ve done this MANY times, with varying degrees of success/failure). We still brought them all to our house to check them out (Aurora Mills knows me and let me borrow them for a day). I LOVED how it looked, and that’s when I made the smart (albeit more expensive) decision to hire a local maker to make 8 new ones, based on the vintage design.
Purl To The Rescue!

I called my friend/frequent collaborator Purl (follow @total_nonsequitur) and asked him if he could make these custom corbels. He is just one of those talented makers and artists who can figure out anything and loves the challenge (he made my coffee table, my huge paint brush and pencil, my sofa table, and I have so many of his paintings). I showed him a picture of the corbel and gave him the dimensions to make sure it was all doable before he came over. Then he popped by and we went over it – in a perfect world, we would have eight large ones and four small ones, the large ones being on the main posts and the small ones on the overhang.


It was a big ask – that’s 12 custom corbels, two different designs that all had to look good with each other. I wasn’t looking for a new design, though; I really just wanted that simple floral Scandi corbel replicated. So he brought that back and used it as a template to create a new one.


Purl shopped for and used reclaimed wood (both for cost purposes and the make it look a bit less polished/perfect/new). He created the cut-out design with a special tool for both ends, then stacked wood in between to add the thickness that we needed.


I was so excited as he sent me photo after photo. I approved them, he dropped them off (this was while I was in Belize), and my brother started hanging them.

In a perfect world, they would have been done in time to paint, but we had to stick to a schedule, so our painter painted the structure and planned to come back to paint these separately.

I think he used massive screws to scre them in? Not totally sure. All I know is that I came back from Belize, and it looked like this:
I was THRILLED!!!! They looked SO GOOD. Once painted white, they looked sweet and pretty, but not too fussy. They actually scaled down the gazebo in my mind, softening the lines. Next up were the smaller ones to go on those ends – we had waited to start them, unsure that we 100% needed them, but once these 8 were up, I really wanted the final four small ones to make those corners even softer. I just LOVED the vibe it was creating and wanted more.


I gave Purl the creative control to make the smaller ones however he wanted to work with the larger ones – he knows more about the process of making them and what would actually work based on his learnings on the larger ones (without needing to buy new equipment or experiment more).


Here you can see how they all look together (and you can even look closely to see our vintage small corbels holding up the island countertop). I LOVE how they look so much.


Purl did such an incredible job at making them look original and vintage – they are scaled perfectly to the gazebo and definitely soften all the rectangular lines. And then yes, my brother painted the glued the old covered walkway corbels onto the island to make it look like it’s holding up the countertops. It’s a sweet little detail that I love a lot.

And that’s the story of our custom corbels. If you are wondering how much they cost, I think I paid Purl $2,900 for all 12 of them (including materials and labor). It’s not nothing, but felt fair for the amount of time and talent that went into making these custom. By the way, I looked online a lot before and found some pretty great vintage-inspired dupes on Etsy (that were around $400 each, so not that much less), but they weren’t as sweet as ours, no cut-out flower. The only thing I regret is not paying the dough to do custom rafter tails (the part of the roofline that juts out that you can see from this angle). We did them throughout our house, but it’s a substantial cost (about $1k each), so we didn’t do it> But if I could snap my fingers, those ends would also be softened by a carved out curve.
More To Come…
We still need to hang our pendants that didn’t come in til a week after we had to shoot. We have big 20″ copper ladies from Rejuvenation that are rad and going to be hung pretty high, so you see them but still have a sense of airiness and space. For now, the string lights provide enough light, but the pendants will look so pretty. Additionally, we might add heaters to extend our time out here by months on either end of summer, and we might have to add gutters (but really hoping not to have to spend the money). Oh, and we did buy the big custom island cover that RTA makes for each – it’s a big U-shaped cover (in addition to grill covers) that you can put on the entire thing all winter long. xx
*Pretty Photos by Kailtin Green