")
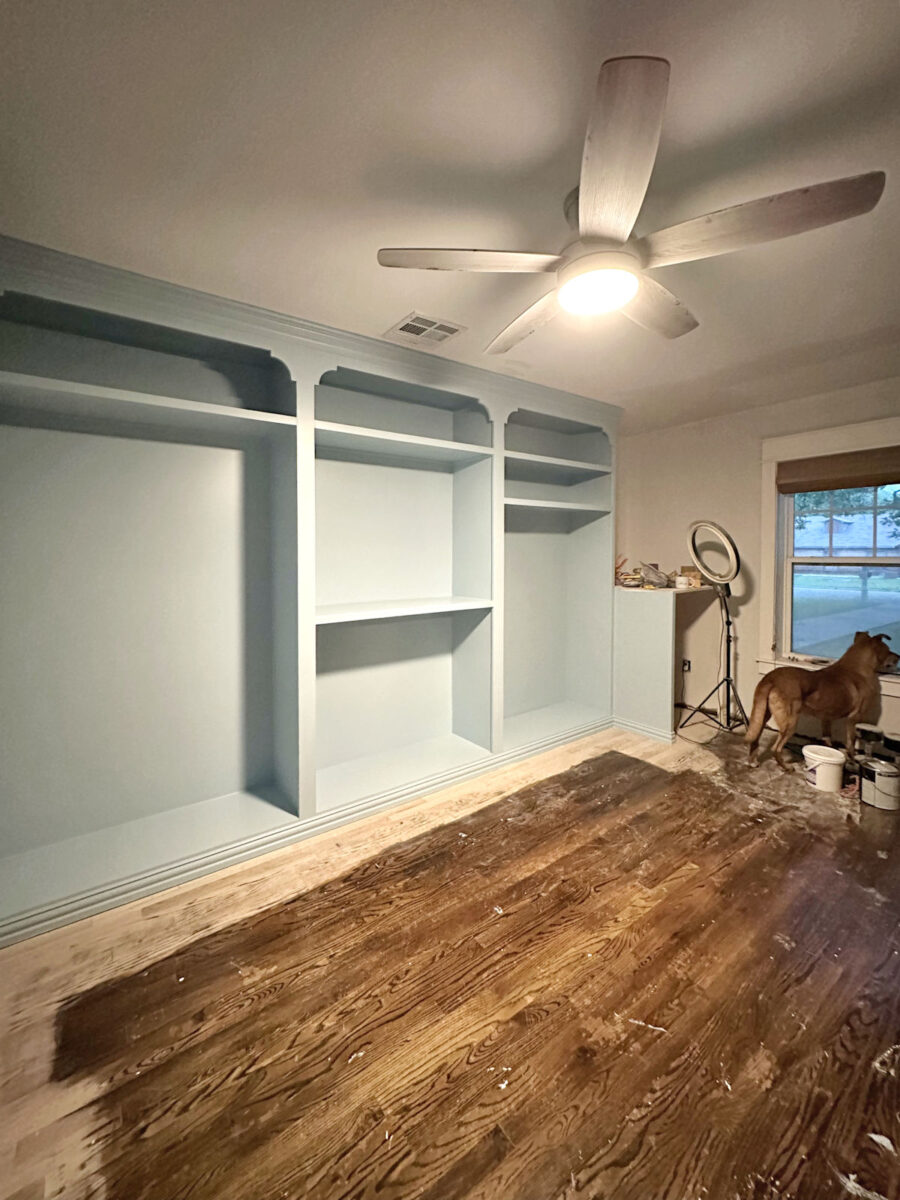
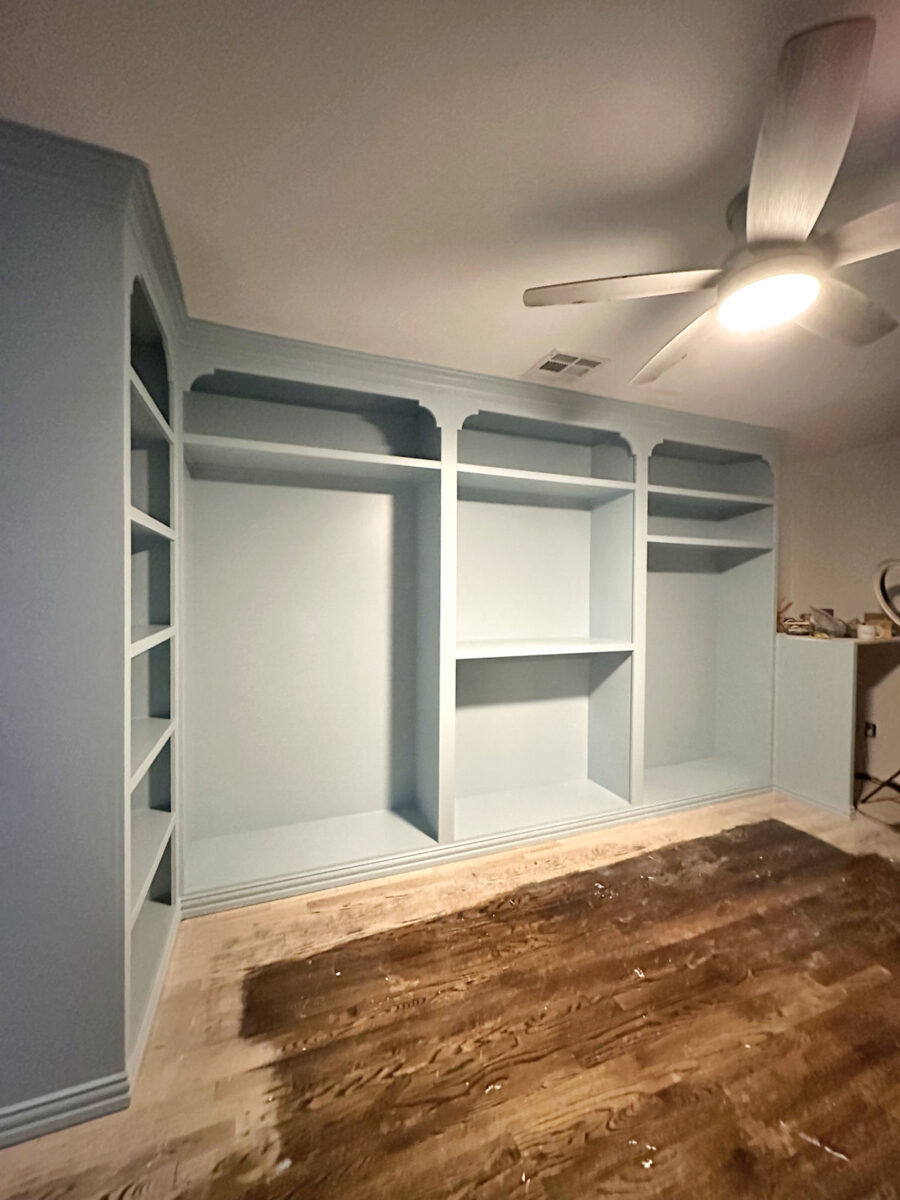
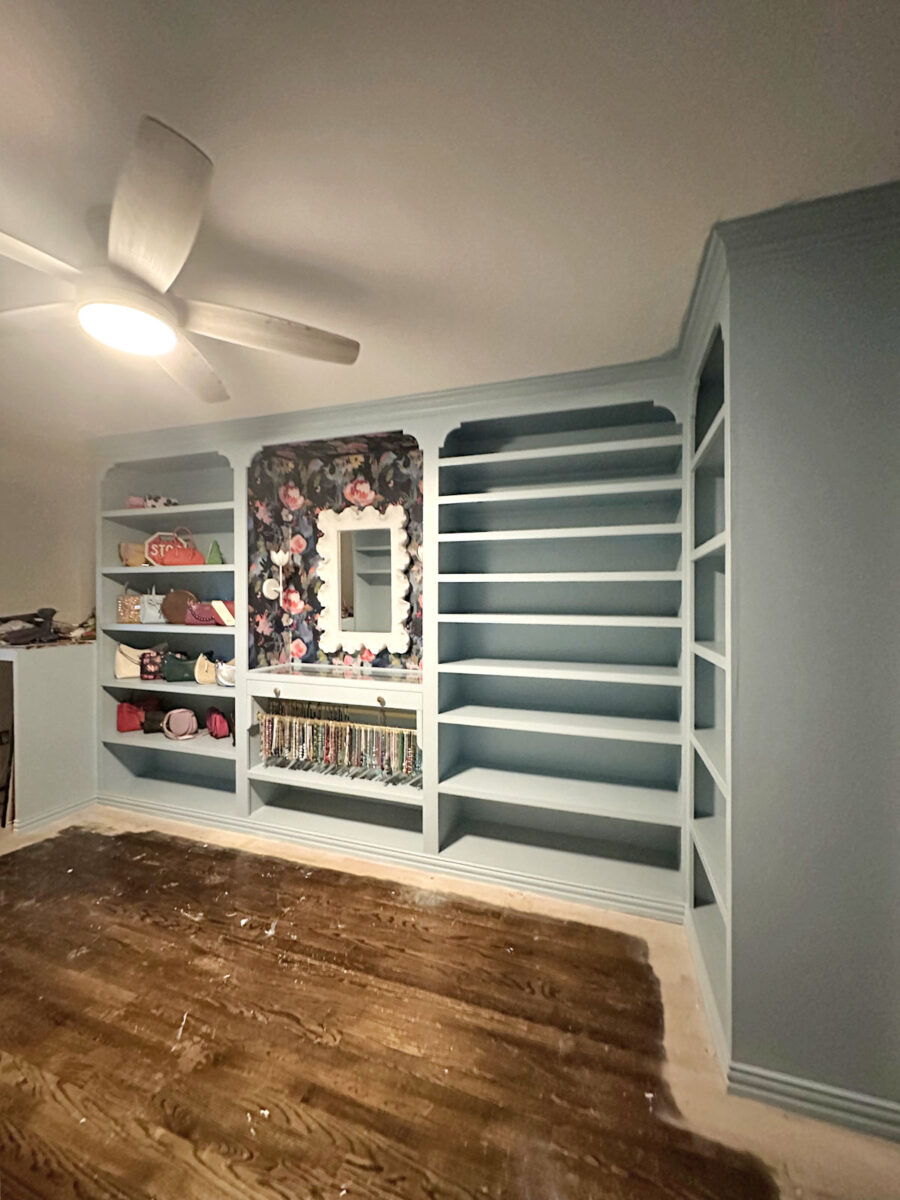
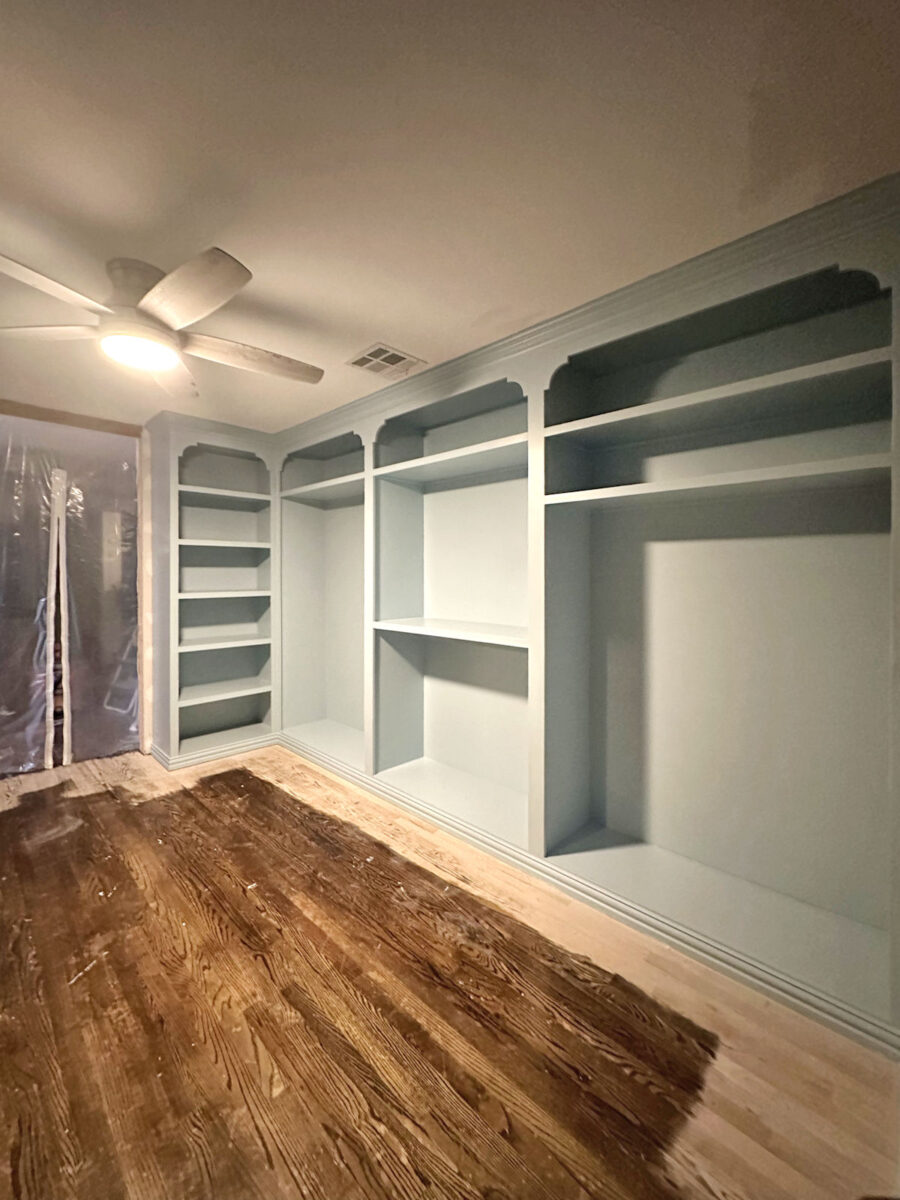
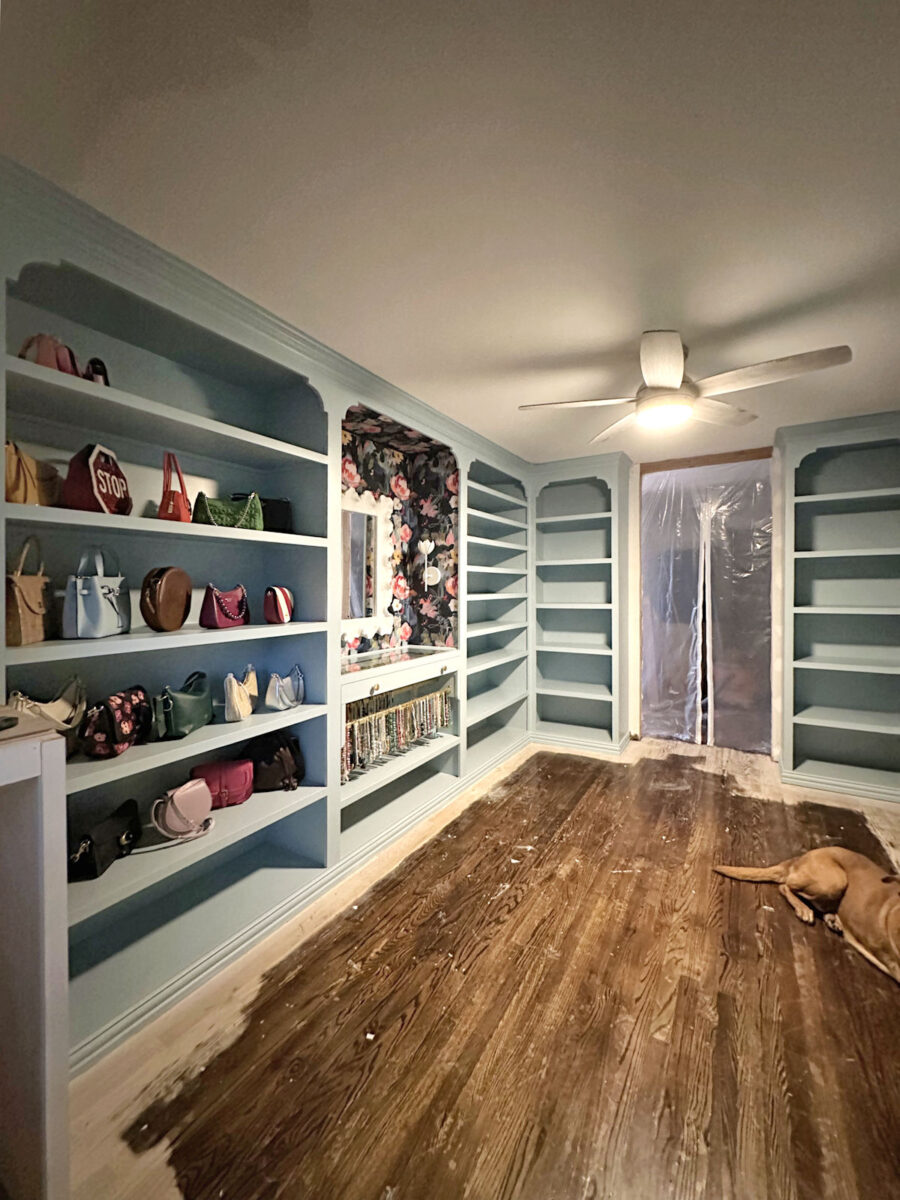
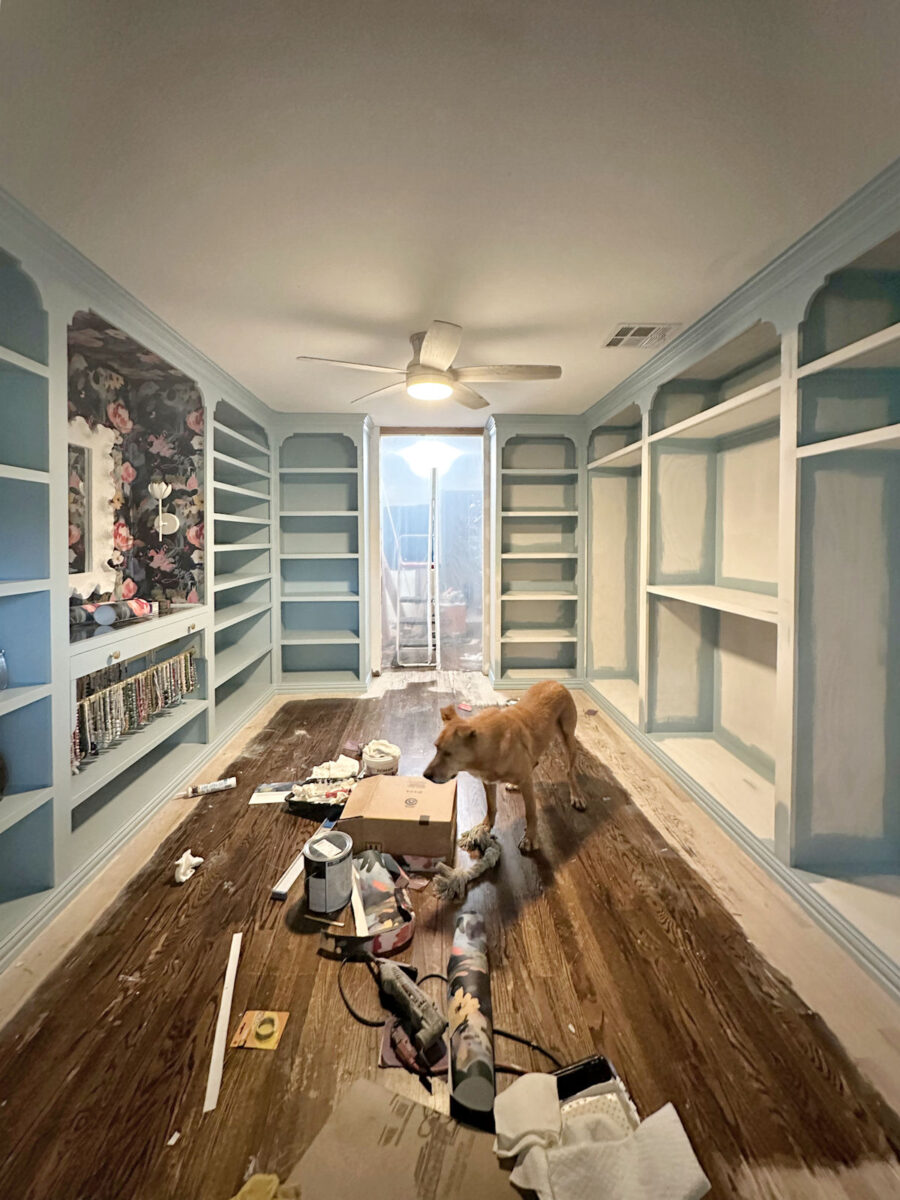
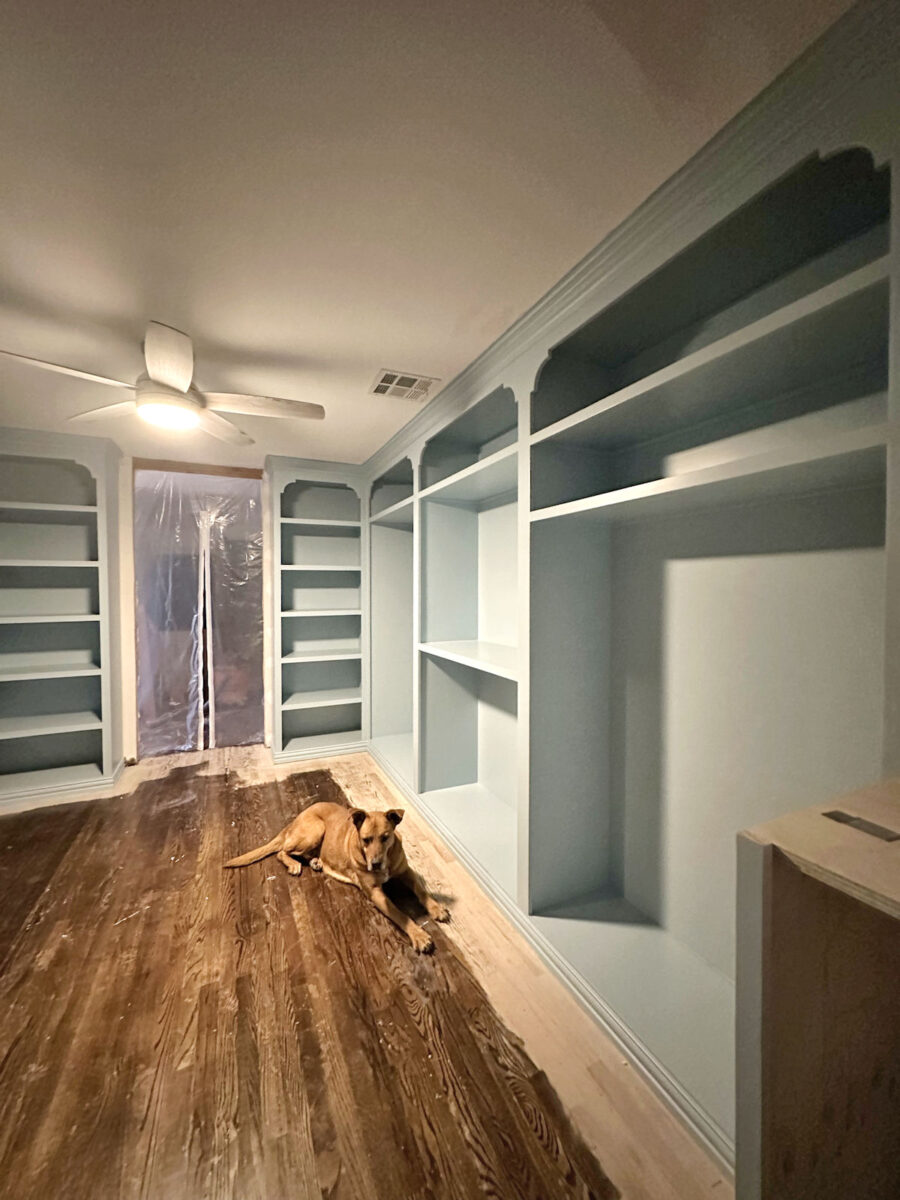
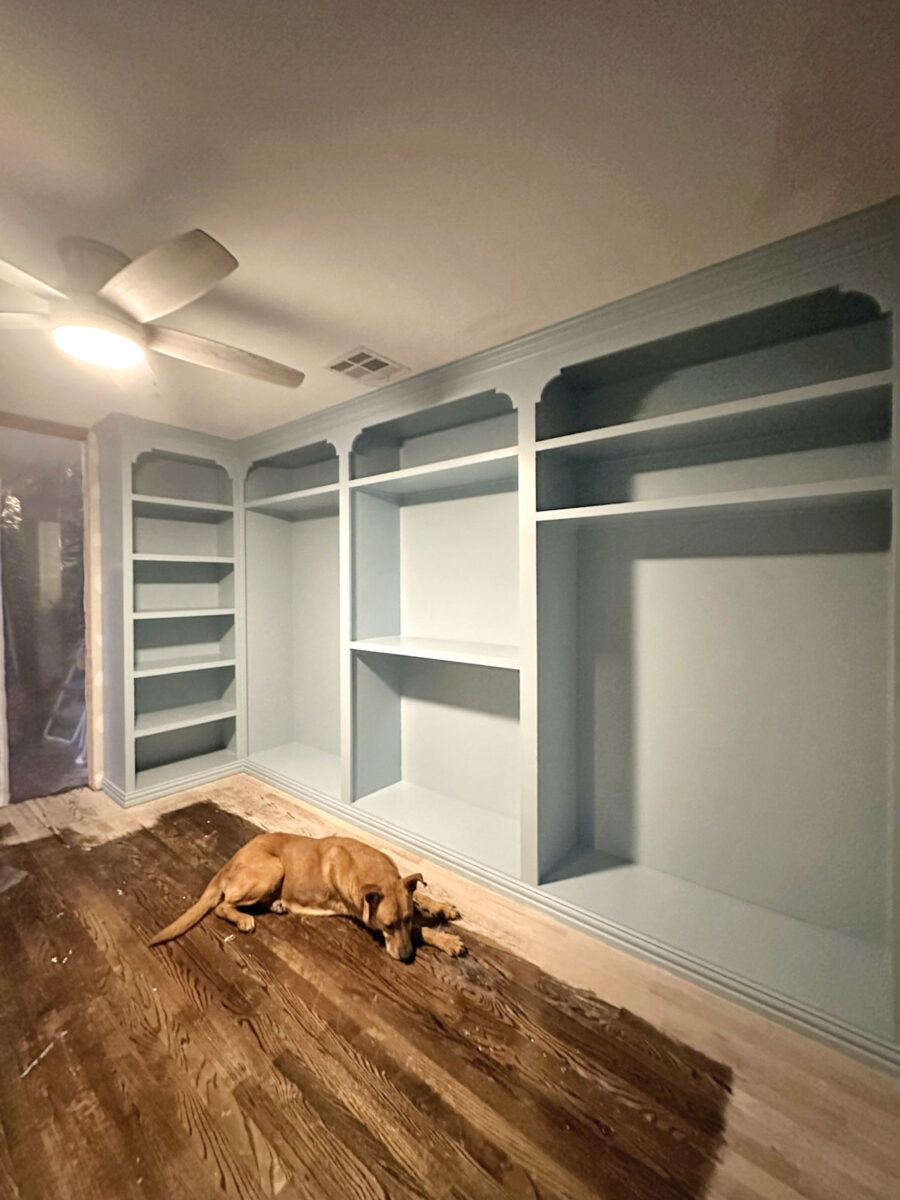
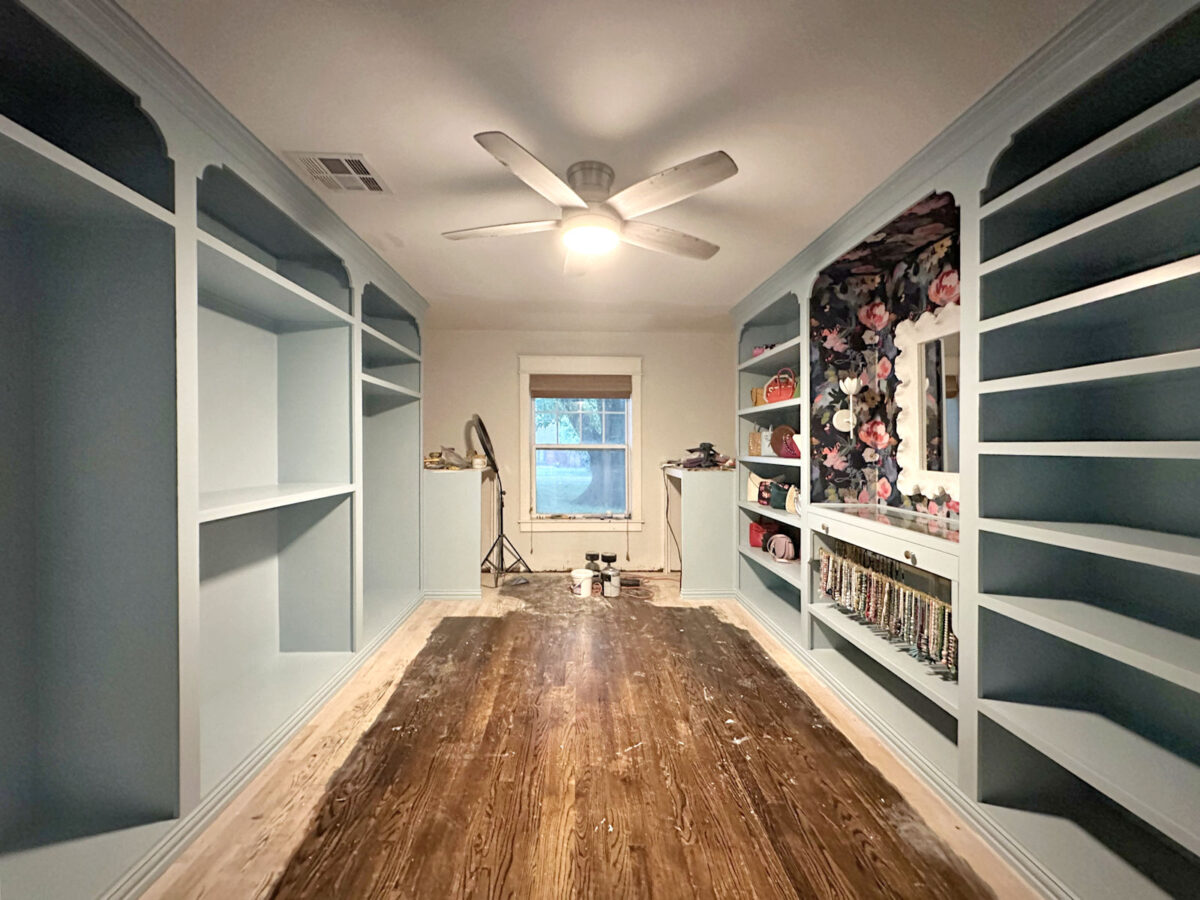
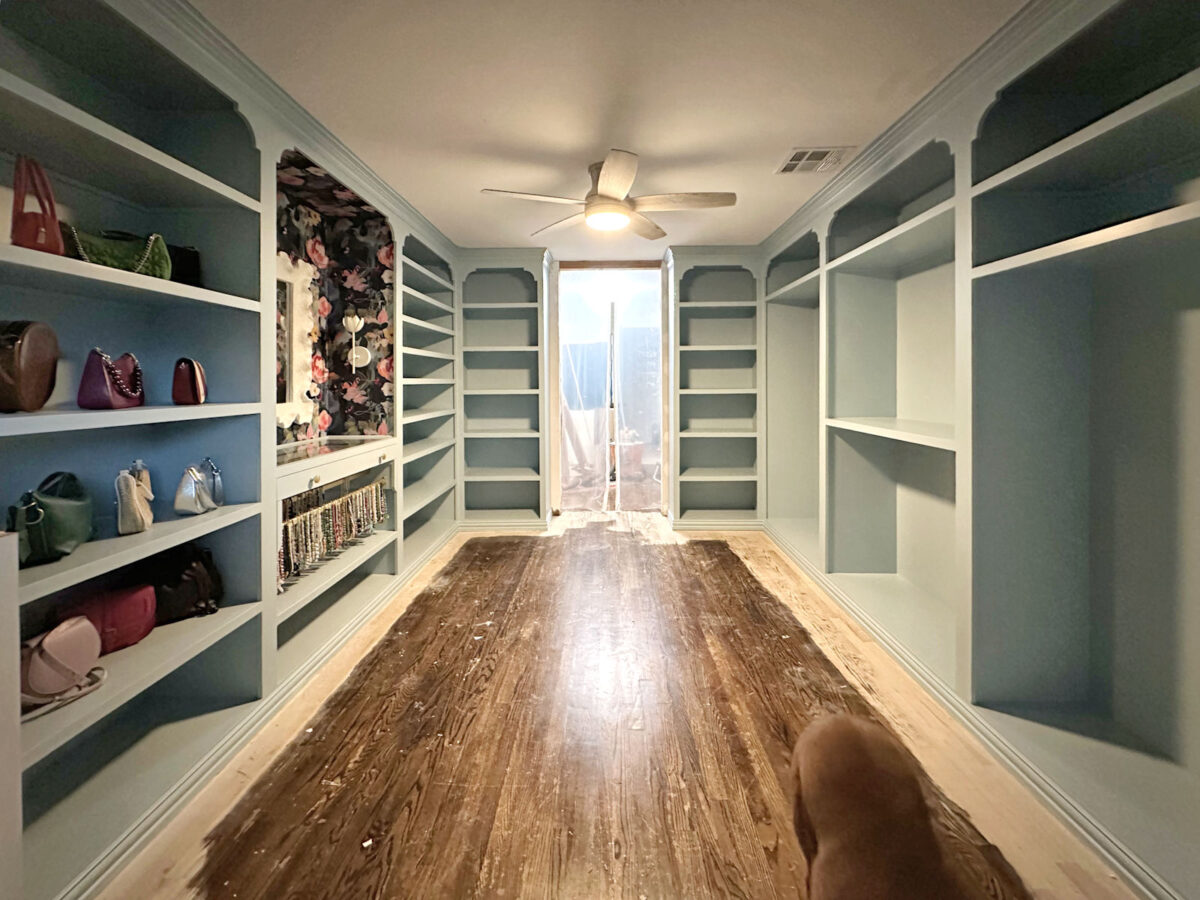
Last night, I cleared one of the major hurdles in this walk-in closet project. The cabinets are painted! This was a huge job with all of those shelves, but it’s finally done, and I can move on to the next step in this closet project.
Here’s how they turned out…
I took all of these pictures with the wide angle setting on my phone, which makes the room look larger (longer) than it really is. I mean, the room isn’t tiny. It’s 11’4″ wide and 15’10” long, but the wide angle does distort it a bit. Using a wide angle is the only way I can get all of the cabinets in the photo, though.
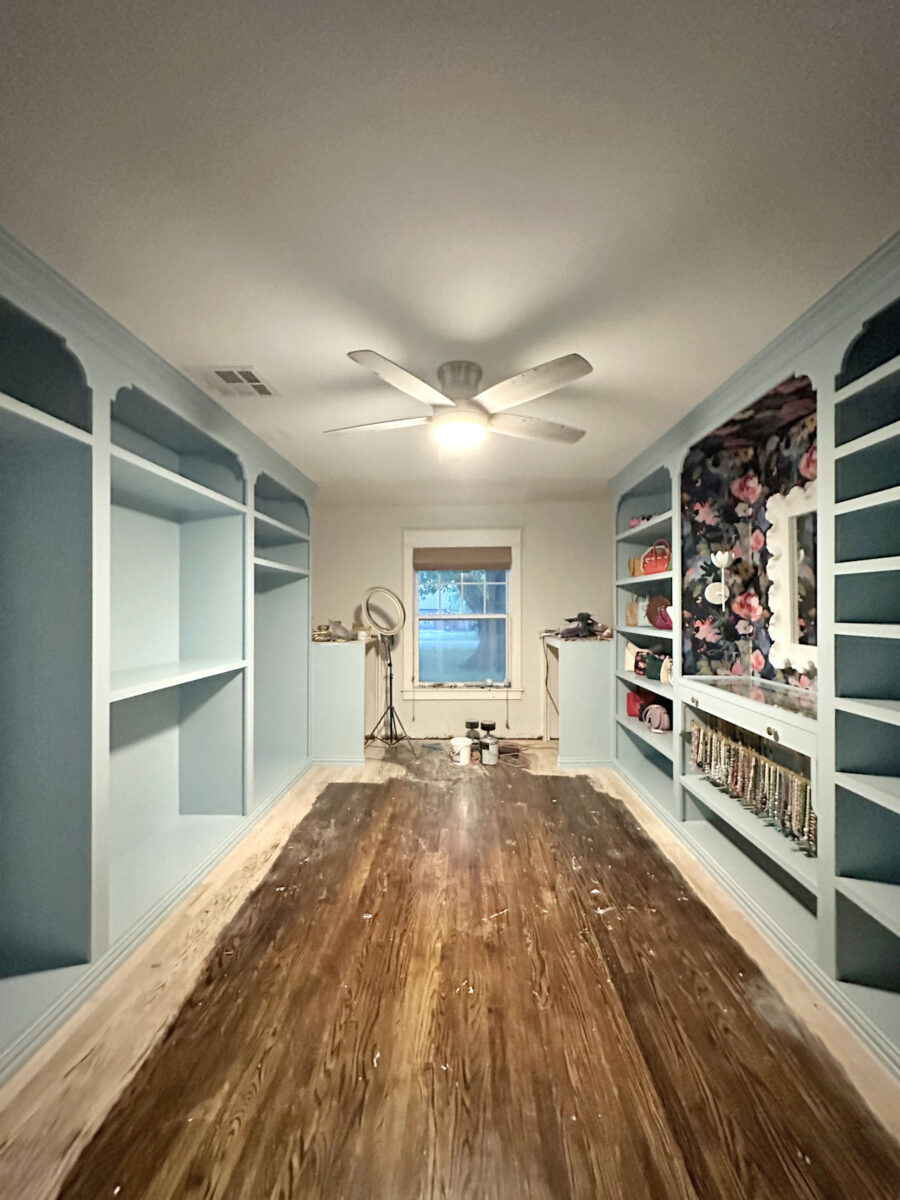
The color is Sherwin Williams Billowy Breeze, which is a very light blue with a hint of green in it. I think that green keeps it from looking like a blue that belongs in a baby’s room. I used their Emerald Urethane Trim Enamel in a satin finish.
This room still has terrible lighting (just the one light on the ceiling fan for now), so I’m certain it will look much better when I finally get the new lighting installed in the room. I’ll be replacing the ceiling fan with a chandelier, and then adding at least five recessed lights, plus accent lighting with four sconces in the room.
I had planned on doing the floors next, starting tomorrow morning, but I think I’ve changed my plan. Instead, I’ll spend tomorrow working on the lighting. Since I have to cut holes in the ceiling drywall, that’s going to be a very messy and dusty project, so I’d like to get it done before I start on the floors. That way, I can also get the ceiling painted before I do the floors, which I think makes way more sense.
Plus, it would really be nice to see this closet in good lighting, and to have much better lighting to work by as I continue with the other projects that need to be done.
Anyway, I’m so excited to have this huge project checked off of my list for this room. Obviously, these perimeter cabinets were the biggest part of this closet, so having them done feels like I’ve turned a corner. While I do still have a very long list of things that need to be done in here (which I shared in yesterday’s post), it feels like the rest will be an easy jog to the finish line by comparison.
How I Painted My Closet Cabinets
To paint these cabinets, I used a brush to cut in around all of the corners and to paint the trim. You can see that in this photo that I shared yesterday.
I did two coats of paint, so once I had the first coat done, the paint was dry enough to start on the second coat. I did all of the cutting in and trim with both coats of paint before painting the rest.
And then I painted all of the large, flat surfaces with a 6-inch roller labeled for smooth surfaces.
Why I didn’t spray my cabinets
The main reason I didn’t spray them was because I finished the cabinets in a very piecemeal way. And I did it that way because that’s just how I work. I don’t always do things in the order in which they make the most sense, or in the order which is most efficient. I work in an order that will keep me interested, motivated, and moving forward.
So by the time I had primed, caulked, and sanded the cabinets on the right side of the room, I was ready to move on to paint. I didn’t want to wait until I had finished the priming, caulking, and sanding on the left side of the room. And then by the time I got two coats of paint on the first two sections of cabinets on the right side of the room, I was anxious to get the wallpaper and sconces up. There’s no way I could have done that out of order if I were spraying my cabinets. But that’s the order in which I needed and wanted to do them for my own peace of mind. I didn’t want to be stuck in the priming, caulking, and sanding stage for several more days without seeing some of the pretty stuff finally being done. I needed that mental break from the mundane tasks, and seeing the pretty wallpaper and sconces motivated me even more to get the other side of the room finished.

It’s definitely not the most efficient way to do it, but since I do all of the work myself, I have to do what I have to do to keep myself motivated.
Will I be clear coating the cabinets?
If you’ve been around here long at all, you know I love to use a clear topcoat on cabinets and furniture that have been painted with latex paint. But this time, I won’t be doing that. This is my first time using Sherwin Williams Emerald paint in a satin finish, and it is perfect all on its own. The paint us durable, and the finish is gorgeous. No clear topcoat is needed at all.
In the past, I’ve used clear topcoat for two reasons. (1) To add durability to lower quality paints, and (2) to knock down the sheen on paint that is too shiny for my taste. But the Emerald paint is durable, and the satin finish is gorgeous. So for the first time in a very long time, I won’t be using a clear topcoat. And I’m sold on Emerald Urethane paint. I’ll be using this paint for all of my cabinet and furniture projects isn the future.

Addicted 2 Decorating is where I share my DIY and decorating journey as I remodel and decorate the 1948 fixer upper that my husband, Matt, and I bought in 2013. Matt has M.S. and is unable to do physical work, so I do the majority of the work on the house by myself. You can learn more about me here.