")
The skirting is completely installed on the workshop, and I can’t believe how much of a difference it made! I knew it would make a difference, but to my eye, this skirting has completely changed the look of the building and turned it from a utilitarian shed into a cute little building. It’s not quite to “cottage” status yet, but this skirting went a long way towards that goal.
I’ve already shared quite a bit about the process of installing this skirting, including products used and why. If you missed that post, you can read it here: Adding Skirting To The Workshop, Part 1
While I did finish the installation, the skirting isn’t completely finished yet. I still need to caulk, paint, and add vents. I can’t forget about ventilation! But I had to order vents online, and I do have them, but I haven’t had a chance to install them yet. I didn’t buy anything fancy. They’re just simple small vents with screens to keep pests out. These are the ones I bought (affiliate link). They’re kind of small, so I’ll be putting a total of five vents in the skirting around the building. Why five? No reason except that I bought a package of five. 😀
I show the whole process, from start to finish, in this video. It’s a longer video, but I ended up with almost four hours of video from this project that I had to edit.
But for those of you who want the pictures, let’s get back to the process. I don’t have much more to share in the way of “how to” on this project. I pretty much shared all of that in the first post. But I will share what I had to deal with during this project. This project spanned several days, and this is Texas, so I was outside working in cold weather, warm weather, dry weather, bright sunshine, rain, cloudy skies, and lots and lots of mud. I feel like I kind of experienced a full year’s worth of Texas seasons during this single project.
I left off on the first post with me wheeling that long 27-foot piece of skirting over into place by putting one end on the furniture dolly, and picking up the other end and dragging it just to get it over by the building. And that’s where I left it that night. So the next morning, I got up to find that it had rained, and the area where I needed to work (which also needed a trench dug the entire 27-foot length) was very muddy.
But I was determined, so I got down there and started digging the trench for the skirting to fit into.

I’m not joking when I say it was muddy! I was covered in mud by the time I had the trench dug, and my board was covered in mud also. I was so glad I was using PVC boards. They’ll just wash right off with a little water. I’m not sure that wood would have escaped this unscathed.

With my trench dug, I had another issue. Working by myself is often a challenge. An extra set of hands would make things so much easier, but I almost never have an extra set of hands to help me. And getting the long skirting board to stand up all the way across on my own was seemingly impossible. By the time I’d get one end up, the other end was falling over. Then the whole thing would fall over. I struggled with this for a few minutes before I realized an easy solution.

I grabbed a cinderblock and used it to prop the board up in the middle, and that gave me the freedom I needed to adjust the board and get the ends in place.

Once it was installed, it was a mess. But again, it’s PVC, so mud will wash right off.

I had to stop working for a while because it poured down rain (oh good, more mud!), but when it stopped, the sun came out, and I got back to work. Next up, I worked on the ramp end of the building. Before I could install the skirting here, I had to shovel away lots of dirt and rocks that were left from the concrete pour. I also had to dig a shallow trench on this side.

But I also had to use my Dremel Multi-Max to cut away this plywood backing that was put there when the concrete ramp was poured. This is one of my most handy tools. If you don’t have one, you can find it here (affiliate link). I find myself using this tool constantly. It’s one of those things that I bought, and then wondered how I went so long without it.

I also had to chip away at the concrete because it was pretty rough and jagged and my skirting boards didn’t fit up against it. Initially, I had about a 1/2-inch gap, which more than I want to caulk, and plenty big for a mouse or probably even a rat to get into. And yes, I used my Multi-Max for that, too. That poor blade. 😀 But it did the trick!

And here’s what that side looked like once it was in place.

I put a vertical trim piece right up against the ramp, and while I was able to close up most of that gap, that’s still big enough for bugs to get through, and possibly even a mouse. I’ve read that they can get through a space as small as the diameter of a pencil, so I’ll still need to caulk this to close up that gap completely.

By the time I got the areas on either side of the ramp finished, I had lost daylight. Y’all, I’m so tired of the sun going down at 5:30! I’m ready for summer daylight hours when the sun goes down at 9:00pm! But we don’t have that now, and I was determined to get the skirting finished before closing up for the day, so I set up my Jackery and Ring light and kept on working. This Jackery is one of my best recent purchases. I drag this thing all over the place to plug things in without having to use extension cords. It’s so handy! This is the one I have (affiliate link), and there’s a $310 coupon available right now!

So I was out there, well after dark, working by lamp light powered by my Jackery. And of course, this side was the hardest of all. I dug this trench about four times before I finally got that board to sit in there properly. I was so frustrated, so tired, and so cold, but the more problems this gave me, the more hardheaded and determined I got. There was no way I was going to pack it up without finishing.

And I did! I got everything on that side finished right at 9:00pm.
I had one more detail I wanted to address the next day. And I had a beautiful, sun-filled day to finish. I wanted to add these corner trim pieces to cover over the cut ends of the PVC boards. I used 1″ x 2″ PVC boars for these corners, and installed the pieces vertically.

These will still need some caulk (as will the entire skirting), but I think this trim gives it a cleaner and more finished look.

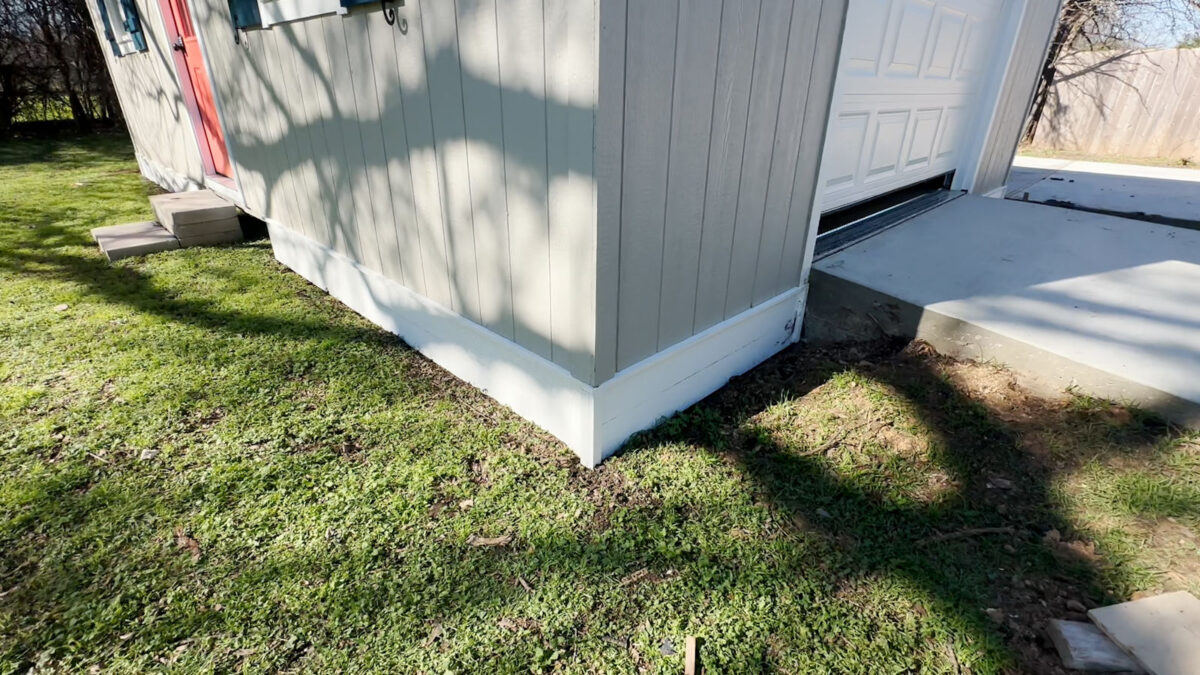
Here’s a look at the corner with the trim attached…

And with that final detail in place, the skirting was completely installed! And of course, I finished up when we had blinding sun with lots of shadows, so the front is covered in tree shadows making it a bit hard to see. But I still think you can see how much of an upgrade that skirting made to the building.

I just love how this looks. I’m going to wait to caulk and paint so that I can do the skirting and front steps all at once.
And here’s a look at the back. I was able to sweep off most of the dried mud, but it’s still pretty dirty. It’s going to take a lot of cleaning for me to be able to paint this skirting.

And here’s a look at the other end — the end I did by lamp light. 😀

This was a big job, for sure, and I’m so glad it’s finished! It wasn’t a difficult job by any means, and I think it would have been much easier had I not had to deal with all of that mud. But it’s finished now, and I can’t stop looking at my little building. I’m so excited about how it’s turning out!

Addicted 2 Decorating is where I share my DIY and decorating journey as I remodel and decorate the 1948 fixer upper that my husband, Matt, and I bought in 2013. Matt has M.S. and is unable to do physical work, so I do the majority of the work on the house by myself. You can learn more about me here.