Close Menu
    Facebook X (Twitter) Instagram
    Trending
    • MillerKnoll unifies its brands under one roof for Chicago Design Week
    • "Opera House of Insects" among students projects from University of Westminster
    • Brandon Haw Architecture completes two metallic skyscrapers on Brooklyn waterfront
    • Forgeworks uses cedar shingles to update 1960s bungalow in Bath
    • 30 Best Architecture and Design Firms in New Zealand
    • My Closet Island And A Battle Of Wills (Mom vs. Daughter)
    • Ateliers O-S Architectes draws on agricultural architecture for French gymnasium
    • The Case For The Unassuming Backyard Picnic Table
    Home Decor DesignerHome Decor Designer
    • Home
    • DIY Home Decor
    • Garden Design
    • Decorating
    • Home Improvement
    • Interior Design
    • More
      • Plants & Yards
      • Architecture
      • Design
    Home Decor DesignerHome Decor Designer
    Home»DIY Home Decor»The Floors Are (Almost) Finished! (The Amazing Difference That Polyurethane Makes)
    DIY Home Decor

    The Floors Are (Almost) Finished! (The Amazing Difference That Polyurethane Makes)

    Team_HomeDecorDesignerBy Team_HomeDecorDesignerMarch 5, 2025No Comments5 Mins Read
    Share Facebook Twitter Pinterest LinkedIn Tumblr Reddit Telegram Email
    Share
    Facebook Twitter LinkedIn Pinterest Email


    I’ll start with the bad news. Sadly, I didn’t get the floors in our bedroom suite finished yesterday because the polyurethane didn’t dry fast enough. I assume it was because of the weather and the humidity early in the day after I did the first coat. That first coat took about eight hours to dry enough to put the second coat on, so it threw off my whole schedule. So they’re not completely finished at this point. They still need a bit of sanding, and then a final clear coat.

    The good news is that they’re looking amazing, even if I do say so myself. 😀 And even though I’ve done this before, and I was fully expecting it, I was still astonished at the huge difference that the polyurethane made on the floors. As I said yesterday, I add stain to the first coat of polyurethane, and that evens out the grain of the red oak hardwood flooring and adds a beautiful depth of color to the floor. I’m not going to go over the details of this process because I did a thorough multi-post tutorial the last time I did it.

    I’ll also add that the last time I did this, I was refinishing 70-year-old red oak hardwood floors. There’s a HUGE difference between 70-year-old red oak and new red oak. I don’t know why, but the new stuff isn’t as pretty, and has a lot more grain in it. I still think the new stuff is pretty, but I definitely prefer the old flooring. There’s really nothing I can do about that, though.

    The last time I did this, I only added stain to the first coat of polyurethane. This time, in order to match the depth of color in the rest of the house, I actually had to do two coats of the stain/polyurethane mixture. That might also have something to do with the longer drying times, but it was necessary.

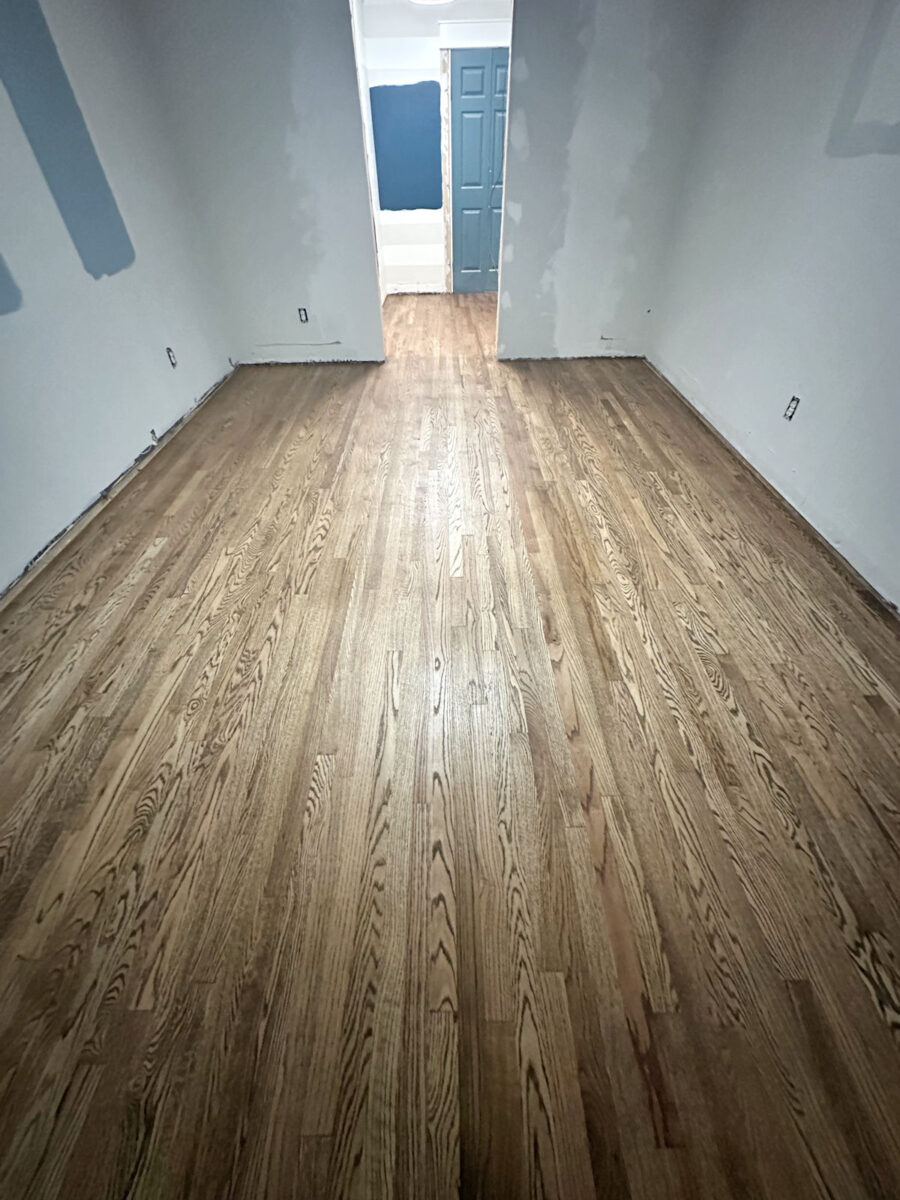
    So here’s a look at the floors so far. This is the floor in the bedroom…
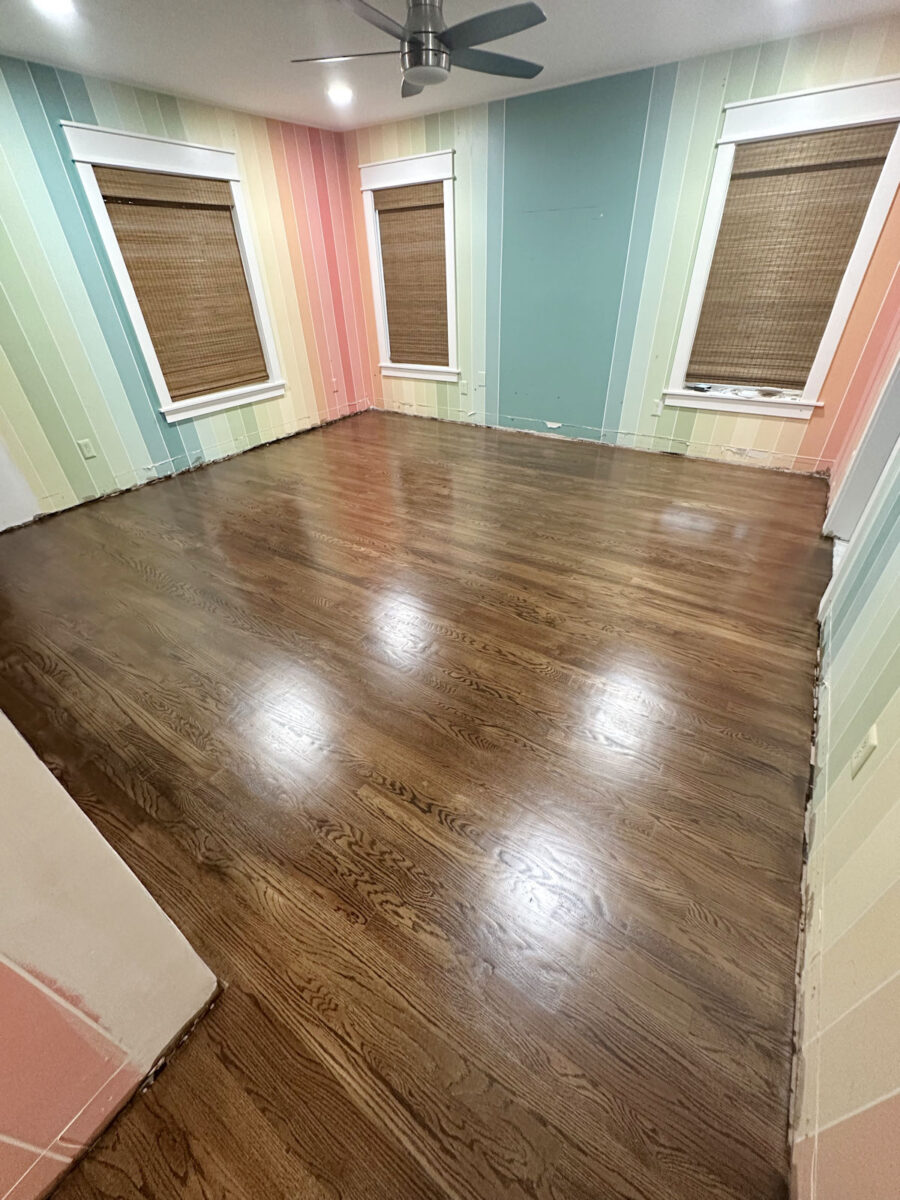
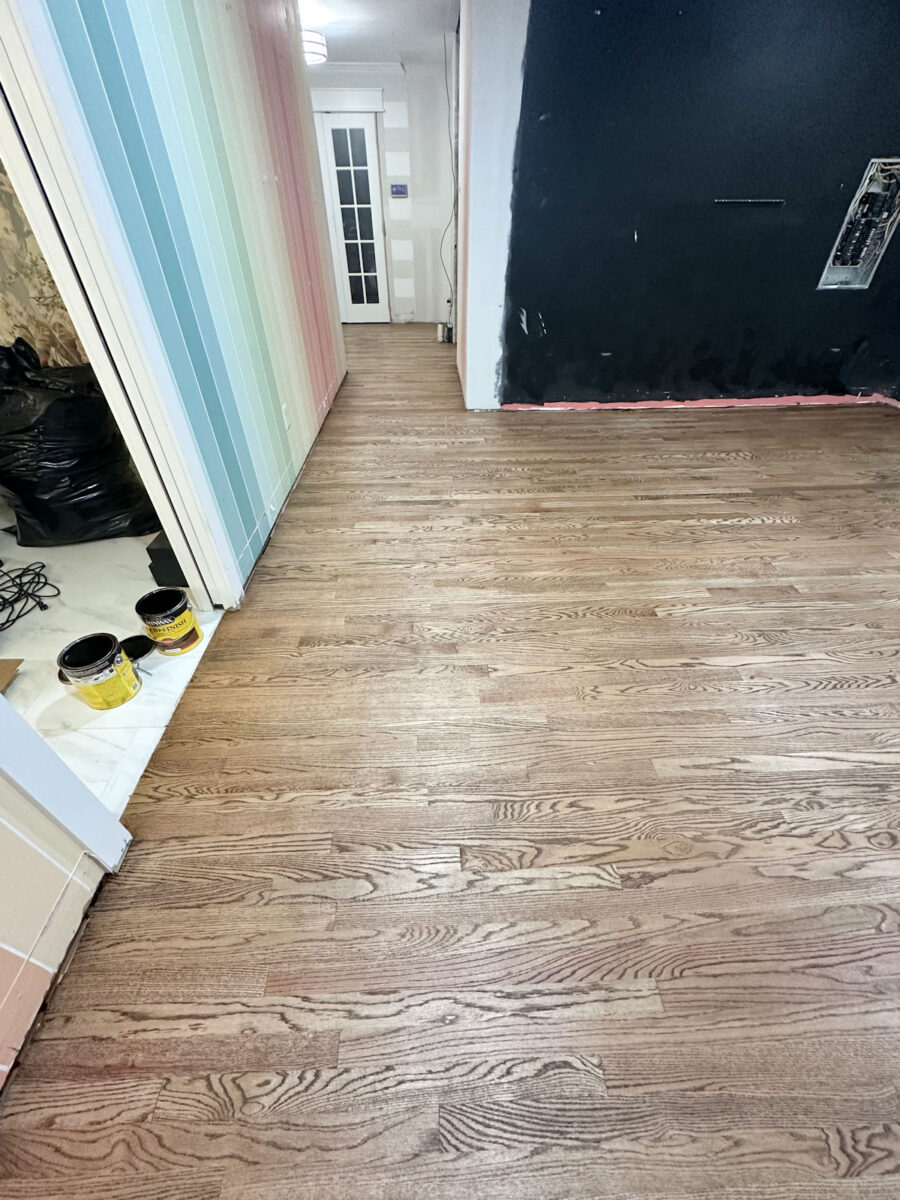
    And here’s a look at the side-by-side comparison of the floors with just the stain on the left, and then with two coats of the stain/polyurethane mixture on the right.
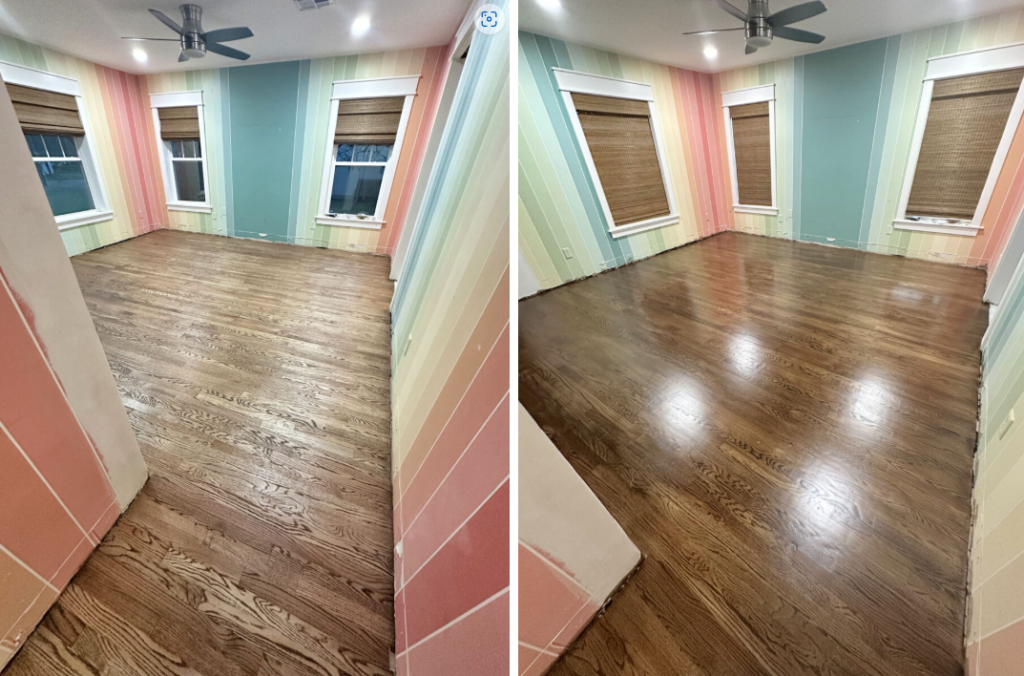
    It makes a huge difference, right? See how it evens out that crazy grain in the red oak? I do like the grain in the red oak, but I just like it to be a little more subtle than how it looks with just the stain, which tends to turn the grain really dark.

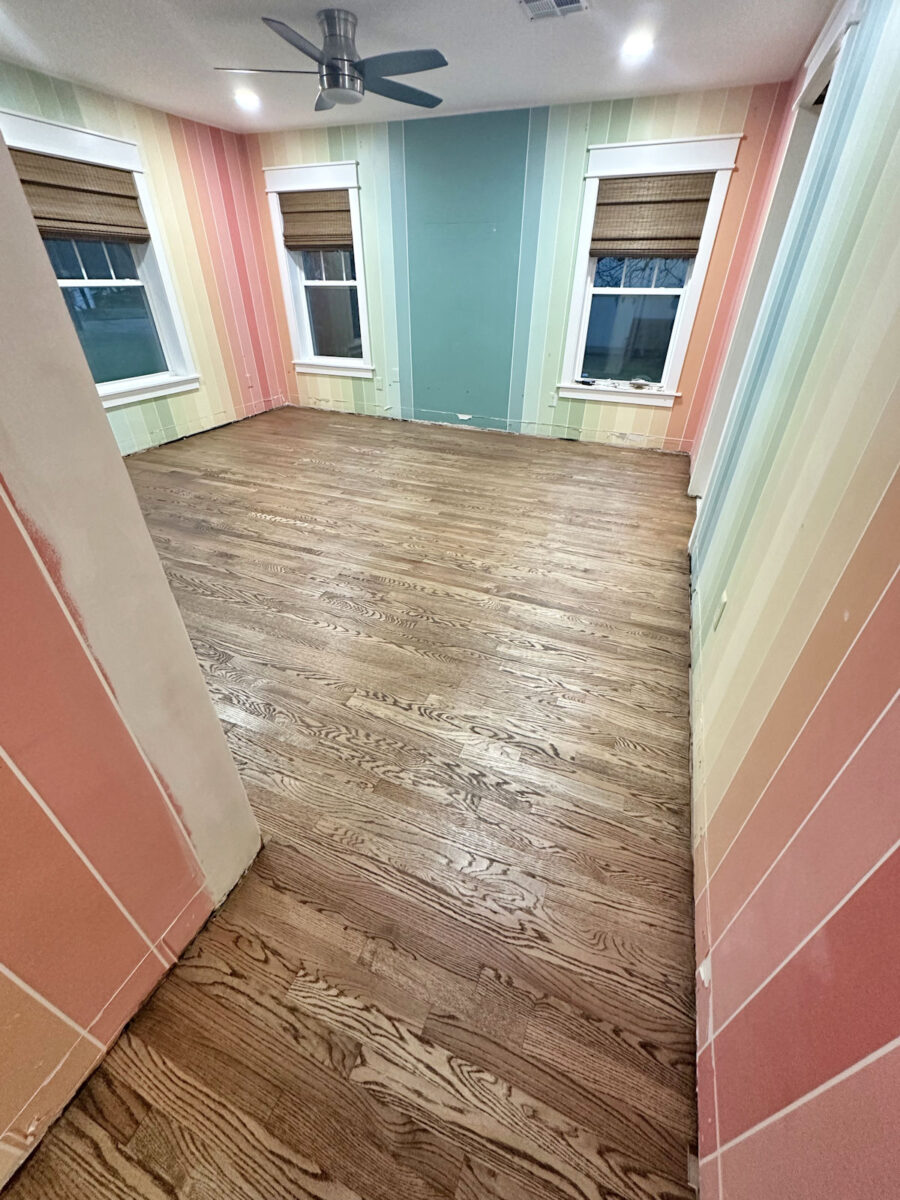
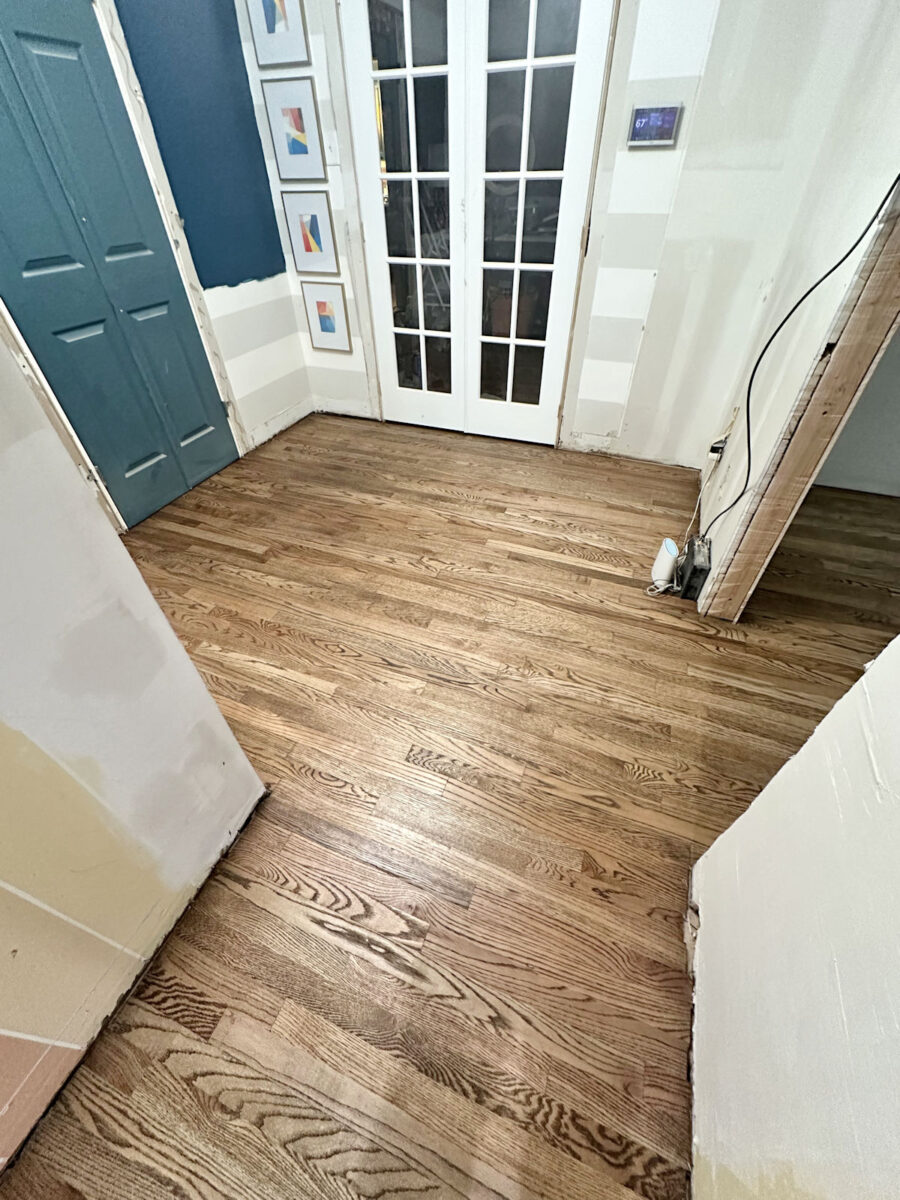
    Here’s another comparison of the stain only on the left, and the stained floor coated with the stain/polyurethane mixture on the right.

    It’s not perfect, and I knew it wouldn’t be because I’m not a professional. But even with my perfectionistic tendencies, this is good enough for me. 😀 I have to imagine the rooms with all of the layering of other materials and finishes that will go in here.

    The floors will be a background for everything else, so they won’t be the star of the show when all is said and done.
    An aerial view of waves crashing against a shore.An aerial view of waves crashing against a shore.

    The floors are a bit too shiny for my taste, but I used polyurethane in a satin sheen, and that’s the lowest sheen that it comes in. But from my experience, that sheen will diminish over time.
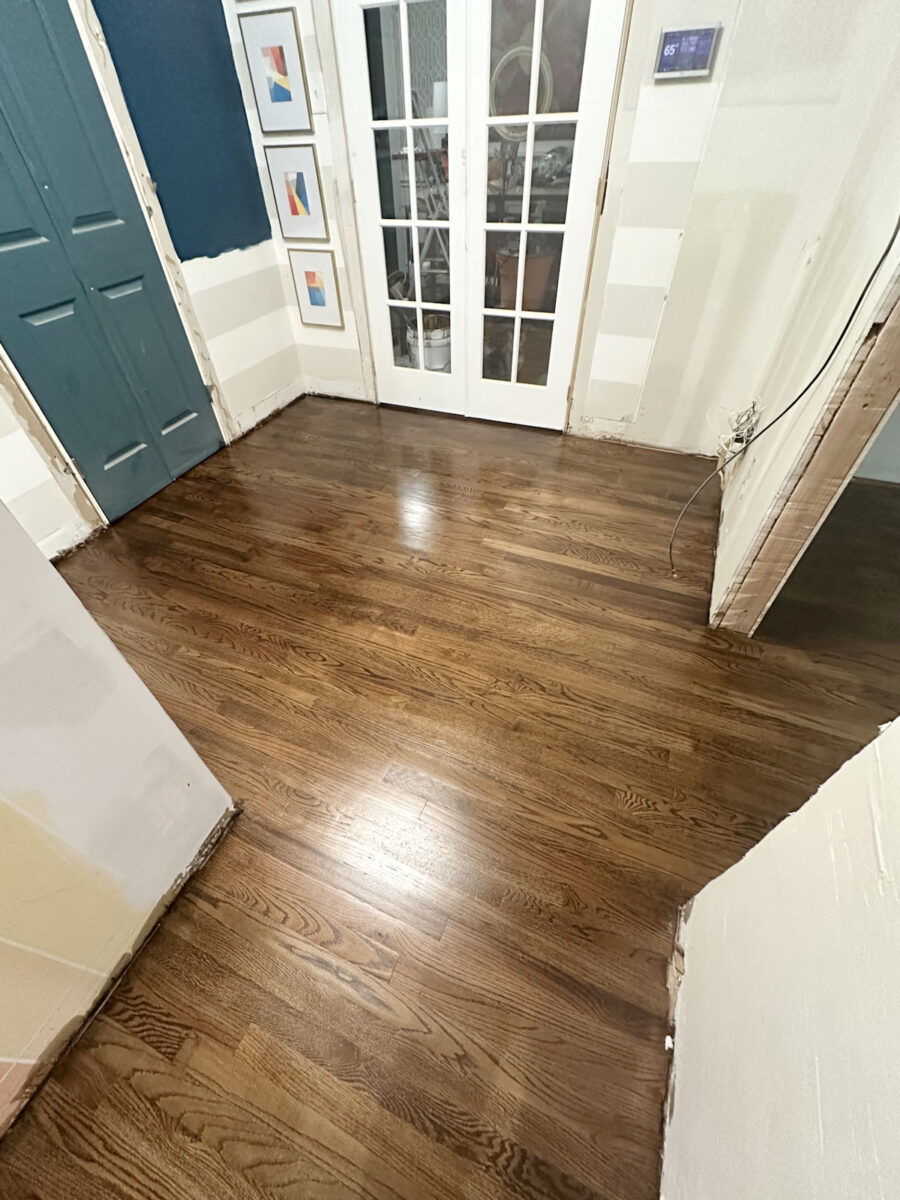
    I wish that it came in a matte or flat finish, though, so that I didn’t have to wait over time for all of that shine to go away. But I’ll just have to be patient. I’m not so good at being patient. 😀
    An aerial view of waves crashing against a shore.An aerial view of waves crashing against a shore.

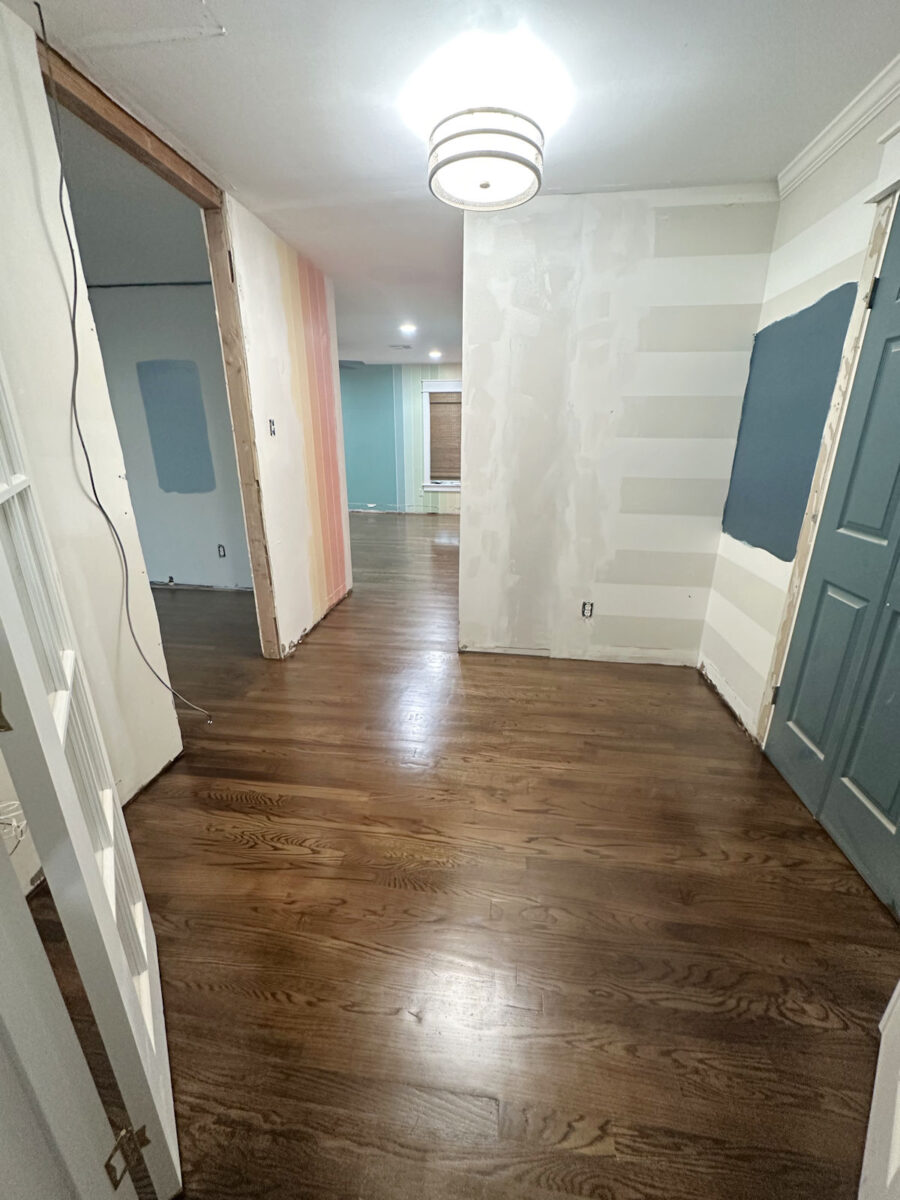
    I’m so excited that this is almost finished!! And Cooper has already walked on the floor (he actually ran because he’s not so good at walking like a calm boy), and it held up beautifully after 12 hours of drying. So I’m hopeful that if I can get the second coat on by the end of the day and let it dry overnight, I can cover the floors by the end of the day tomorrow.

    And then I can spend tomorrow making my purchase/cut lists for the closet, and then get starting on building my closet on Friday!

    So by Monday, I’m hoping to have some closet progress to share with y’all!
    An aerial view of waves crashing against a shore.An aerial view of waves crashing against a shore.

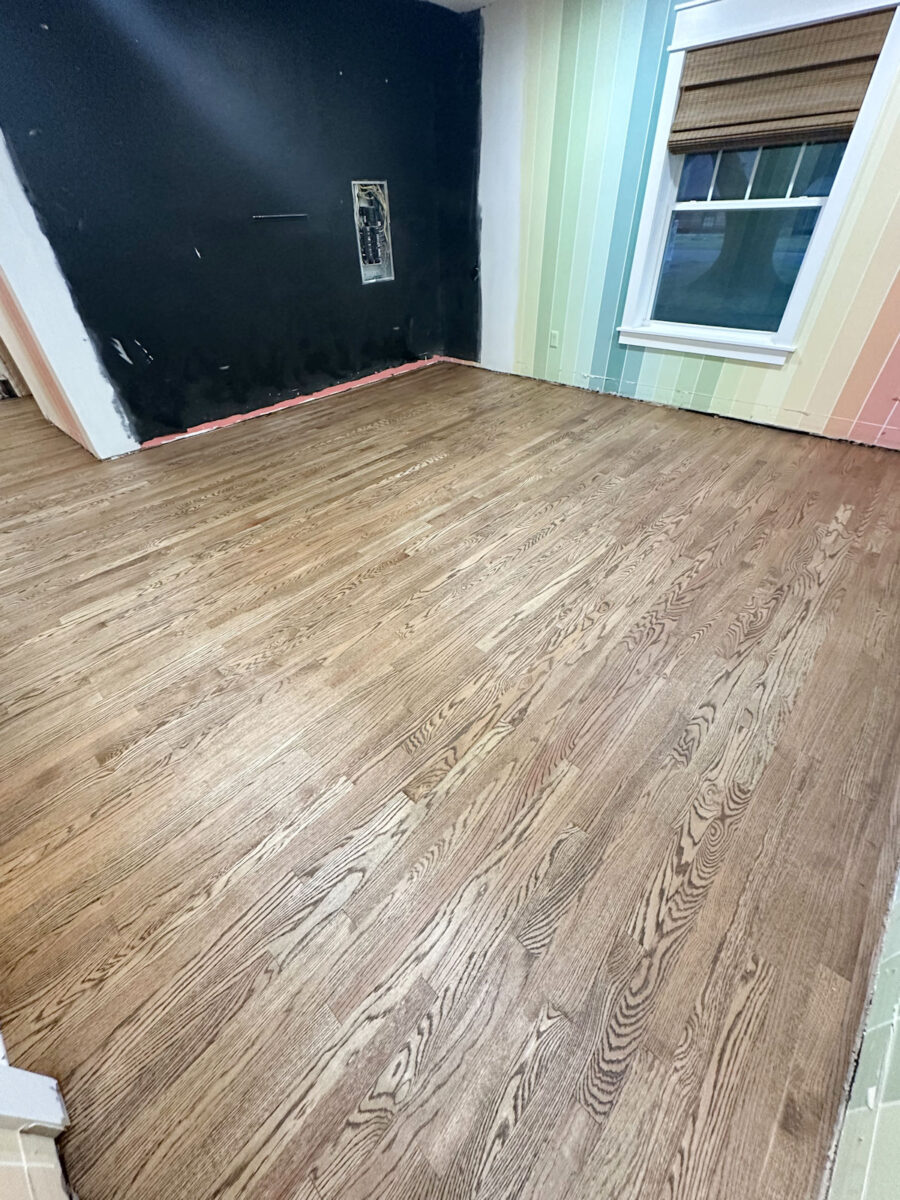
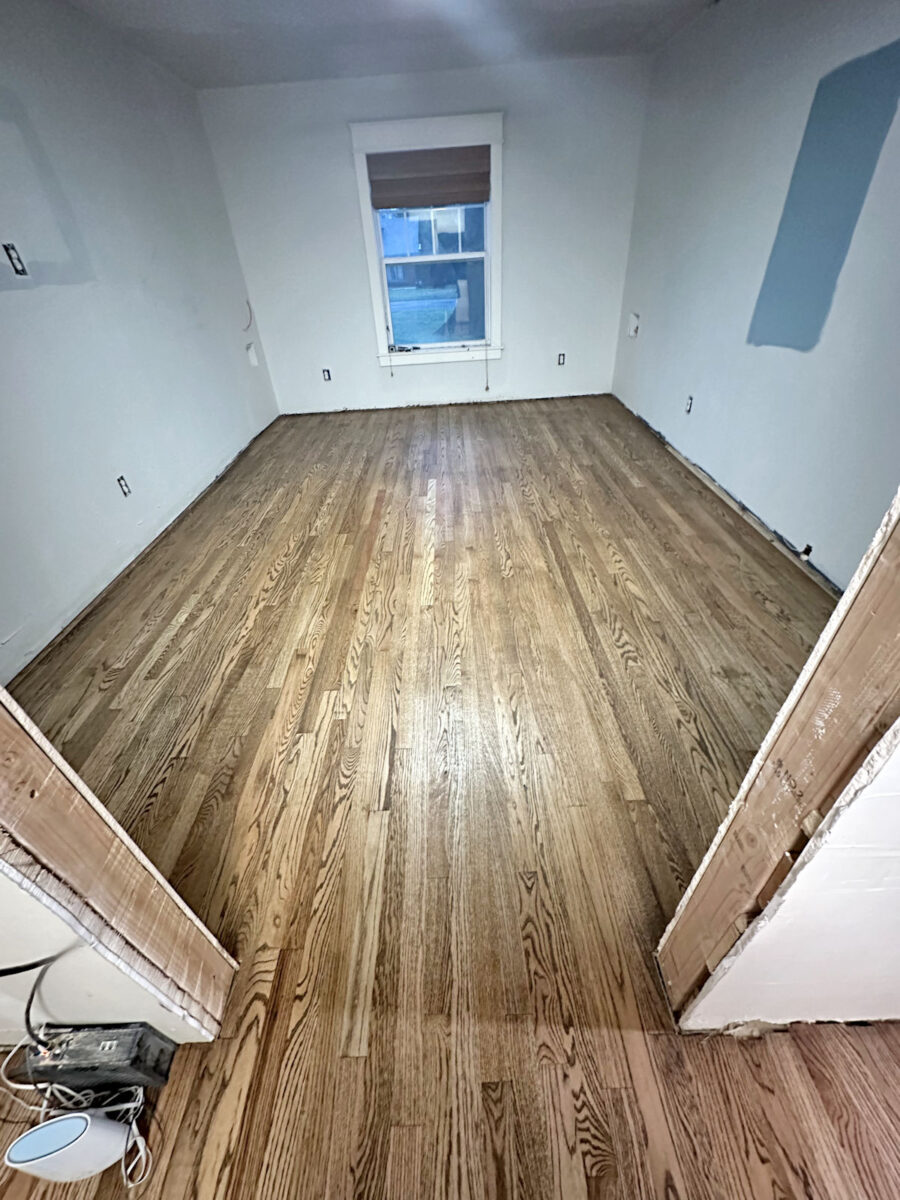
    And obviously, adding new (and more) lighting to the closet will be on my list of things to do. This room is so dark right now, but I promise that the floor in here is exactly the same color as the rest.

    I still haven’t decided exactly what kind of lighting I want to go with, but it’s very likely that I’ll use the same ultra slim recessed lights that I’ve used in the other rooms. But I’ll also have my decorative chandelier and probably some sconces as well. So this might go from being the darkest room to the brightest room when all is said and done.
    An aerial view of waves crashing against a shore.An aerial view of waves crashing against a shore.

    So that’s it for now! I’m thrilled with the progress, and I’m going to do my best to finish these floors by the end of today so that I can stay on schedule and start building my closet on Friday!
    The A2D Daily:


    Addicted 2 Decorating is where I share my DIY and decorating journey as I remodel and decorate the 1948 fixer upper that my husband, Matt, and I bought in 2013. Matt has M.S. and is unable to do physical work, so I do the majority of the work on the house by myself. You can learn more about me here.


    Source link

    Share. Facebook Twitter Pinterest LinkedIn Tumblr Email
    Previous ArticleCutting-Edge Craft: 8 Times CNC Technology Redefined Modern Wooden Architecture
    Next Article Insula modular sofa by Patricia Urquiola for Kettal
    Team_HomeDecorDesigner
    • Website

    Related Posts

    DIY Home Decor

    My Closet Island And A Battle Of Wills (Mom vs. Daughter)

    June 13, 2025
    DIY Home Decor

    Michaels’ Superchic Summerween Collections Just Dropped

    June 12, 2025
    DIY Home Decor

    One Step Closer To Tearing This Room Down

    June 12, 2025
    Add A Comment
    Leave A Reply Cancel Reply

    Top Posts

    Son Studio draws on “sun-bleached” shacks for Bangalow Road House

    January 20, 2025

    Walmart gives refresh to its logo”beyond typography or colours”

    January 15, 2025

    XGIMI creates smart projector that “doesn’t need to be hidden away”

    November 28, 2024

    Designing a child’s Room — AKIVA UK Affordable home Interior Design

    November 24, 2024

    TBo refreshes Philadelphia townhouse originally designed by IM Pei

    January 20, 2025
    Categories
    • Architecture
    • Decorating
    • Design
    • DIY Home Decor
    • Garden Design
    • Home Improvement
    • Interior Design
    • Plants & Yards
    Most Popular

    MillerKnoll unifies its brands under one roof for Chicago Design Week

    June 14, 2025

    2024 Holiday Gift Guides – Ideas for Women, Men, & Kids

    November 24, 2024

    Exploring the Choice Between Interior Design Companies and Self-Employed Designers — AKIVA UK Affordable home Interior Design

    November 24, 2024
    Our Picks

    Hugh Broughton Architects conceals Kew Pumping Station with larch slats

    February 1, 2025

    Found-art sculpture, bejeweled gnome village in Tom’s garden, Part 2

    April 27, 2025

    United Center's parking lots to be turned into "network of plazas and paseos"

    February 27, 2025
    Categories
    • Architecture
    • Decorating
    • Design
    • DIY Home Decor
    • Garden Design
    • Home Improvement
    • Interior Design
    • Plants & Yards
    • Privacy Policy
    • Disclaimer
    • Terms and Conditions
    • About us
    • Contact us
    Copyright © 2024 Homedecordesigner.co.uk All Rights Reserved.

    Type above and press Enter to search. Press Esc to cancel.