
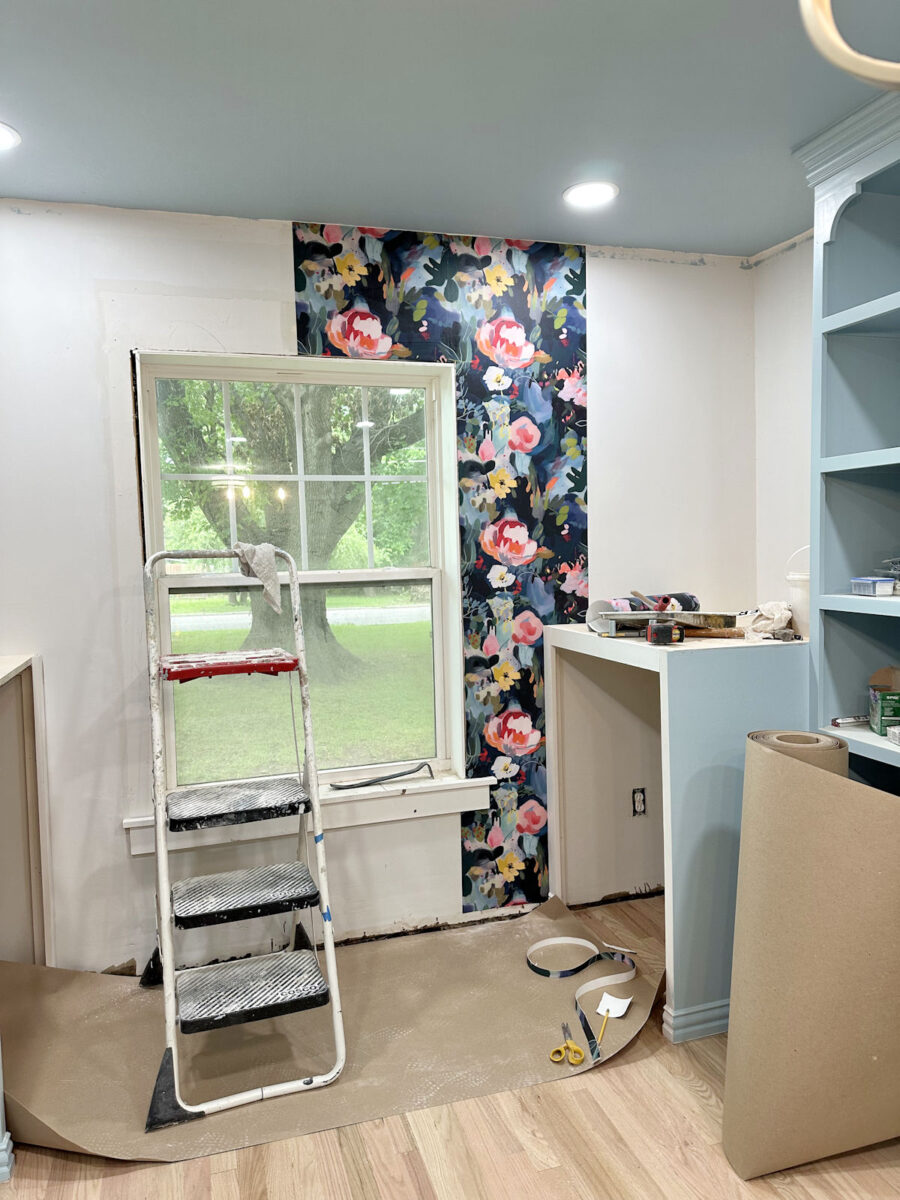
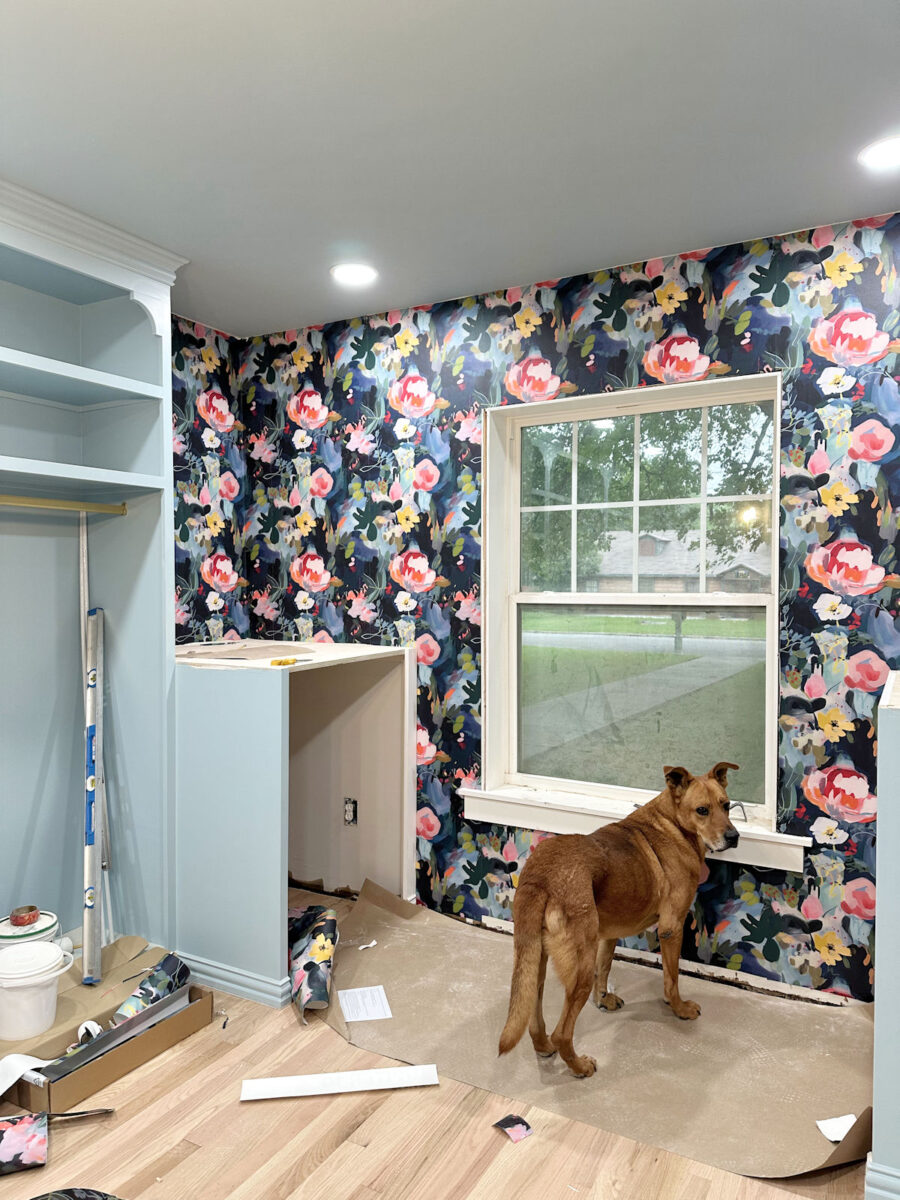
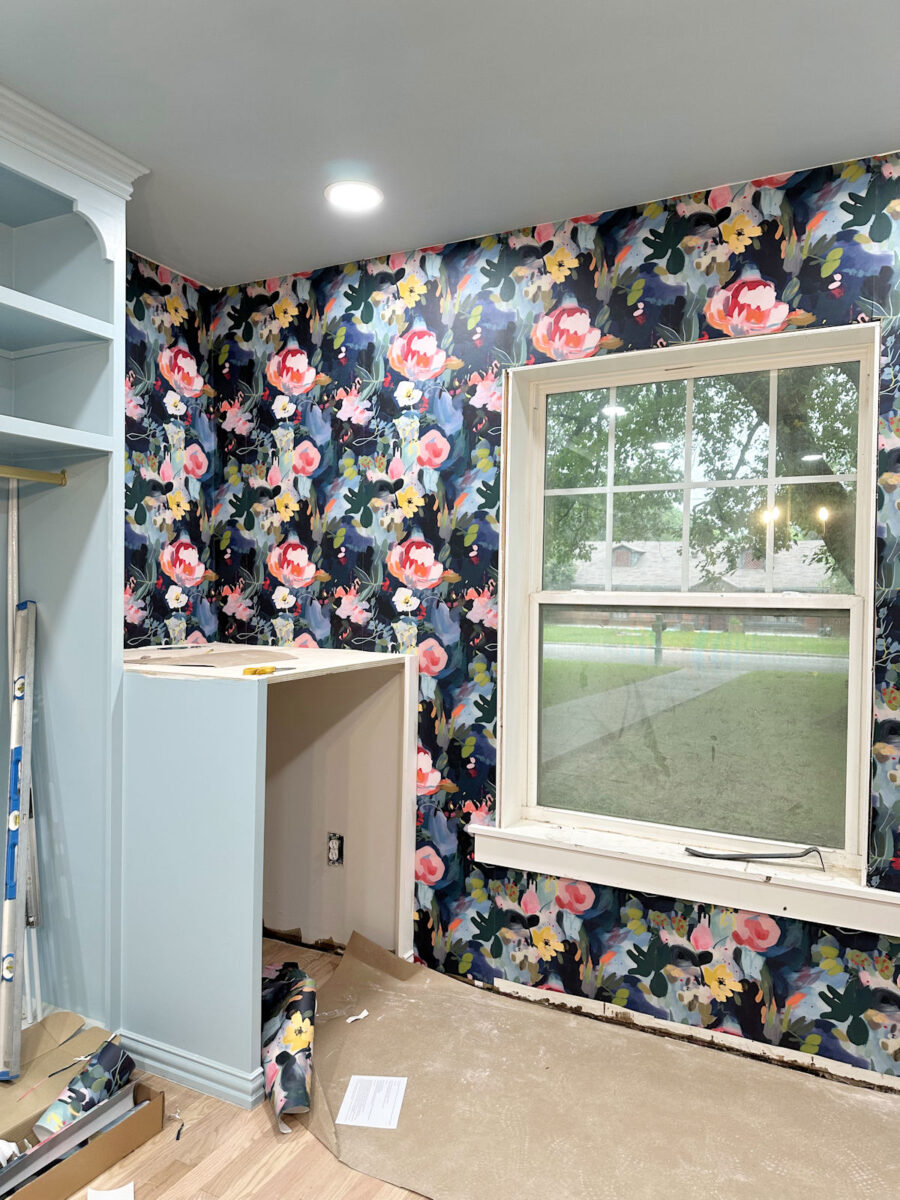
I spent yesterday afternoon and evening doing the project I’ve been anxiously anticipating for a while now. I got the wallpaper up on the window wall and above the washer and dryer cabinets! This single project transformed the room more than any other single project, and I absolutely love how it looks. I’m so glad that I decided to use wallpaper on these areas instead of the tile that I had originally considered!
The wallpaper I used is this Taylor wallpaper from Jupiter10.
Before I started hanging the wallpaper, I decided that it would be so much easier if I remove the top trim from the window. Thank goodness I no longer install my trim using loads of construction adhesive like I used to years ago! Since I only use nails to install trim these days, it was fairly easy to remove with no damage to the wall.

And then I decided to also remove the side trim pieces as well. The least amount of precise trimming I have to do on wallpaper, the better. I’m not so skilled at the precise trimming of wallpaper, so I try to work with my strengths and weaknesses to get the best outcome possible.
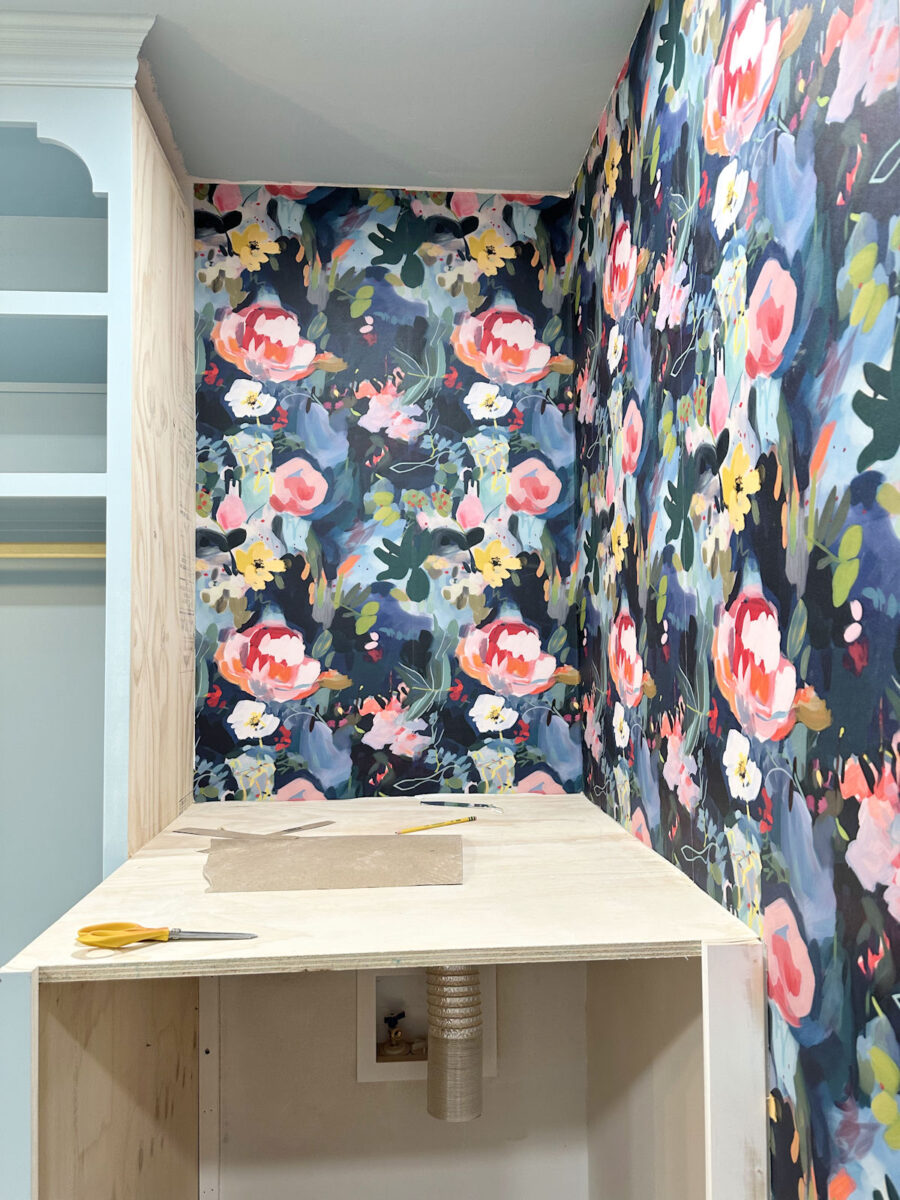
I wanted my first piece to be one of the full-length pieces of wallpaper, and then work out from there. So I marked from the side of the cabinet on the right wall, and measured out three sections that were 20.5 inches wide (the width of the wallpaper) until I reached the first section that would go from ceiling to floor, and I used my level to draw a perfectly vertical line as my starting point. It’s kind of faint, but perhaps you can see it here about 19 inches to the right of the window.

After I got that piece on, I moved to the right and worked my way around the window.
And of course, with each new piece that went up, I had to stand back and admire it and make sure it looked good from the entrance to the room.

I was so relieved once I got all of the wallpaper around the window. I was so nervous about this because I had zero confidence that I could actually get that second full length of wallpaper to meet up perfectly with the short pieces I had applied above and below the window.
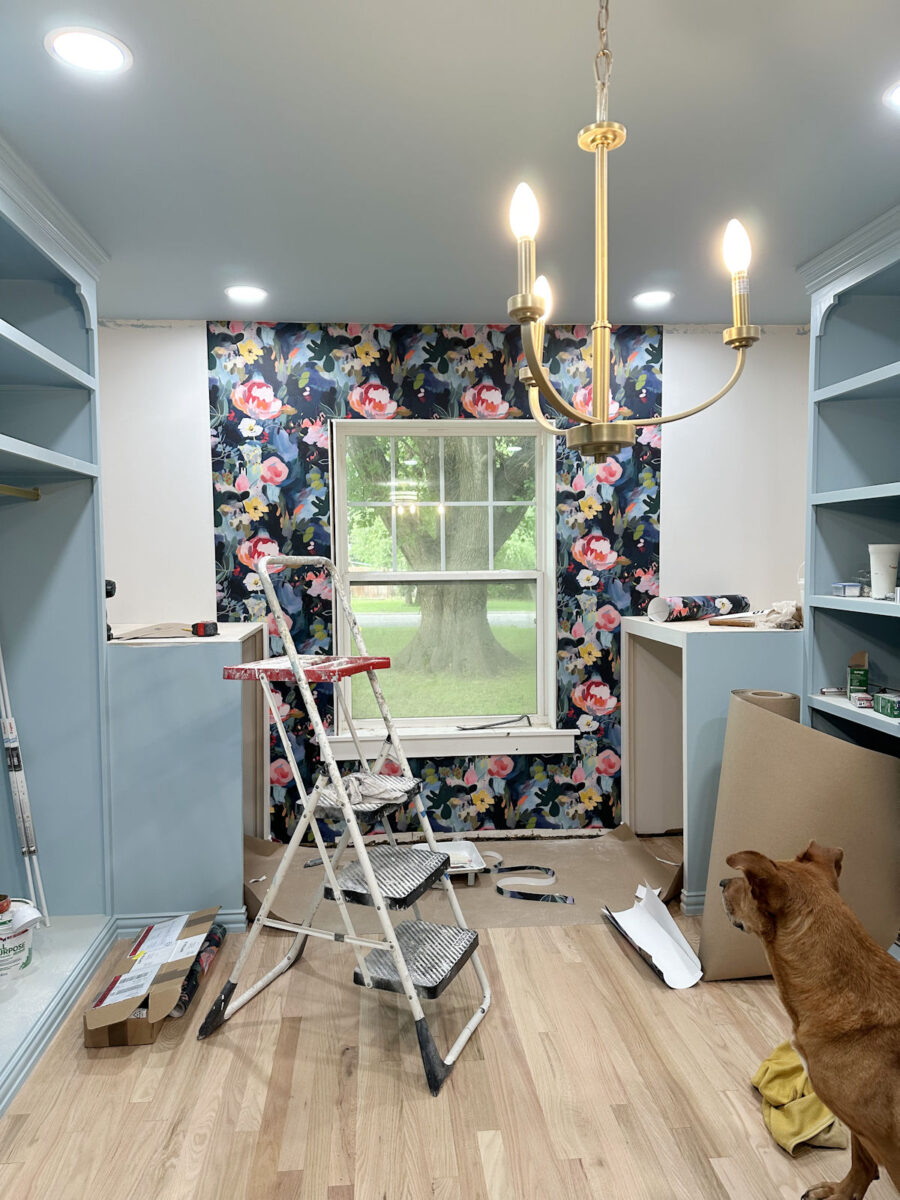
And you know what? They didn’t meet perfectly, but the wallpaper is so busy that I doubt anyone would ever notice. So that’s a win for busy wallpaper! 😀
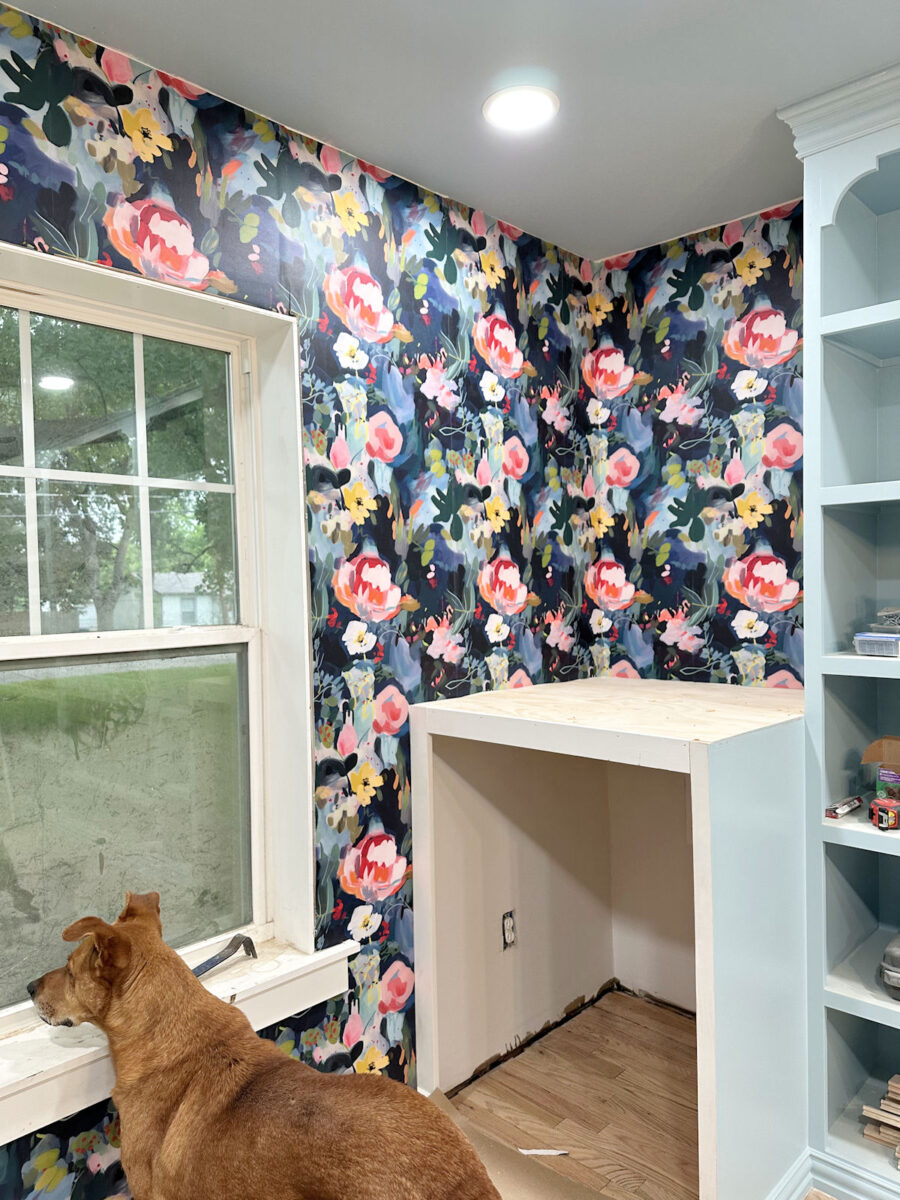
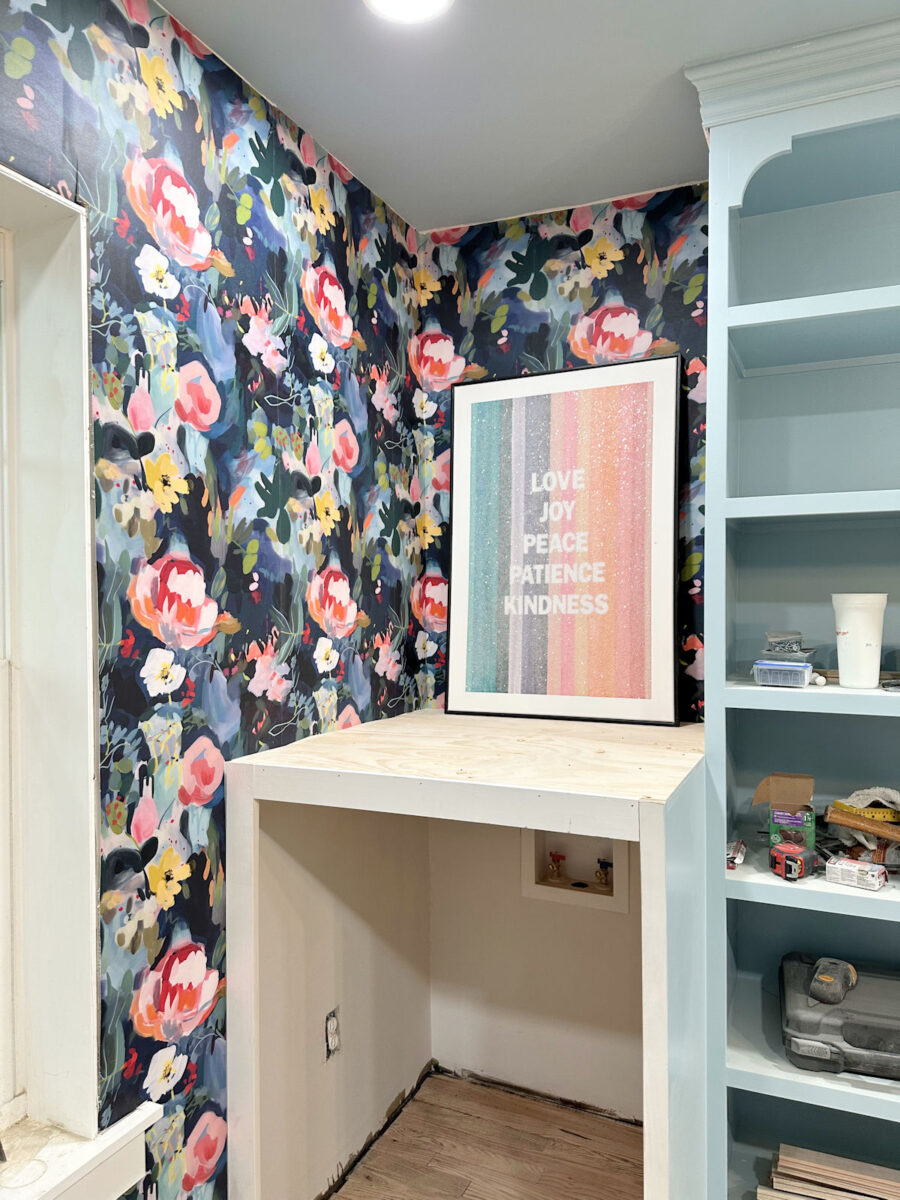
Once I got those pieces on around the window, I could work my way out from there and around to the areas above the washer and dryer cabinets. And here’s what it looks like now!
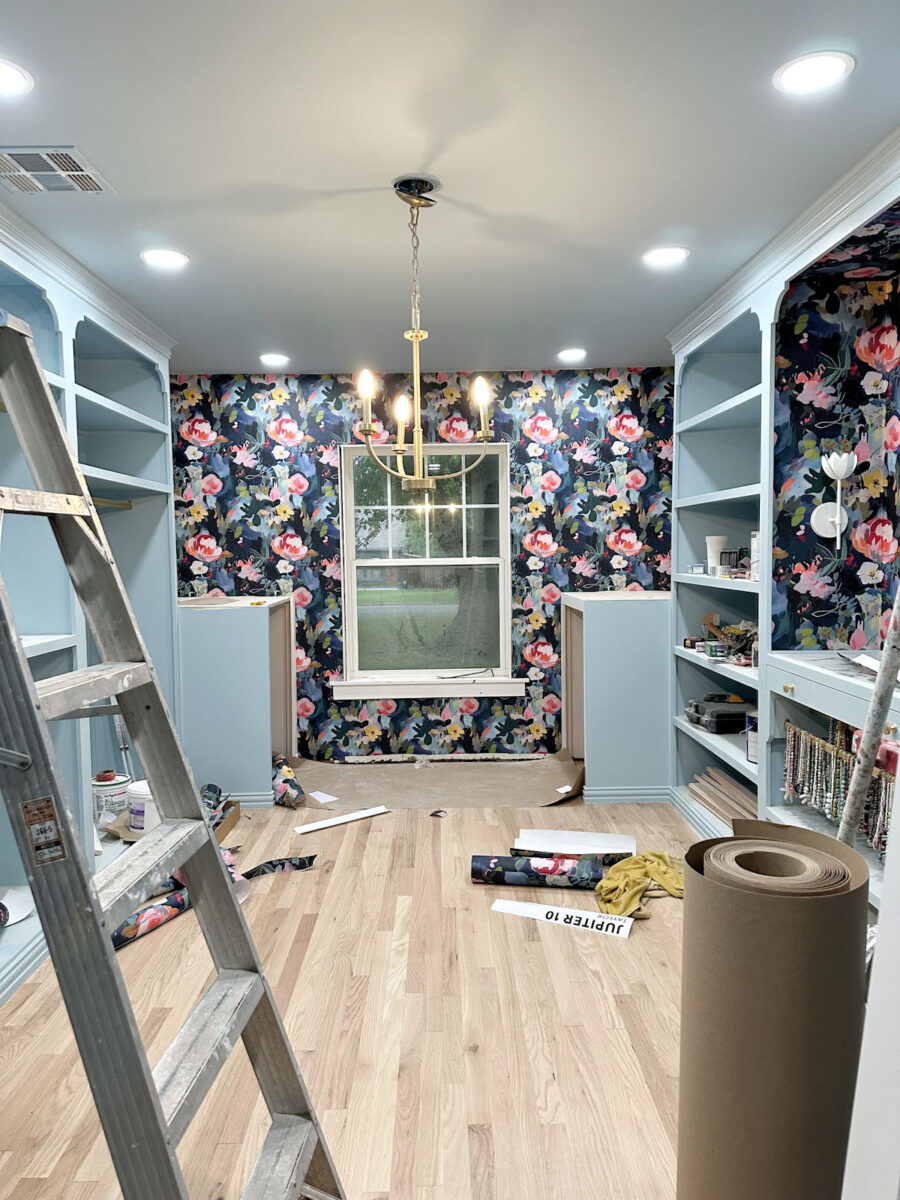
I love it so much! And you can see that I did my best to line up the height of the pattern in the wallpapered section of the cabinets with the pattern on the back wall. It’s probably not perfect, but I think it looks pretty good.
I didn’t have time to reinstall the window trim, so I’ll do that this weekend. I’ll also be continuing the crown molding around these walls, and all of the trim will be painted the same blue that’s on the cabinets.
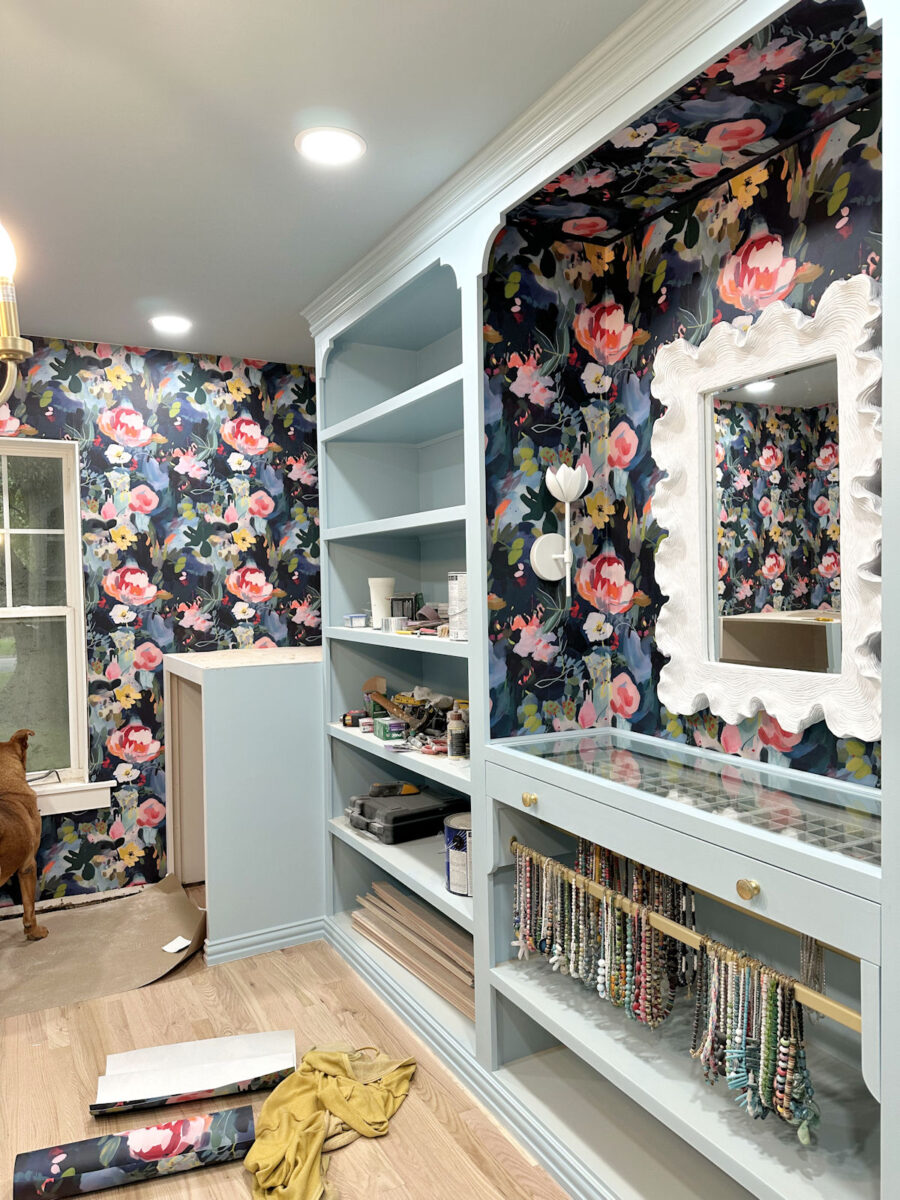
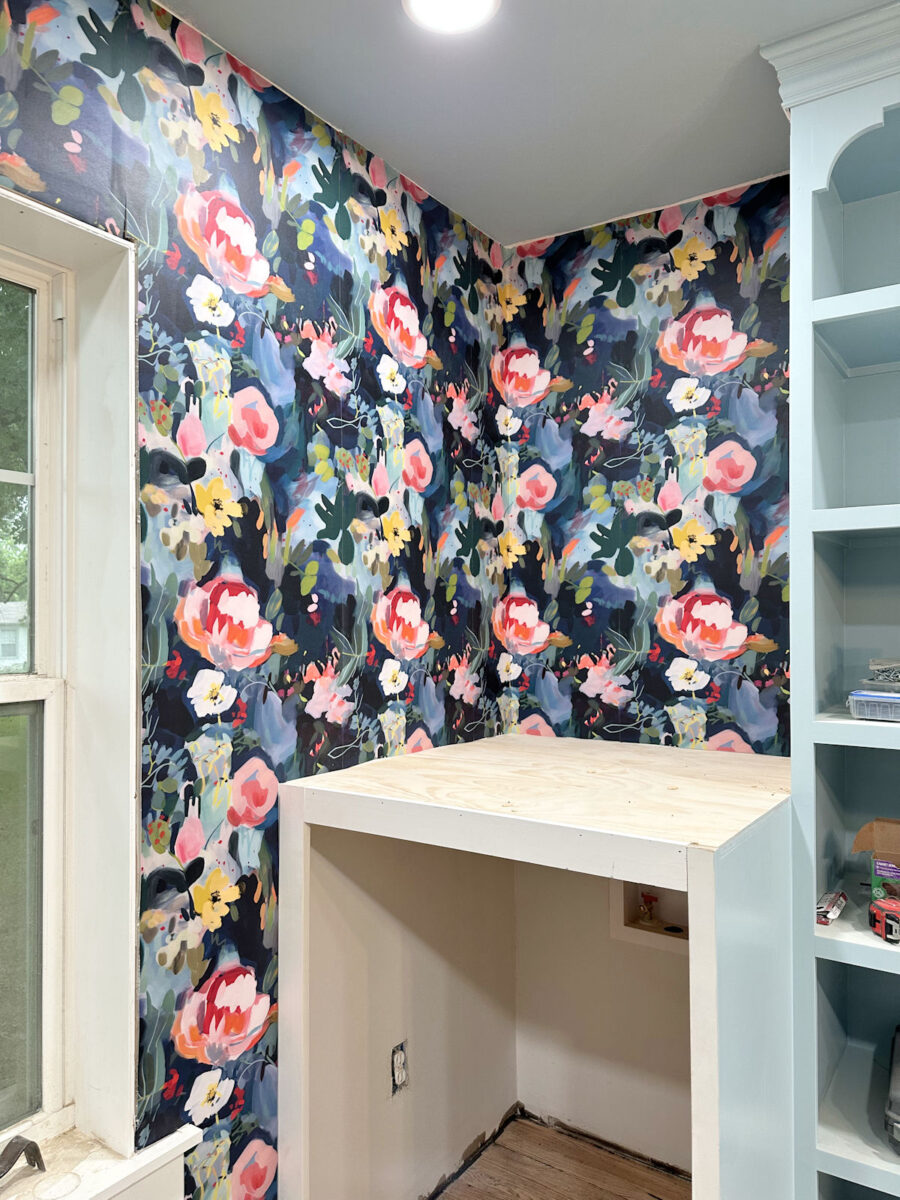
And you can see that I’m terrible at trimming wallpaper. This is why I try to do wallpaper before I install trim if I can. I’m capable of trimming wallpaper much cleaner than that if I absolutely have to (if the trim is already installed), but I’m almost never pleased with my trimming ability no matter how careful I am. So I much prefer to install wallpaper before trim.

I can also see some of the seams, even though I spent so much time and effort trying to hide them and get them perfectly lined up. So I’m going to buy paint to match all of the dark colors and use a tiny art brush and see if I can get them to disappear.
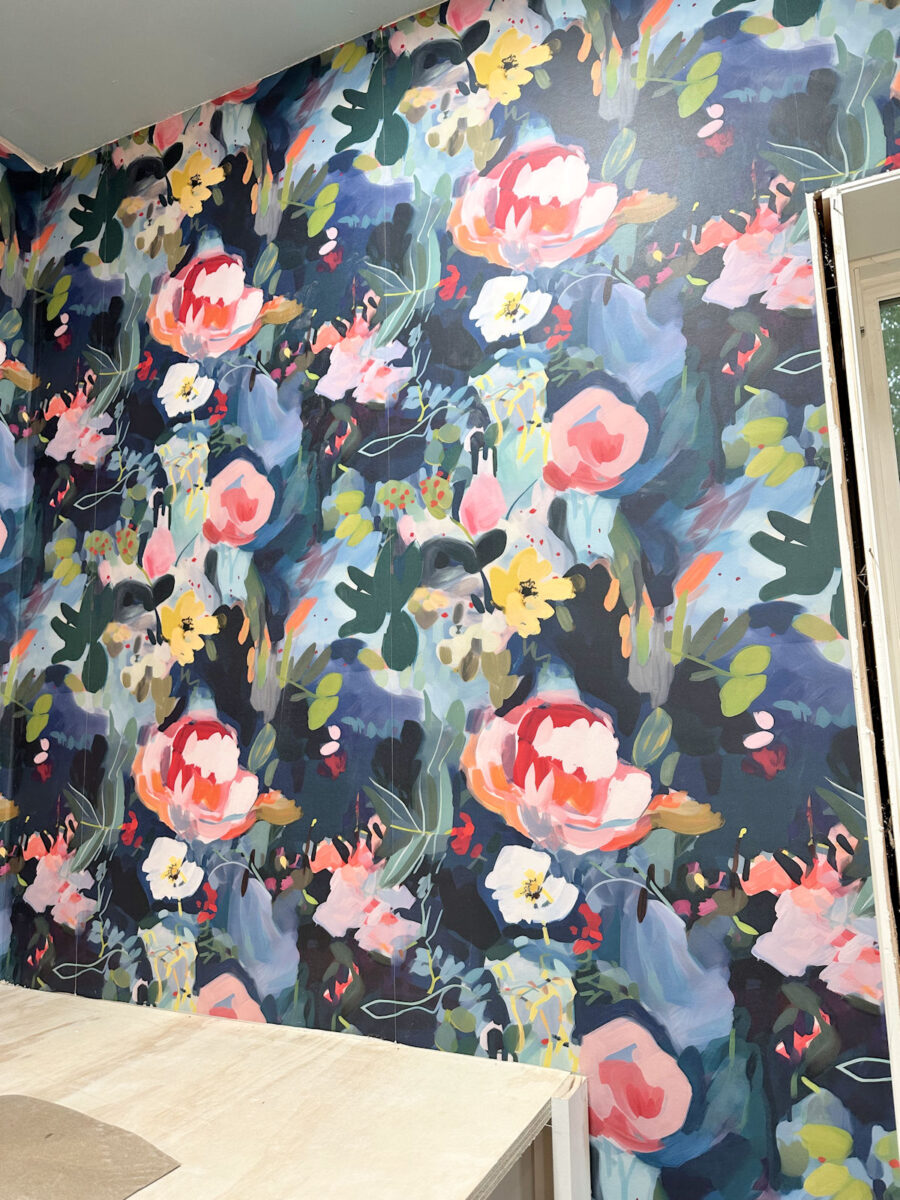
I had previously said that I was going to paint the whole wall dark blue before hanging the wallpaper to see if that would solve that problem, but I ran into two issues with that. First, I looked up how long paint needs to dry before you can hang wallpaper on it. It needs to fully cure, and that can take up to 30 days. I wasn’t willing to wait that long. But also, the problem isn’t that the wall is showing through the seams. The problem is that the white edges of the wallpaper show on the really dark areas. But a tiny bit of paint will solve that problem. And really, this wallpaper is so busy that I doubt anyone else would notice.
Since I removed most of the window trim before hanging the wallpaper, that meant that the only areas where I needed clean cuts were around the window sill. I think I did a pretty good job on those areas. They’re not perfect, but in the whole scheme of things, no one is going to be inspecting the wallpaper next to the window sill. 😀

Anyway, I’m so excited that I can check another project off of the list for this room. That’s two big projects that I’ve finished this week. I have several small projects (mostly trim) that still need to be done, and then that leaves two big projects — building the island and remaking the chandelier. Those are pretty big, but I think I’m still on track to finish this room by the end of this month!
Now that the wallpaper is up, I was curious to see what the artwork looks like in this area against the wallpaper. I love it! It almost looks like it was made to go in this room.
I still need to decide what to do with the frames. I won’t be keeping them black. I’ll either paint them the dark blue that I used on the top trim in the wallpapered cabinet section, or I’ll gold leaf them to match the closet rods and the cabinet/drawer pulls.
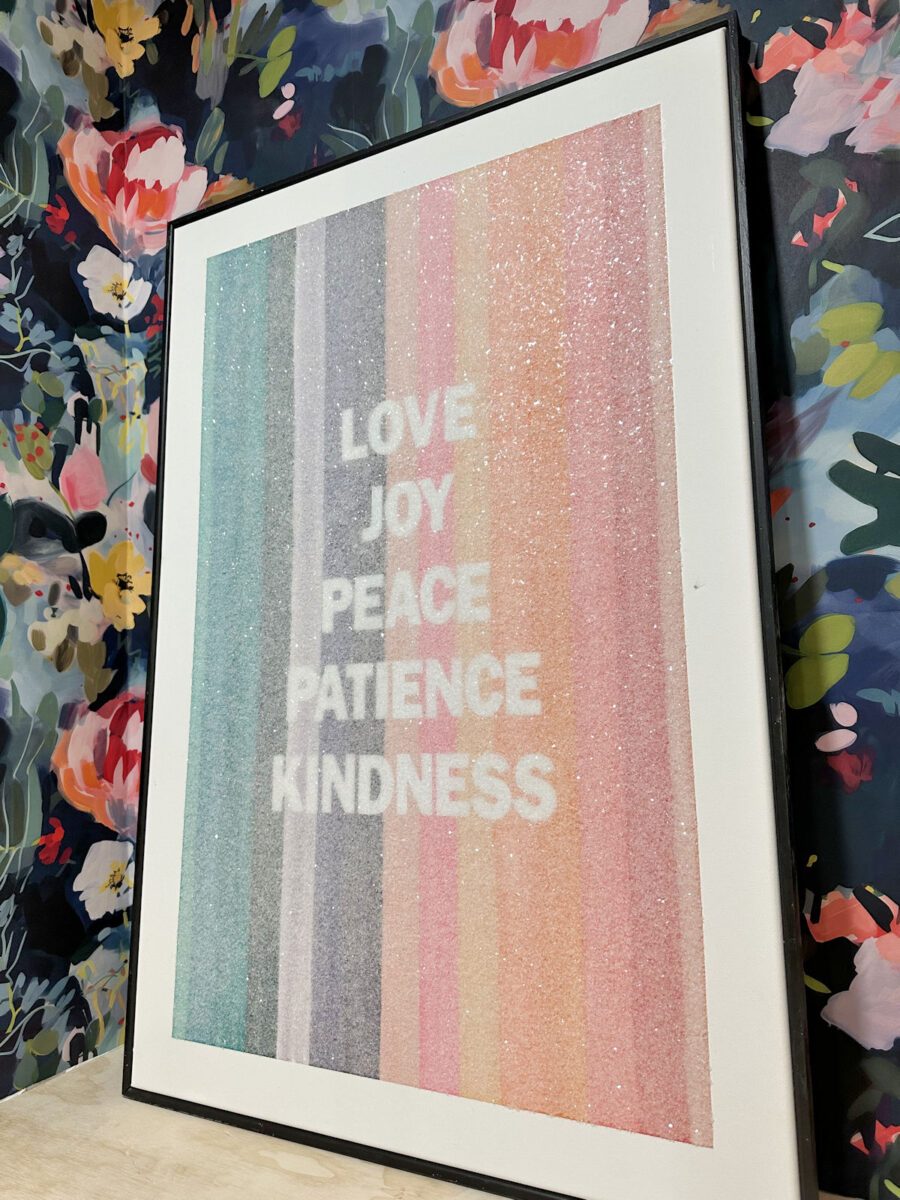
I’m leaning towards gold, but y’all can let me know your thoughts on that.
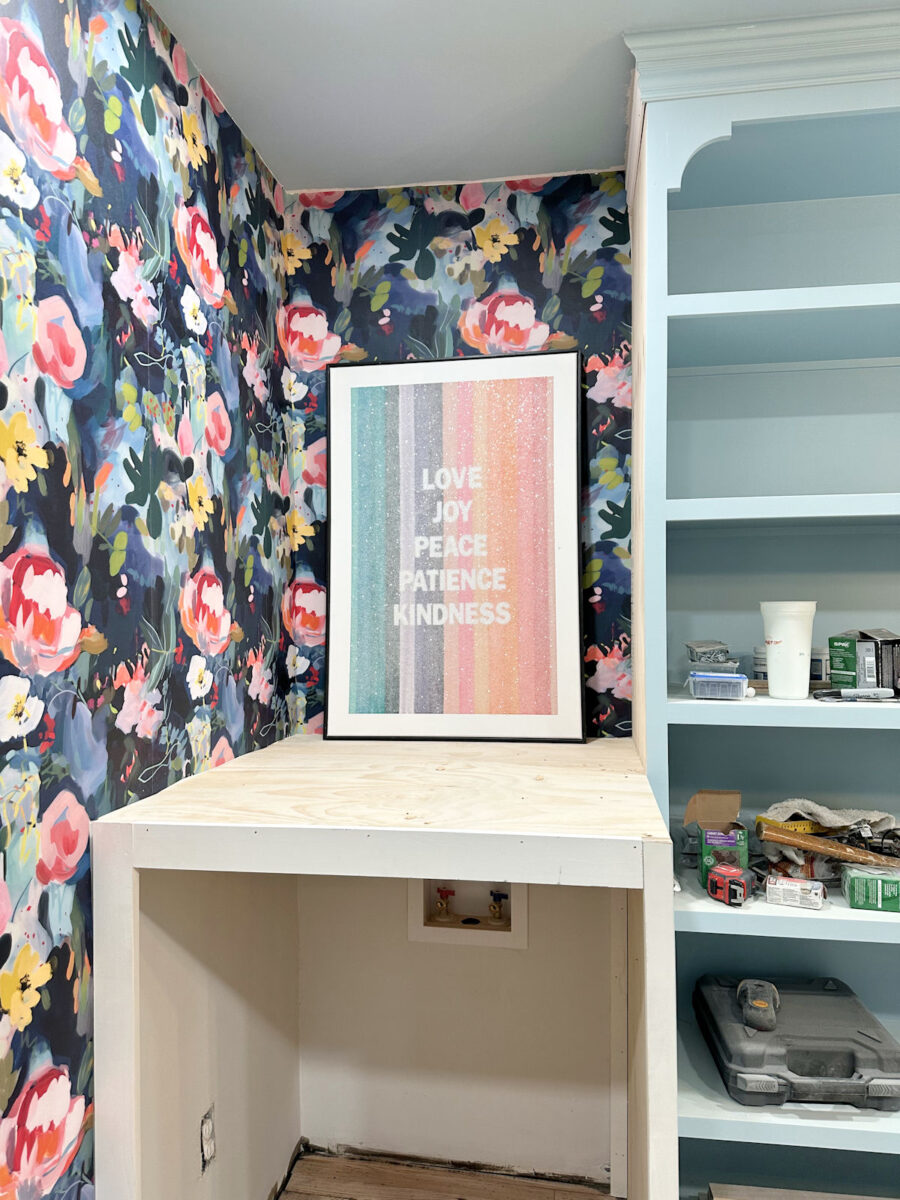
And as I look at these pictures, I’m also reminded that I still need countertops! I was going to use the same red oak that I have on the floors to make countertops, but I’m not so sure about that now. I might look into some other options, although low-cost countertop options aren’t abundant. And I don’t want to pay for stone or quartz for a walk-in closet. So that final decision has yet to be made.
Anyway, the wallpaper is done, and I couldn’t love it more. This is so much better than tile!
I wish all of you could see it in person. From the foyer, it’s so eye-catching and really packs a punch.
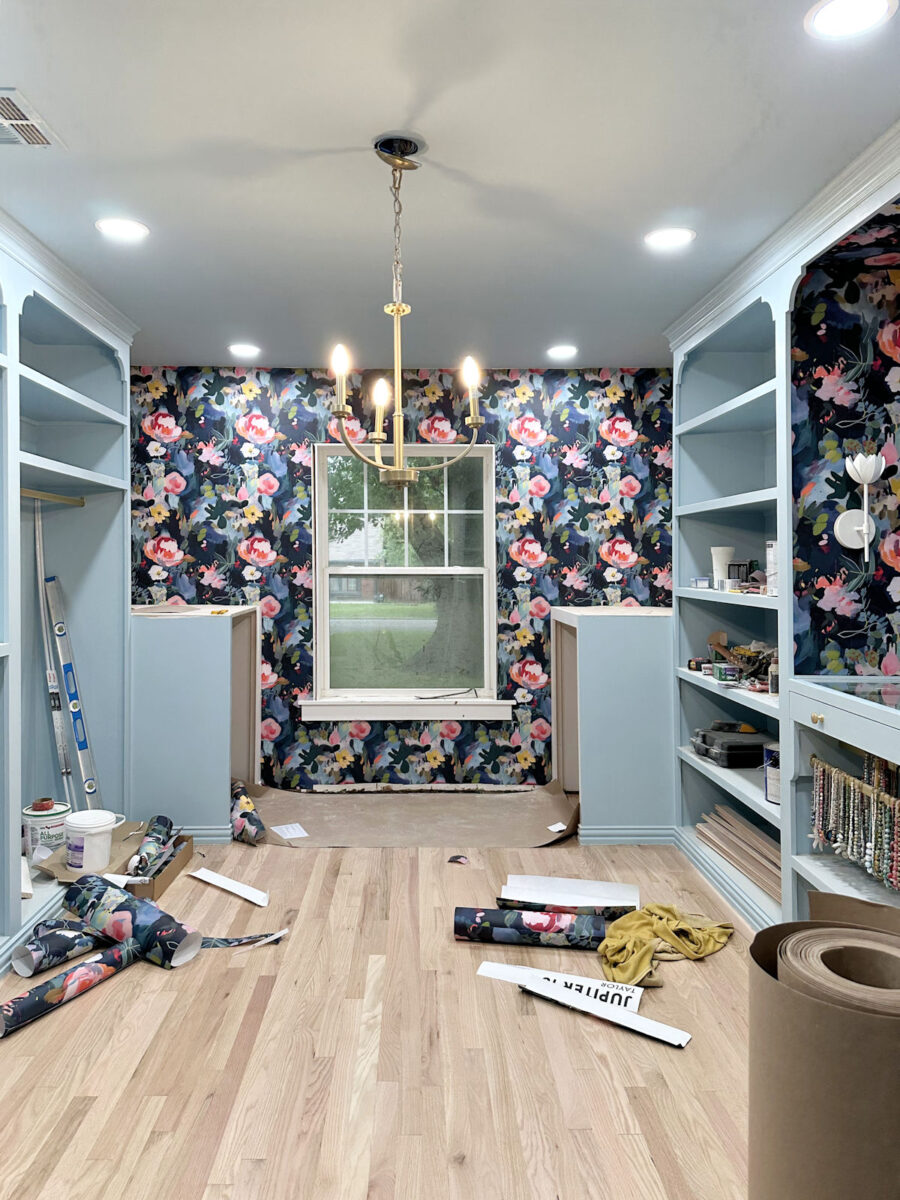
There’s a possibility that this — a walk-in closet — might end up being my favorite room in our house. 😀
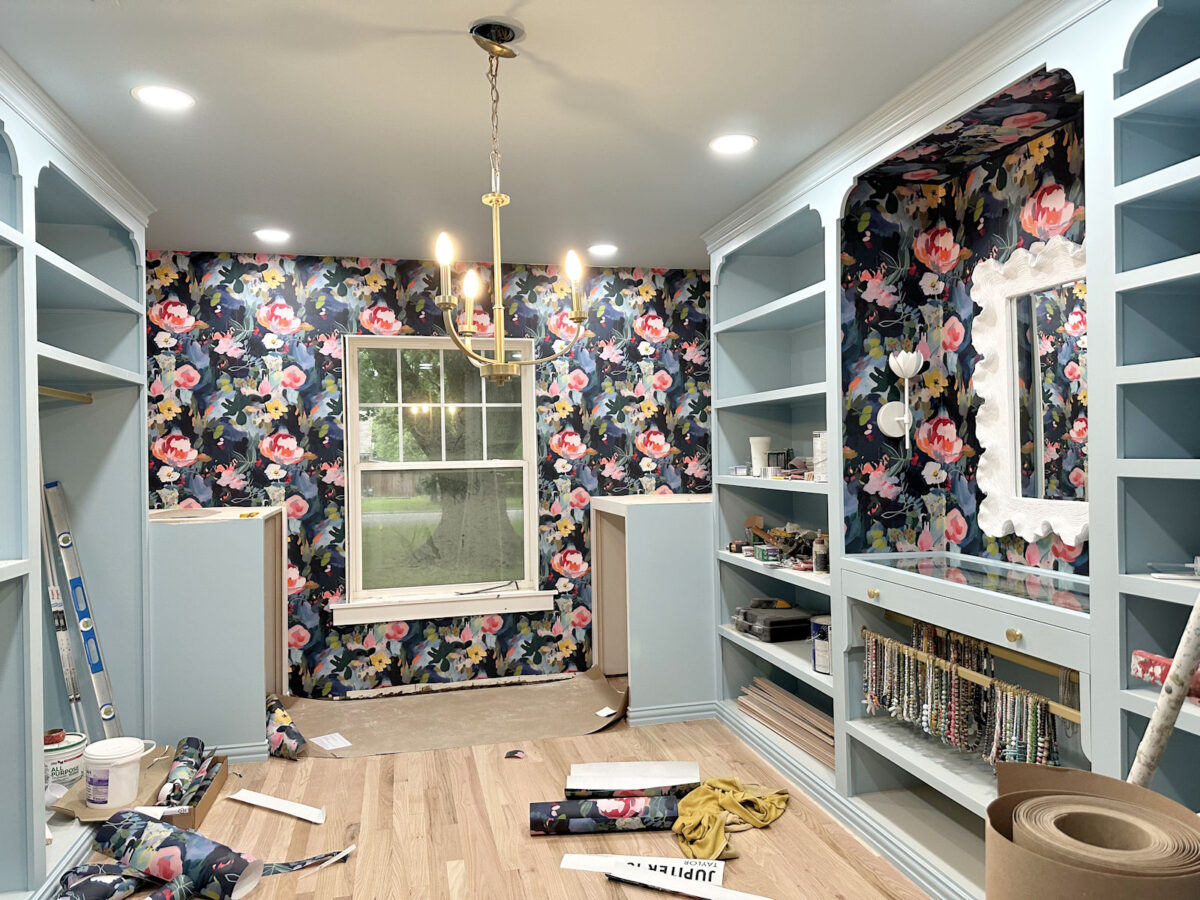
It’s all coming together, and I think it’s turning out even better than what I had envisioned in my mind. That’s always a bonus!


Addicted 2 Decorating is where I share my DIY and decorating journey as I remodel and decorate the 1948 fixer upper that my husband, Matt, and I bought in 2013. Matt has M.S. and is unable to do physical work, so I do the majority of the work on the house by myself. You can learn more about me here.