")
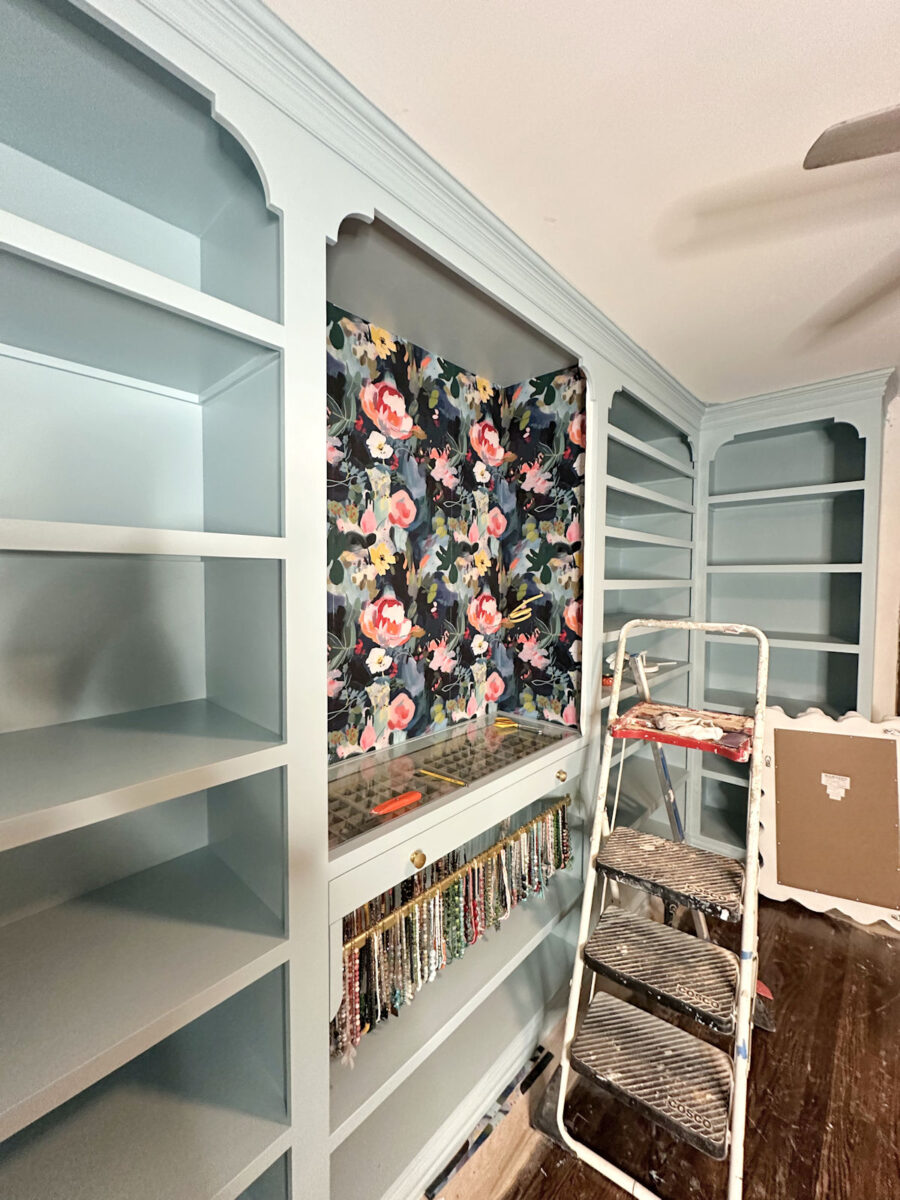
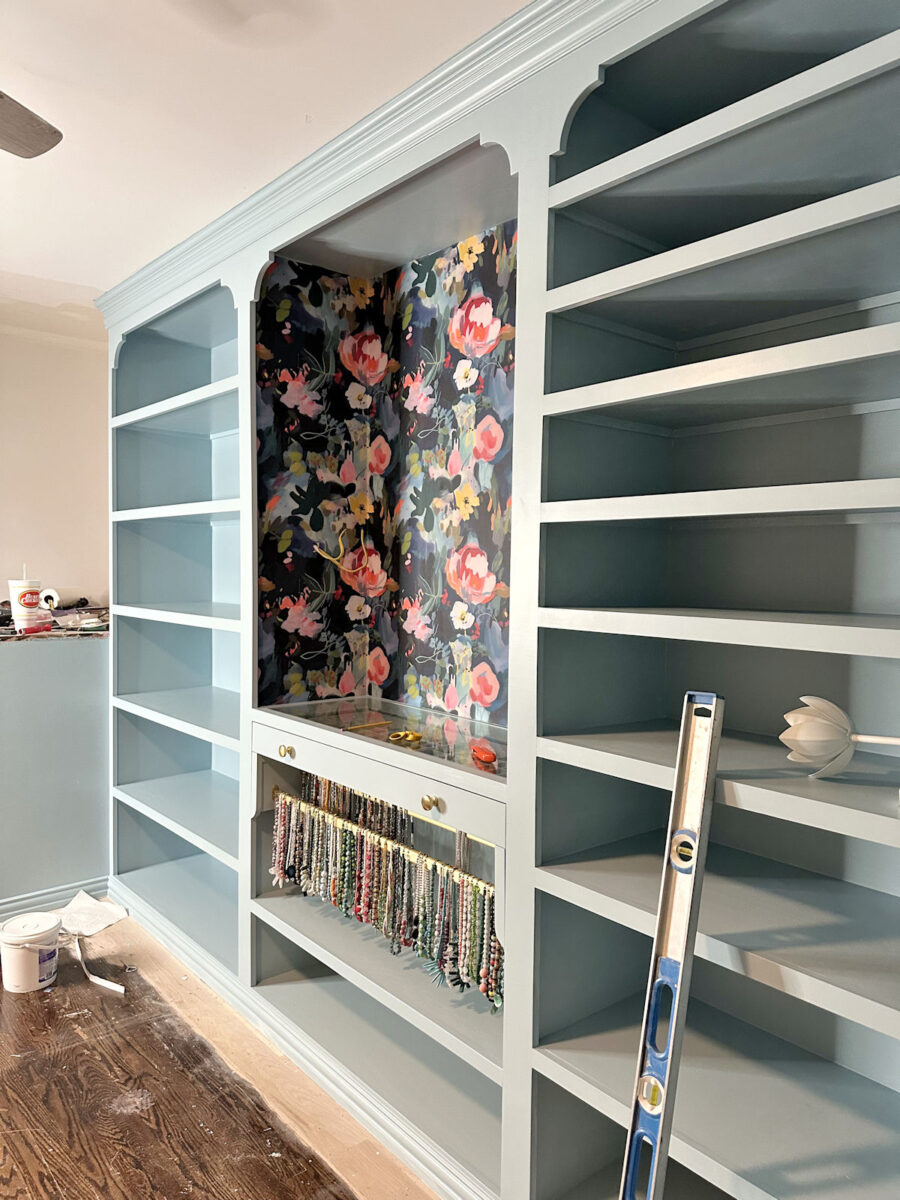
Last night was the moment I’ve been waiting for. I generally don’t have a lot of time to get projects done on Wednesdays, but I was determined to get the wallpaper installed in the closet section before I went to bed last night. And I did it!
I had to take all of the pictures last night, and I won’t be able to include any pictures taken this morning after the sun comes up because I have an appointment this morning and I’m writing this in the pitch dark at 6:30am. So the lighting in these pictures is terrible. It’s a mix of the yellow-ish light from the ceiling fan (which makes the paint color look dingy) and the daylight bulb from my work light. But even with the funky light, I still wanted to show y’all this gorgeous wallpaper. I’ll get better pictures today after I completely finish this section, and I’ll show you those tomorrow.
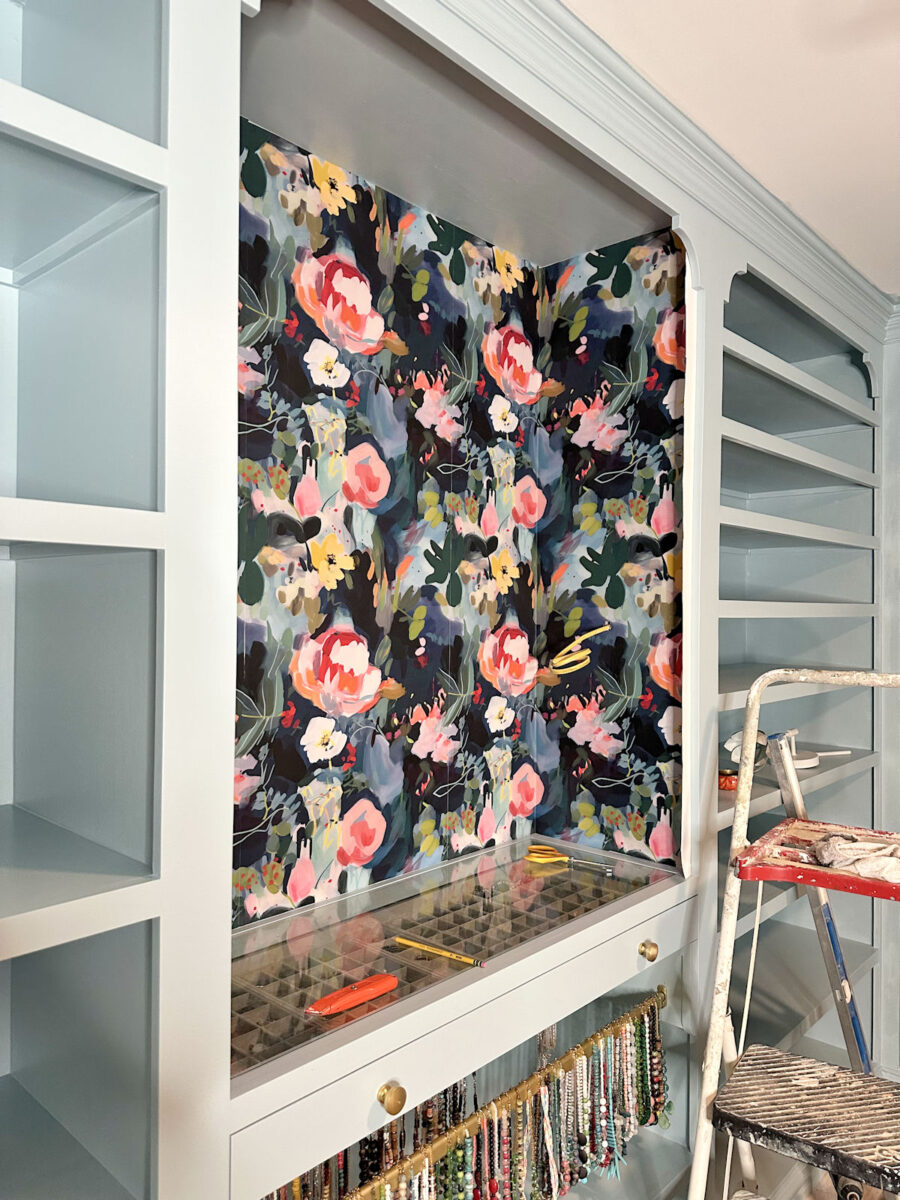
In the meantime, check out this wallpapered section!
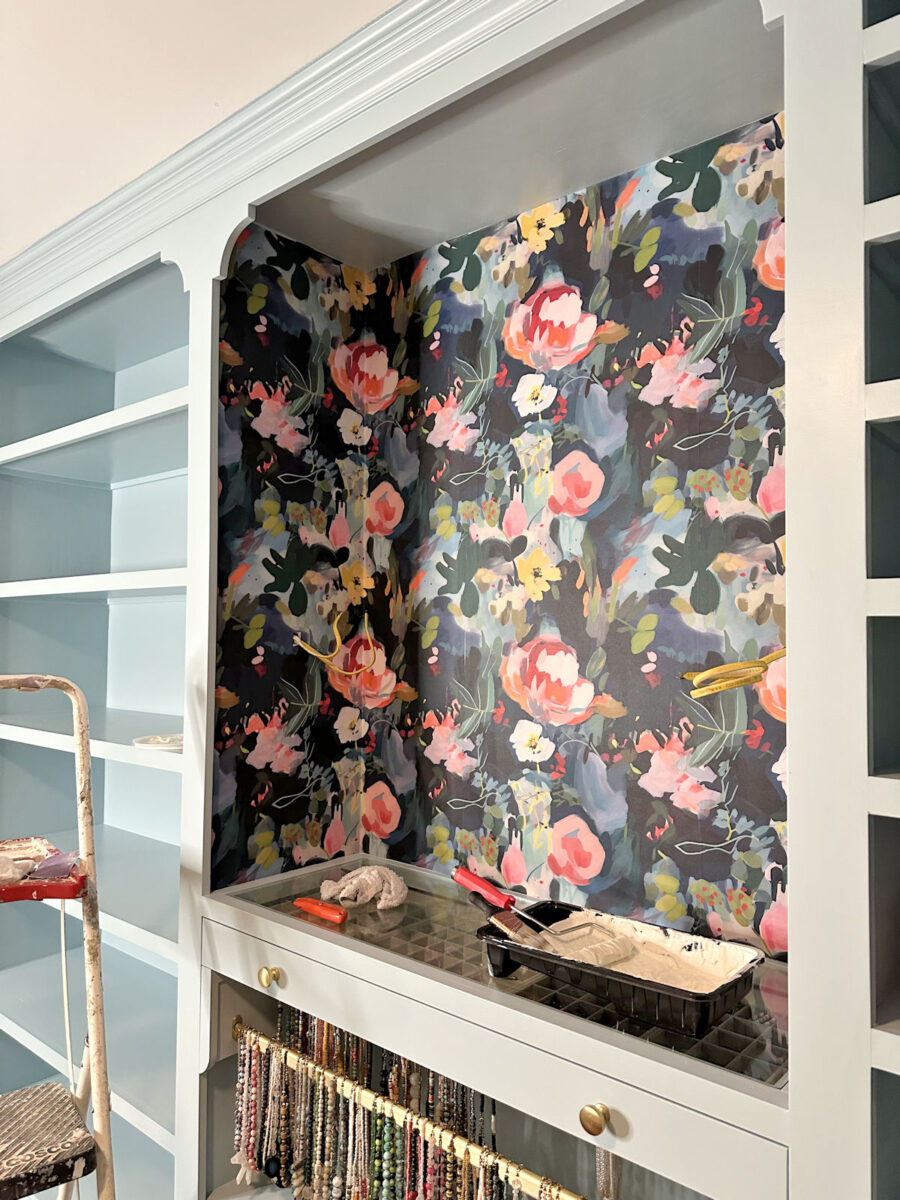
I’ve done quite a bit of wallpapering in my life, and this was, without a doubt, the hardest wallpapering job I’ve ever done. I’m so glad I started with this section instead of the back (window) wall in the washer and dryer area, because I really didn’t do a great job on this section. Fortunately, I finally got the hang of it when I got to the side sections, which will be the areas that show the most. The areas where I really messed up will mostly be hidden behind the mirror.
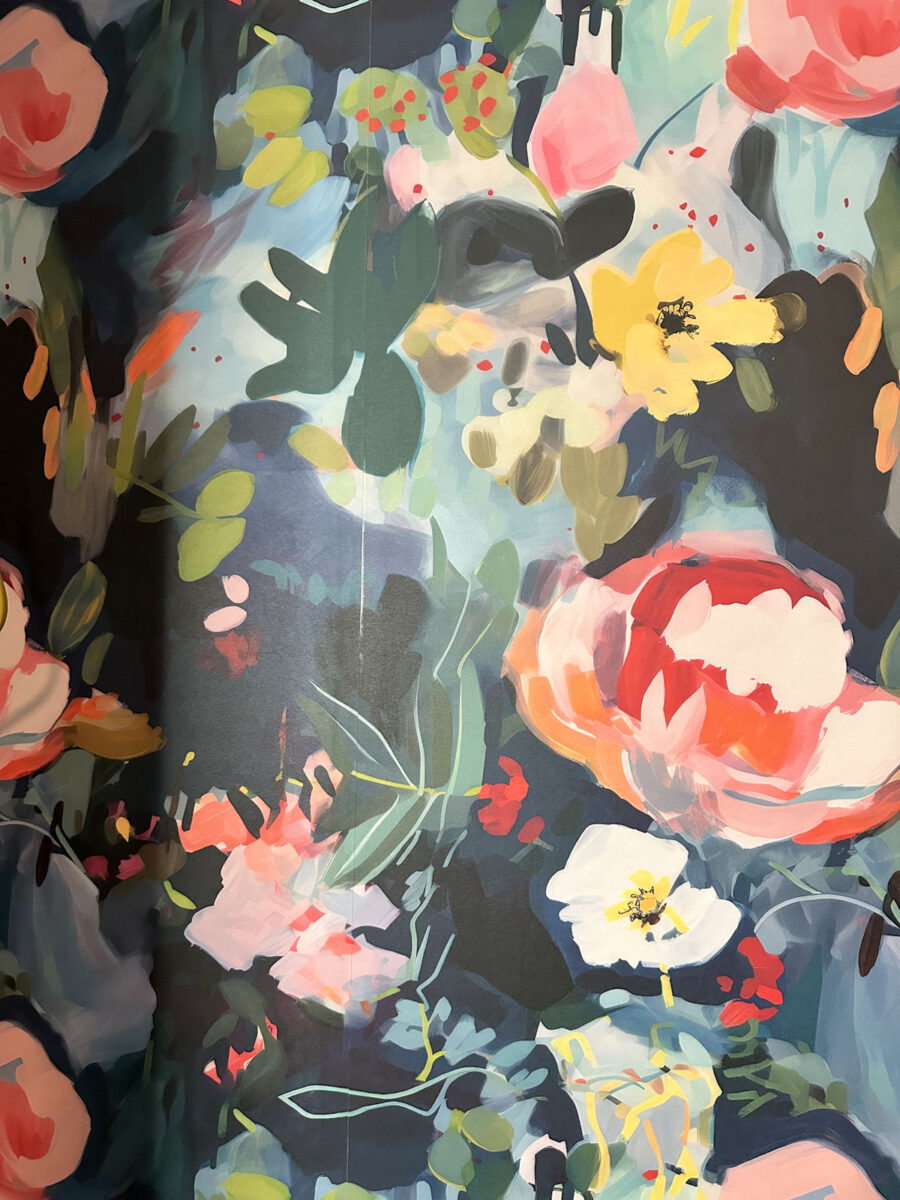
I started with the piece in the center of the back section and then worked out from there. That second piece was a real beast. This wallpaper is much thicker than what I’m used to working with, so getting that seam perfectly lined up and then keeping the seam perfectly lined up while also trying to wrap that second piece of wallpaper around the corner and to side of the cabinet section was such a struggle because I hadn’t cut the piece to the exact length first. I learned that lesson the hard way. Any piece that wraps around a corner has to be cut to the exact length, especially with this thick wallpaper.
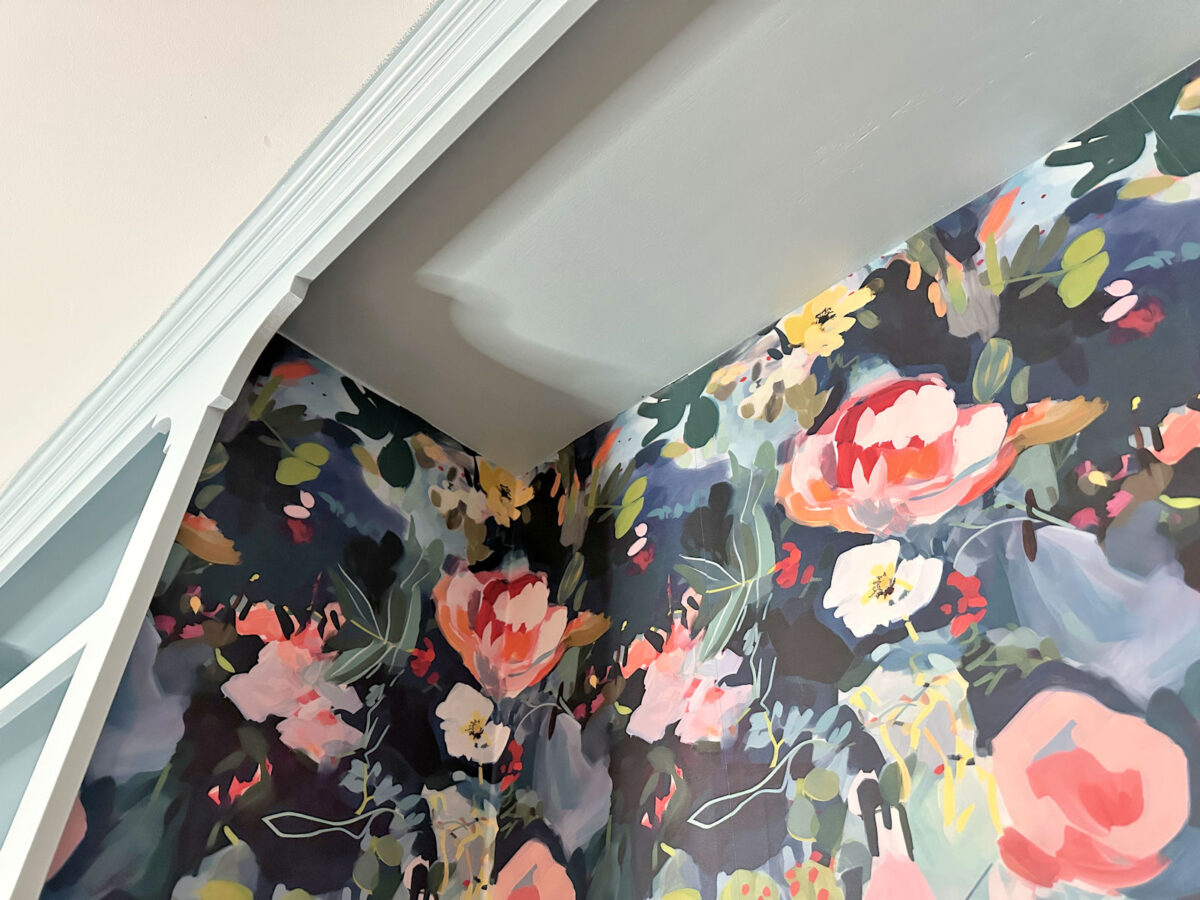
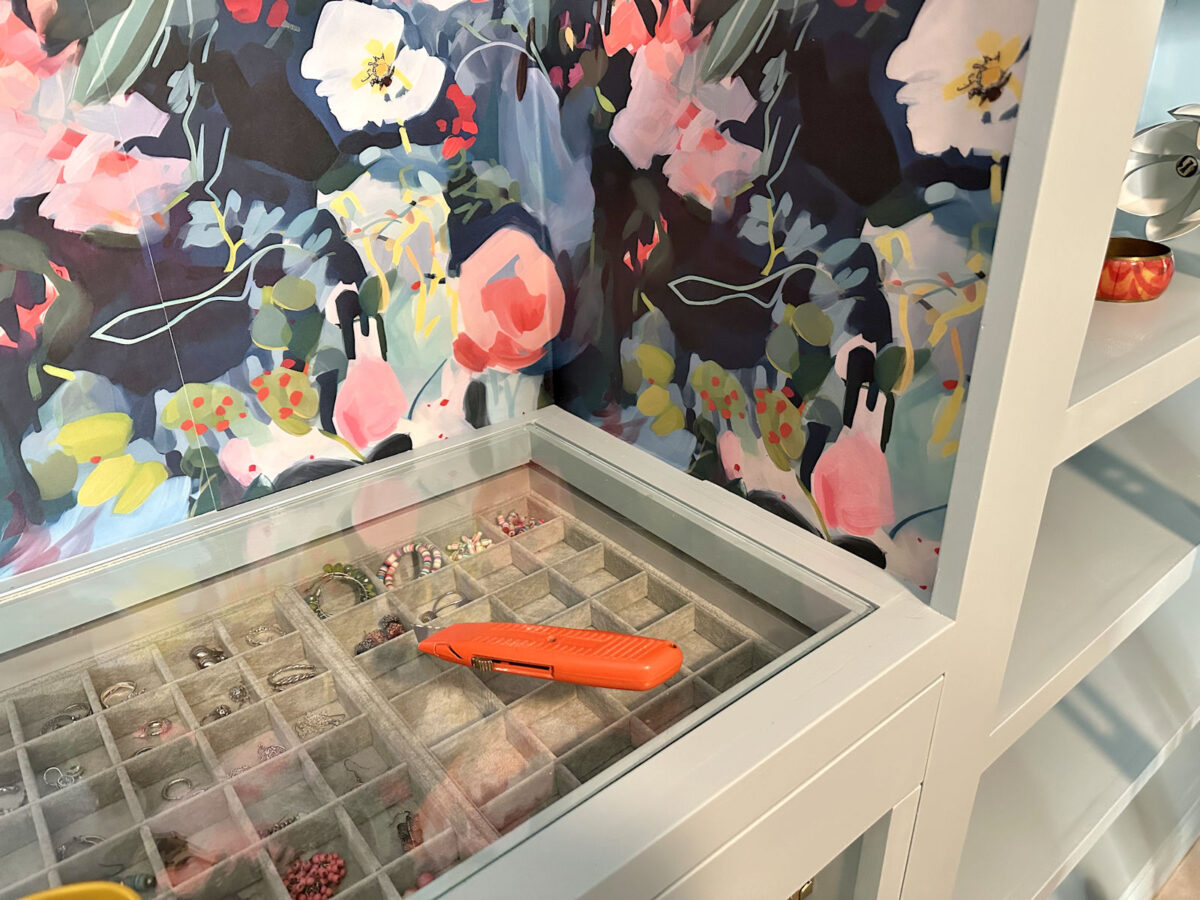
So that resulted in a less-than-perfect seam, which you can probably clearly see in this photo below. That awful seam is about 12 inches to the left of the corner…
But thankfully, most of that wil be hidden behind the mirror. And from a distance, it’s not very noticable.
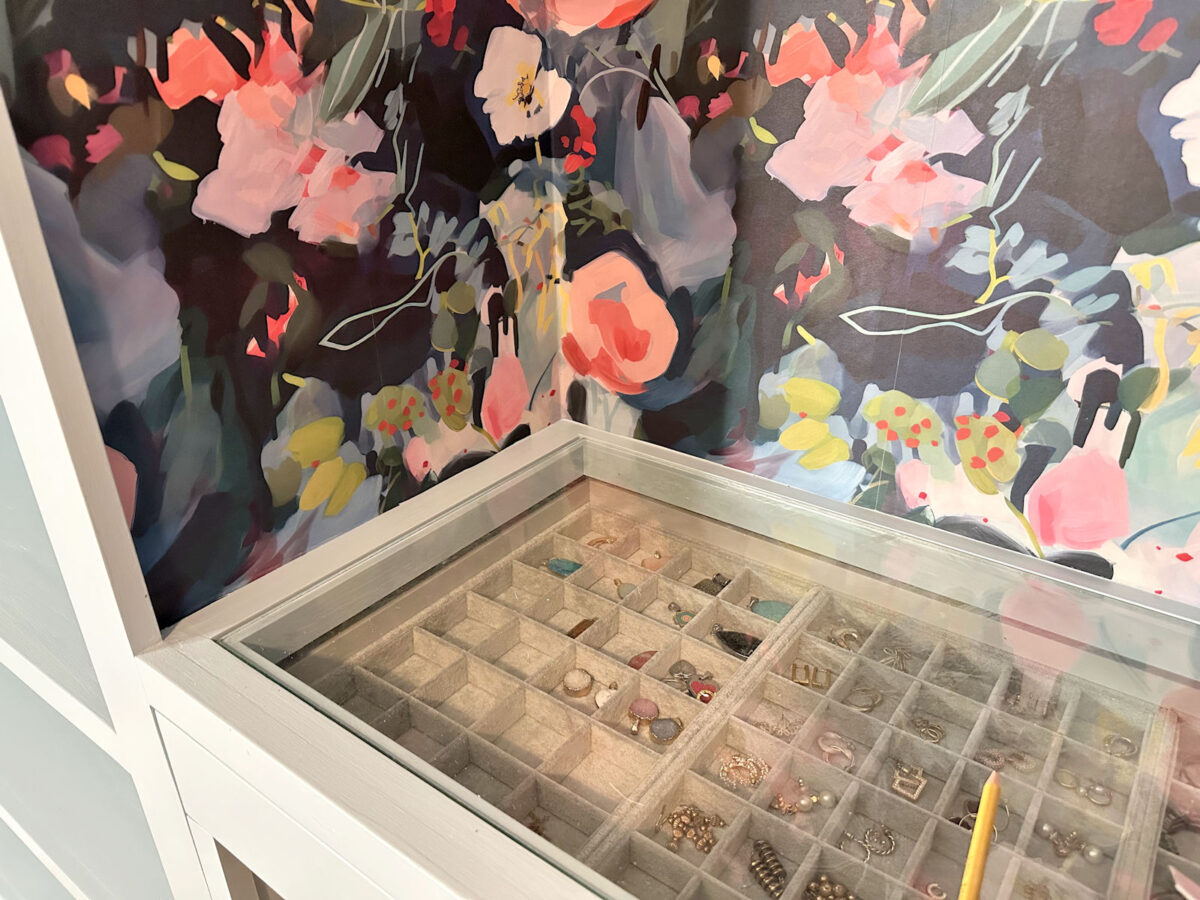
So as I was working the opposite direction, and attaching the other piece that had to wrap around the other corner, I did much better on that seam because I cut the piece to the exact length first. But then I stood back and noticed that I had managed to scrape the edge of the first piece somehow. So it has this white area along the edge.
Had I been doing this kind of wallpapering job on the back wall of the walk-in closet, I would have been in tears at that point. But again, that area will be covered by the mirror in this closet section. So I just chalked it up to “live and learn” and tried not to let it dampen my excitement over finally seeing the wallpaper installed.
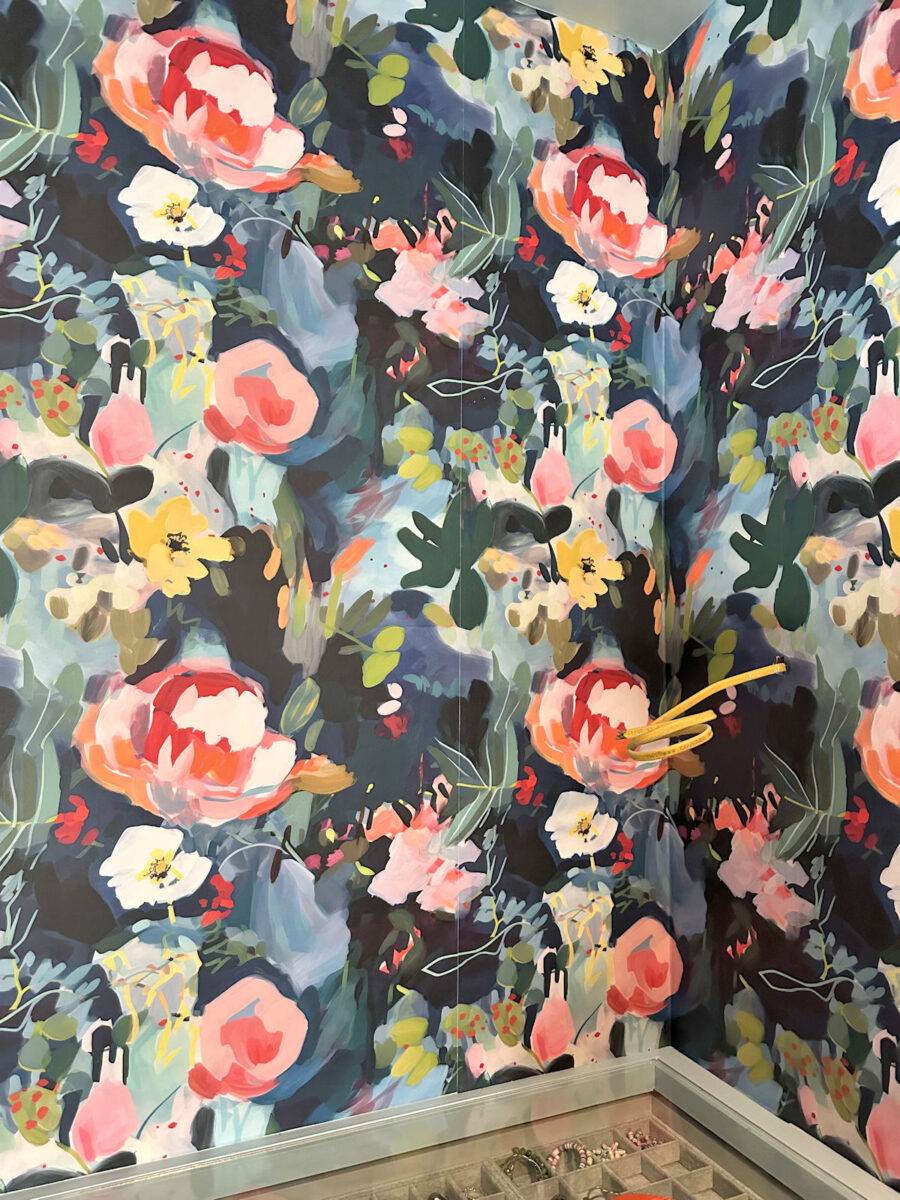
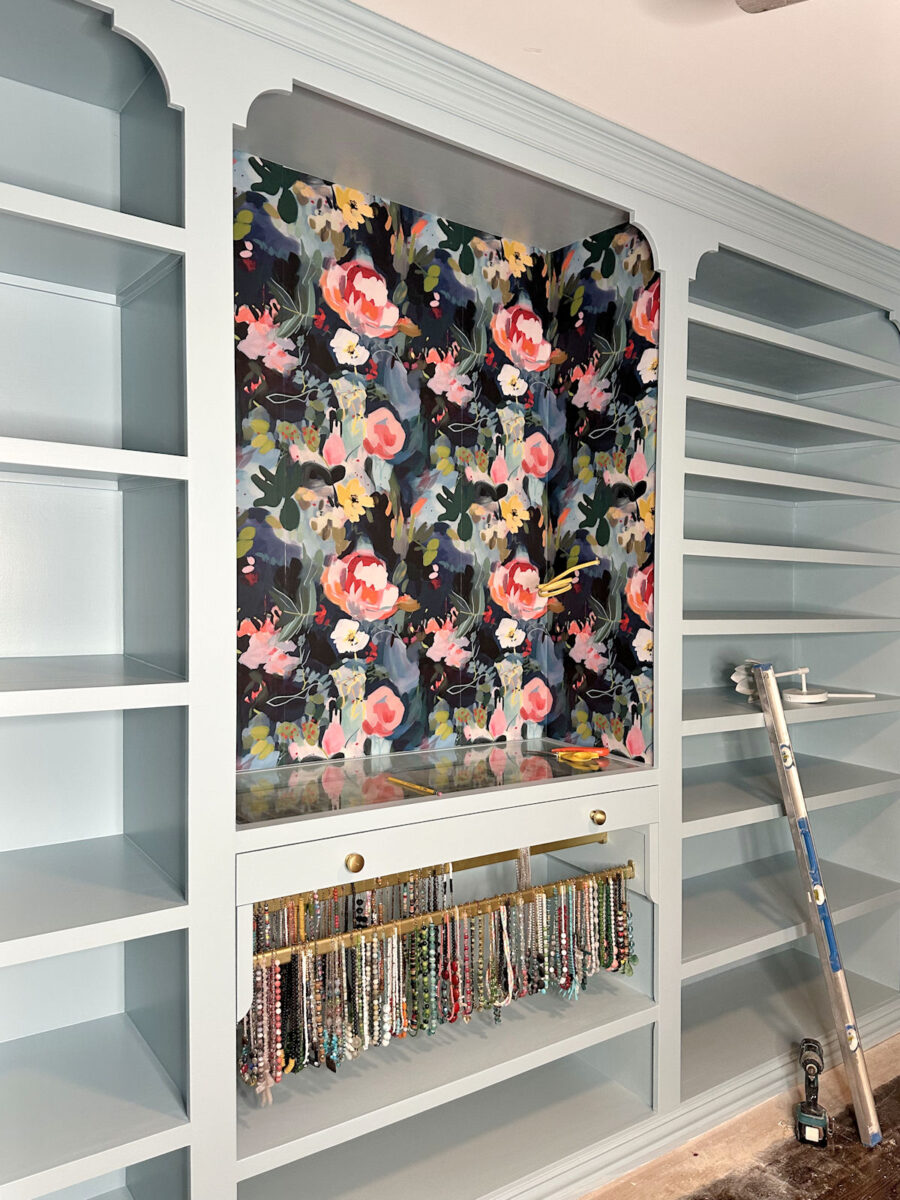
By the time I got to those final two side pieces, which seam right down the middle of the sides of the cabinet, I had gotten a much better feel for the wallpaper, and I was able to do a much better job on those seams. I was so relieved because those are the seams that will actually show.
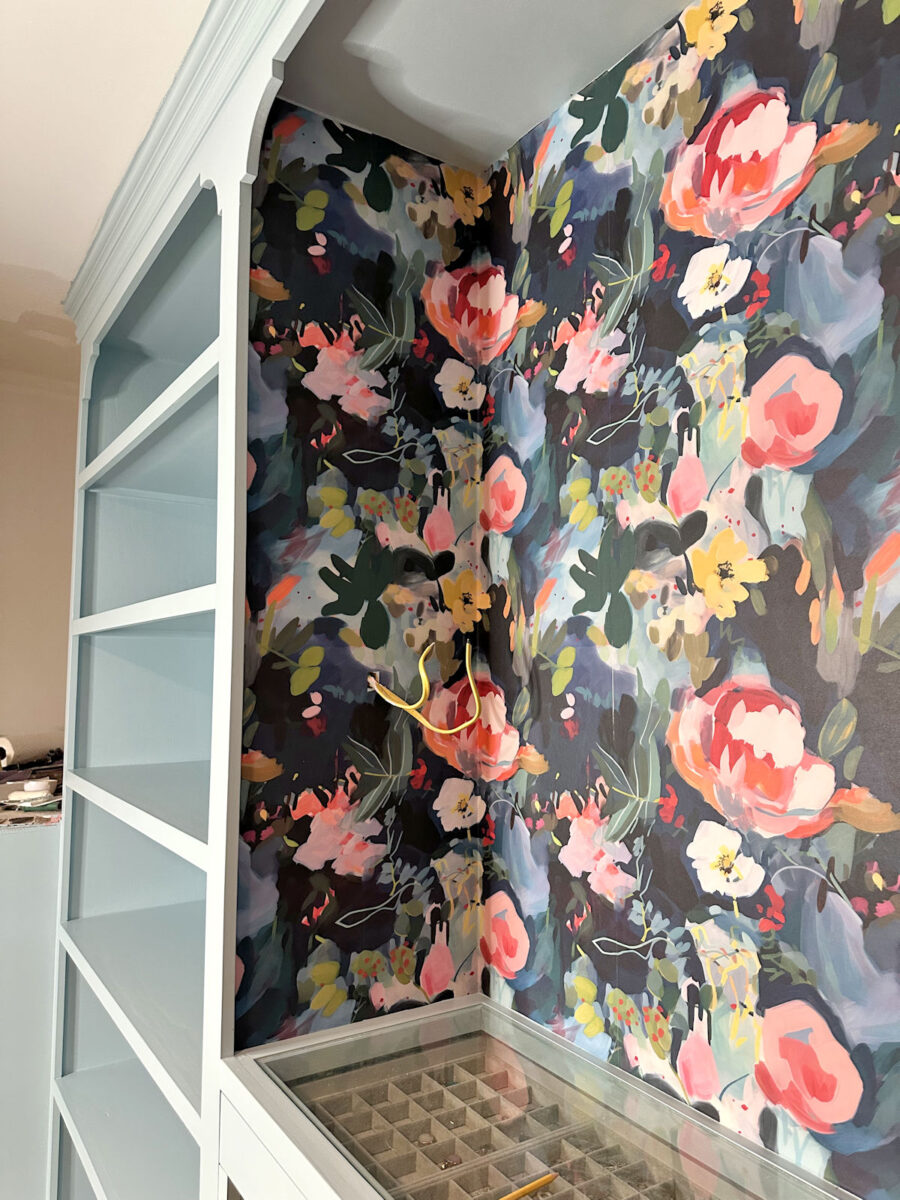
Here’s a look at the other side…
And because I had to pre-cut the length, it’s not perfect along the top or the bottom. But I had already planned to put tiny trim around the top and the bottom (probably shoe molding) after the wallpaper was installed, so I wasn’t too concerned about that.
Anyway, it’s done! And even in the poor lighting, and even with my mistakes, I love how it looks.
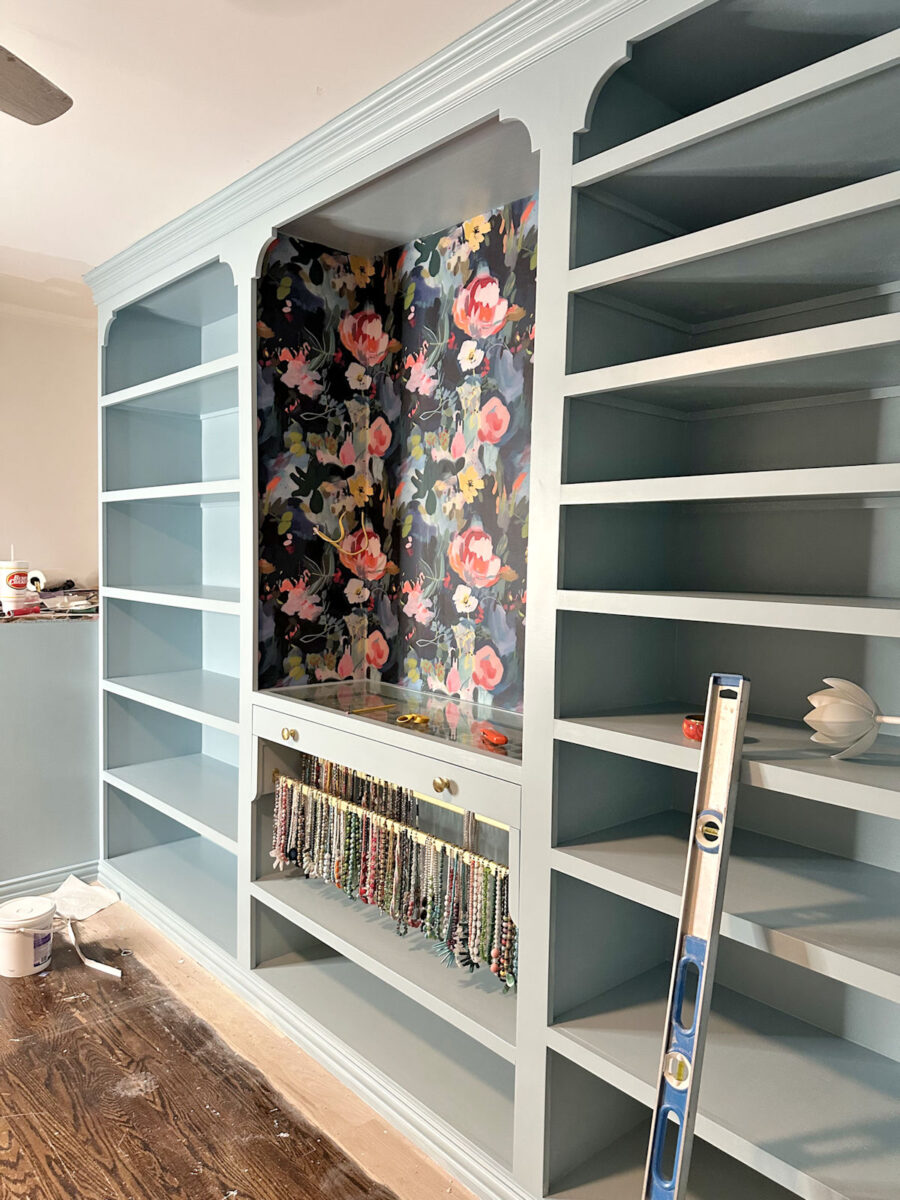
It’s always so fun to go from concept…

…to reality, and to see a design plan start to take shape…
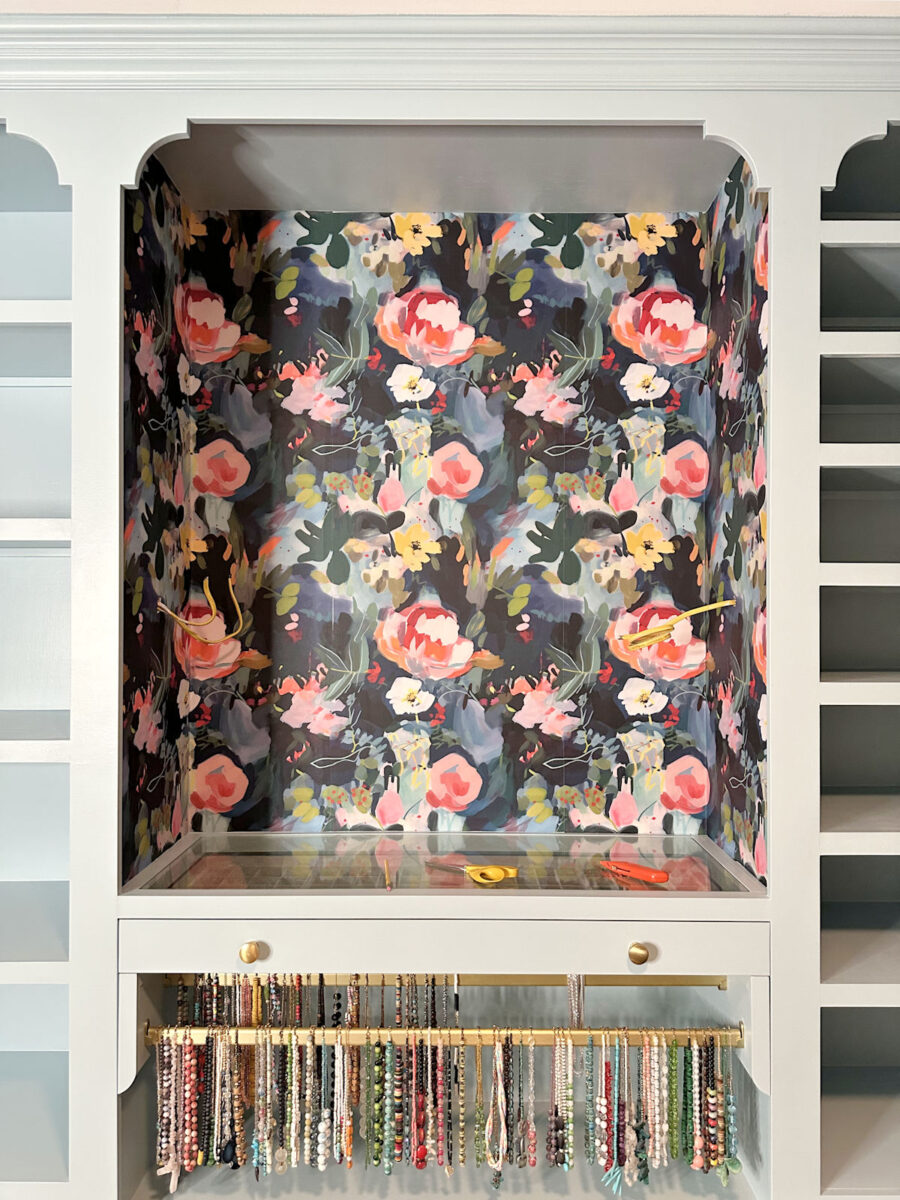
I’ll be adding the shoe molding not only around the top, but also around the bottom. So these uneven areas around the bottom don’t concern me. And I’ll wait until the mirror is hung to see how much of a problem that one seam is going to be. If any of that shows, I’m going to have to figure out a solution. Because if I can see any of that seam, especially close to the bottom where it’s closer to my line of sight, it will absolutely drive me bonkers. I have a feeling that I’ll be using a tiny art brush and painted in several custom-mixed colors to hide at least part of that seam. But again, I’ll wait until the mirror is hung to see just how much of that will be necessary.
I did much better on the other side, but that left seam on the back might also need some touchup as well. I’m confident that if I have to do any touchups, it won’t be much because the mirror will cover most of it. That’s the only reason I was able to remain super excited about this wallpaper job rather than lying in a puddle of tears of disappointment. 😀
Before I wallpaper the back wall of the closet, I think I’m going to paint the whole wall that darkest navy blue from the wallpaper. It needs to be painted first anyway, and it’s on the darkest part of the wallpaper where the seams are the most visible.
Anyway, overall, I’m super excited about how this looks. Today, my goal is to get the tiny trim painted and attached around the top and bottom of the wallpapered section, and then get the sconces installed and the mirror hung. And then I’ll be putting the second coat of paint on the last two closet sections on this right side of the room.
So if things go as planned, by the end of my day today, the cabinets on the right side of the room should be completely finished.
And then I can start caulking and paint the cabinets on the left side of the room. The good news is that the left side shouldn’t take nearly as long as this side because (1) there are far fewer shelves on that side, and (2) there are no wallpapered sections, no sconces, no mirrors, no drawers, no necklace bars, no specialty anything on that side.
That side of the room just has a few shelves and lots of wide-open spaces, which will be much easier and much faster to caulk and paint.
The side of the room with the most detail is almost finished!
And y’all have no idea how much self-control it will take me not to start loading up these shelves with shoes and handbags. 😀 Last night, I almost convinced myself that it would be okay for me to start doing that this weekend since all of the building phase is finished, and I’ll be covering all of the cabinets with plastic before I sand the floor. But the practical side of my brain (which I do have, but which generally isn’t the strongest part of my brain) realizes that would still be putting the cart before the horse. So I’m mustering all of the self-control I have to keep myself from loading up these shelves until everything is finished. We’ll see how long that self-control will hold out. 😀

Addicted 2 Decorating is where I share my DIY and decorating journey as I remodel and decorate the 1948 fixer upper that my husband, Matt, and I bought in 2013. Matt has M.S. and is unable to do physical work, so I do the majority of the work on the house by myself. You can learn more about me here.