")
I’m slowly but surely checking off projects from my punch list for the walk-in closet. Yesterday, I finished up sanding the patched areas on the ceiling drywall, primed the ceiling, installed three of the four closet hanging rods, and painted the ceiling.
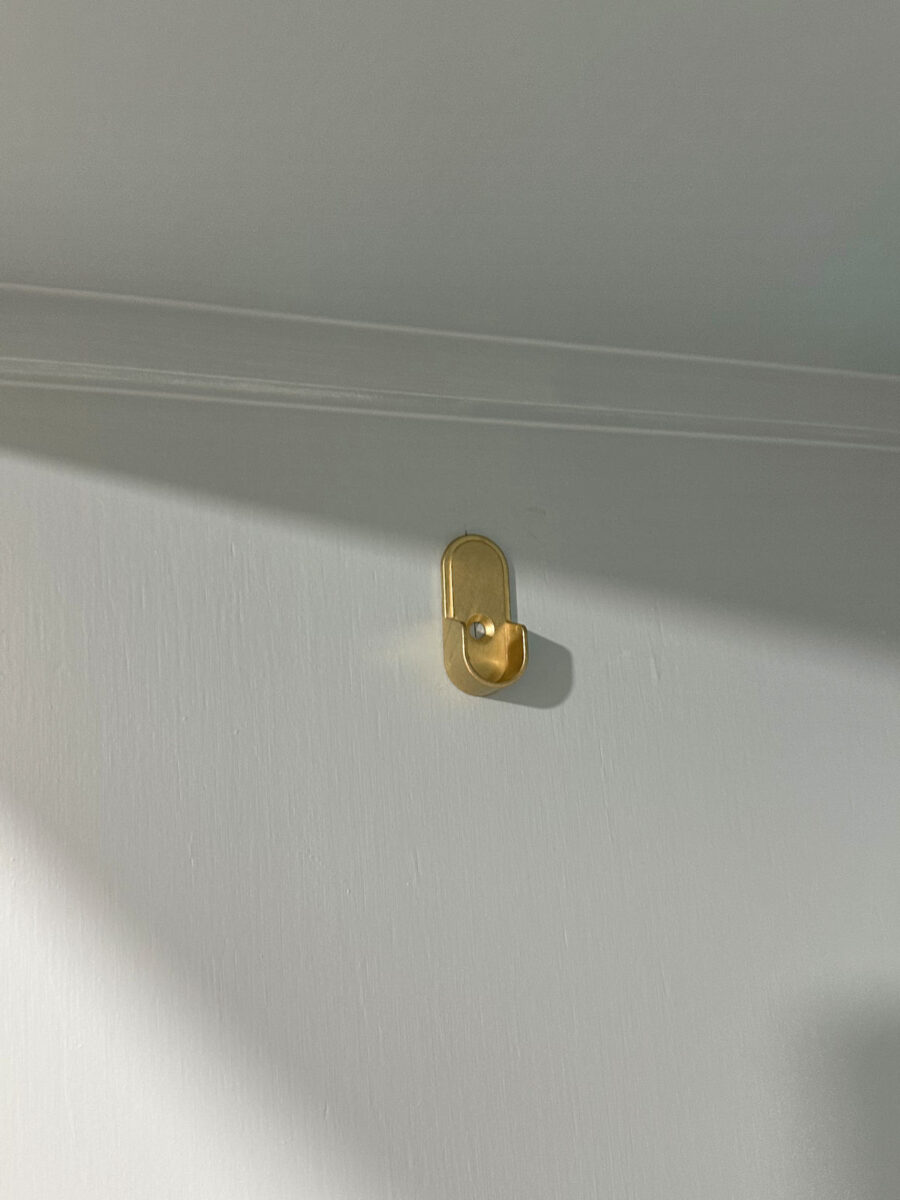
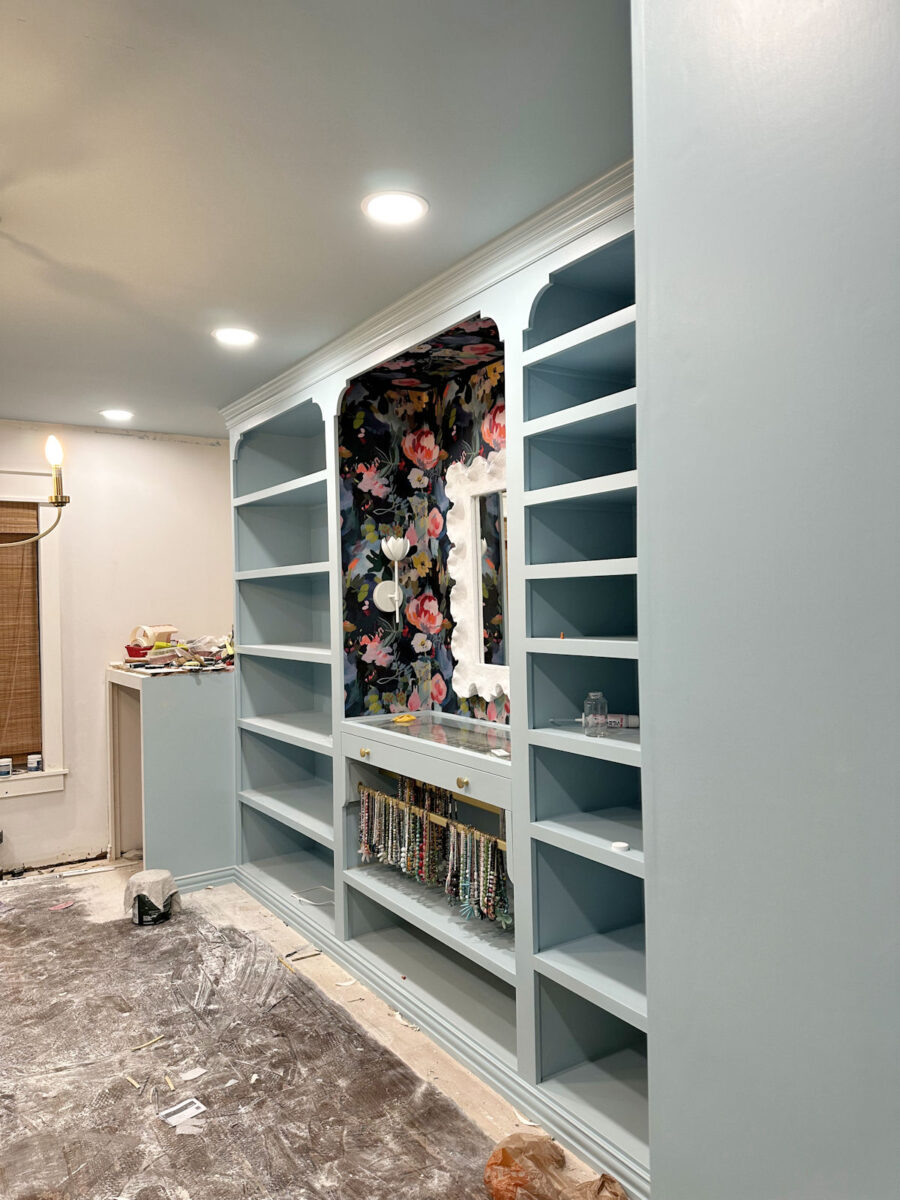
I’ll start with the closet rods. I absolutely love how these matte gold rods look against the blue cabinets!
Installing these rods was pretty simple. They came with these mounting brackets that have these 5mm pins on the back, and then they’re held in place with a screw in the middle. (Please excuse my gross hands. I always say that you should never trust someone who claims to be a DIYer and has clean hands and perfect fingernails. 😀 )

To install those brackets with the pins, I marked where I wanted them to go inside the cabinets.

But here’s my first tip. If you’re installing several items that all need to be installed at the same height/distance, rather than using your tape measure to mark and measure the placement for each one individually, cut scrap pieces of wood to use for this process. I wanted all of my brackets to be 8.5 inches from the back of the cabinets, and 1.75 inches from the brace for the shelf above it. So I cut two pieces of scrap wood. I cut the first to 8.5 inches, and used that to quickly mark the vertical line for my brackets…
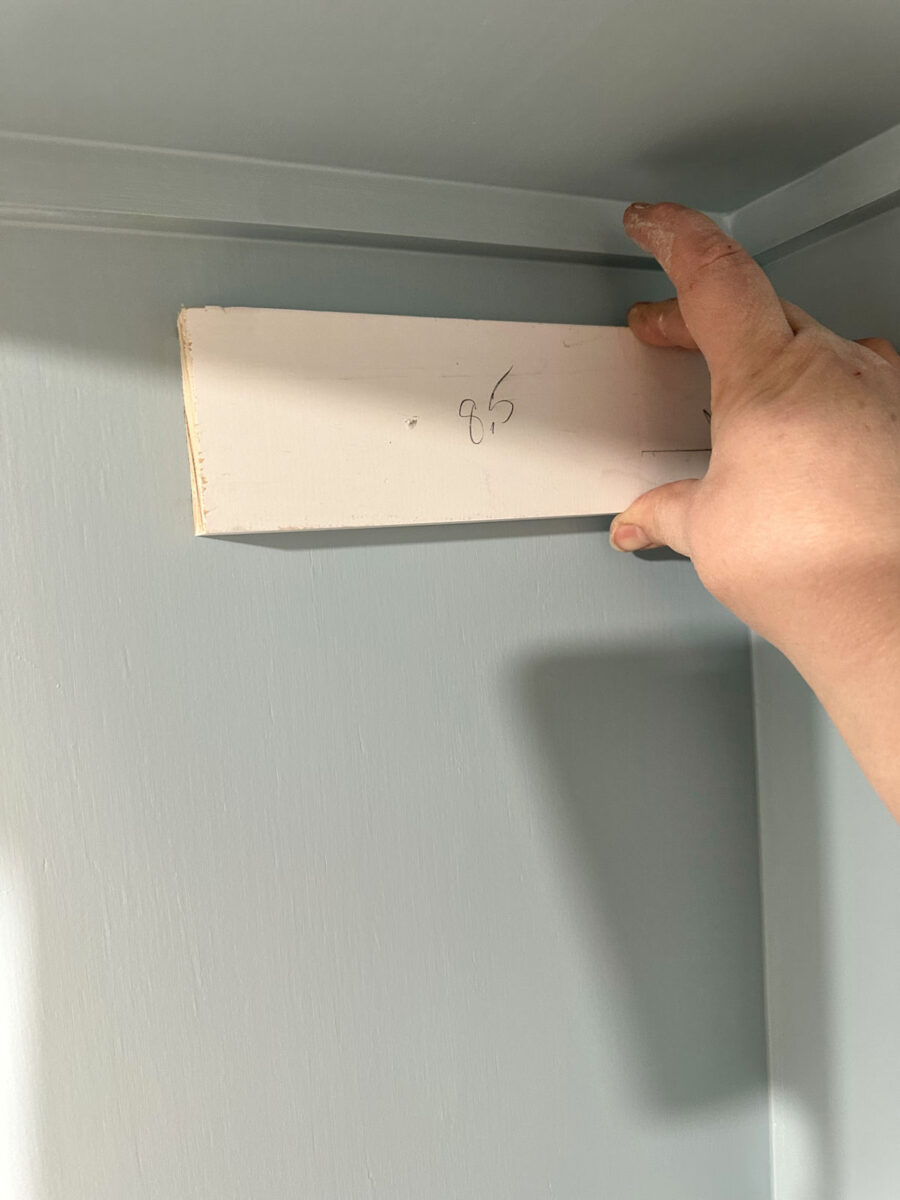
And then I cut another piece of scrap wood to 1.75 inches to quickly mark the distance from the shelf brace above it.
That way, I don’t have to count on my accuracy in using a measuring tape for each and every mark, which is good, because sometimes I make mistakes in my measurements. This is a foolproof way to get all of the measurements exactly right, and it goes so much faster.
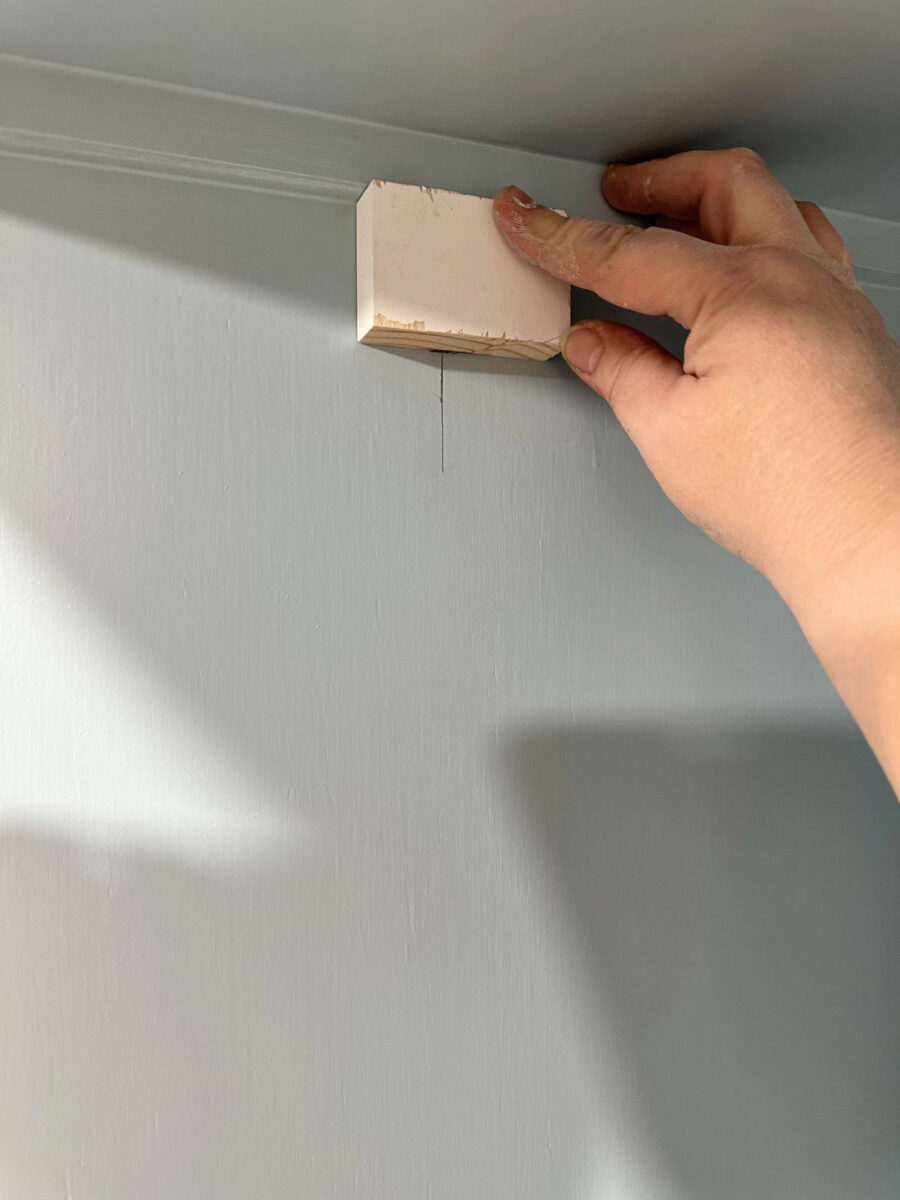
And here’s my second tip. When you need to drill holes for something like these mounting brackets that have pins in them, and those holes need to be in very precise places, don’t try to measure and mark that spacing using a tape measure. Just use something like paint or lipstick on the backs of the pins and press that to the wall or cabinet where you need to drill the holes. For these, I used the darkest lipstick I have (and rarely wear).

And then I lined up the top pin to the point where my two marks crossed, and lined up the bottom pin on the vertical line, and then I knew exactly where I needed to drill the holes. No guesswork. No measuring with a tape measure and hoping that I got the measurements exactly right.

Each one fit perfectly because the marks came directly from the pins on the bracket.
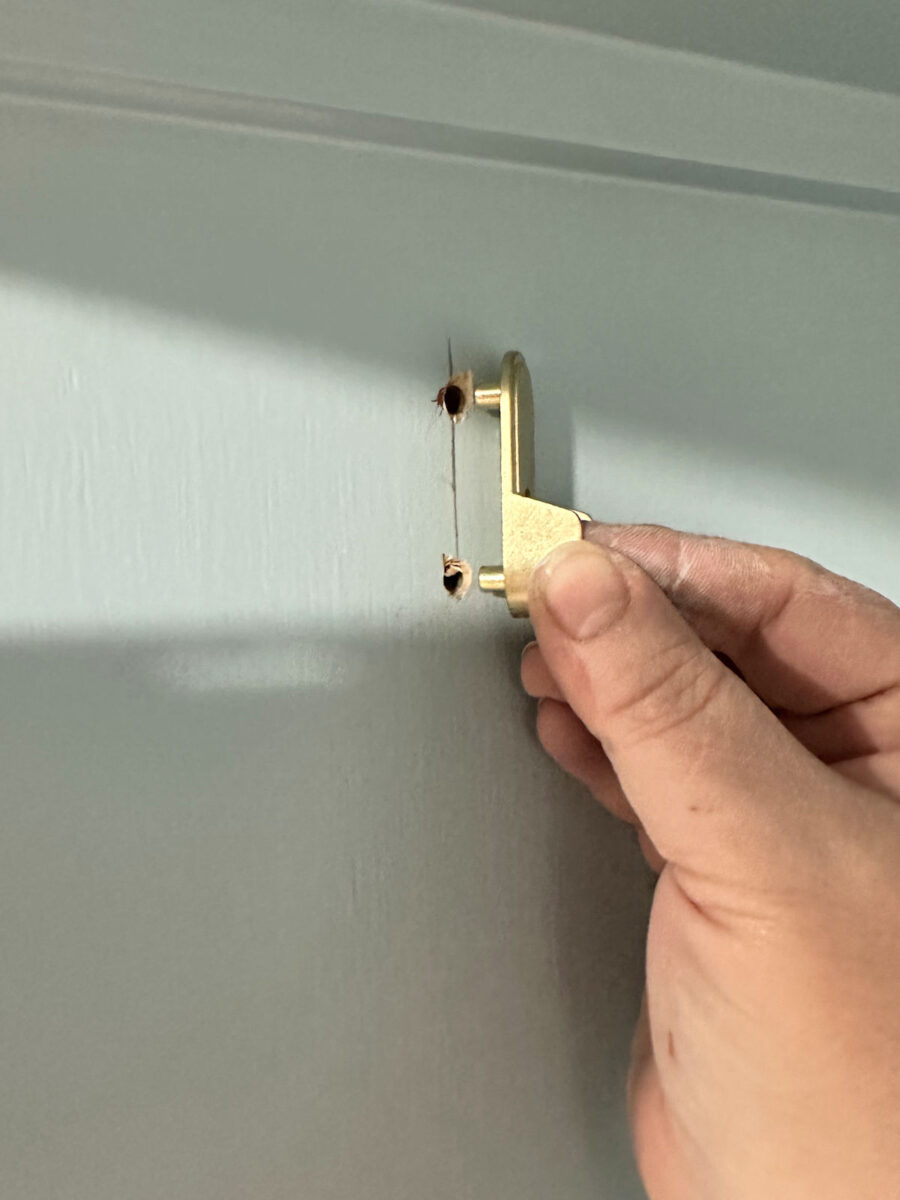
So I very easily pushed that bracket into those perfectly spaced holes, and then I was able to secure it with the screw that was provided with the bracket.
I’m all about taking the guesswork out of processes that I need to repeat over and over and finding ways to repeat those processes that don’t rely on me using a tape measure to mark each individual placement. And doing it this way makes the process go so much faster.
So the good news is that that process went very smoothly. I got the brackets installed for all four rods, and I got three of the four rods cut and in place.

The bad news is that there was no such foolproof method for cutting the bars. Each one was a slightly different measurement, so I had to measure, mark, and cut them individually. And on the very last one, I managed to cut it one inch too short. 😢

No problem. I can just order a new one, right? Wrong. They’re out of stock on the one I need. *Sigh* Of course they are. I’m so frustrated with myself for this. Measure twice, cut once, right? I didn’t do that, and now I don’t quite know what I’m going to do. I can’t find a way to contact the seller on Amazon to see when or if they’ll have more, so I may have to chance it with another brand. I can’t believe I did that. I had to cut a total of six rods for this closet, and I managed to do five of them just right and messed up on the very last one.
But I had to put that out of my mind and not obsess over it, because I needed to keep moving forward on this room. I was determined to get the ceiling completely finished before I went to bed last night. And I did! As I mentioned in a previous post, I decided to color drench this room with the Sherwin Williams Billowy Breeze that I used on the cabinets. So everything except the wallpapered areas and the floor will be the same color.
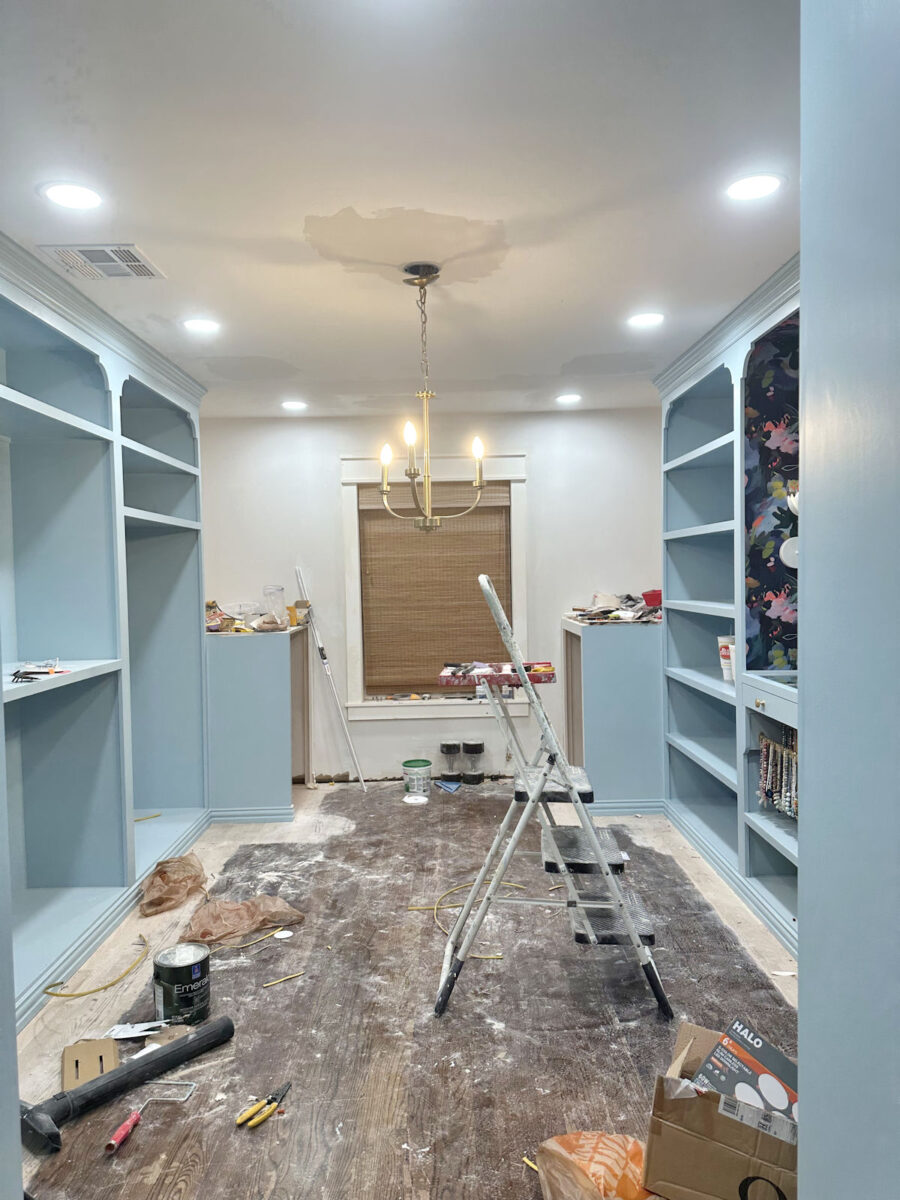
When I went to bed last night, the ceiling was still completely wet from the second coat of paint. But here’s how it looked early this morning after everything was dry.
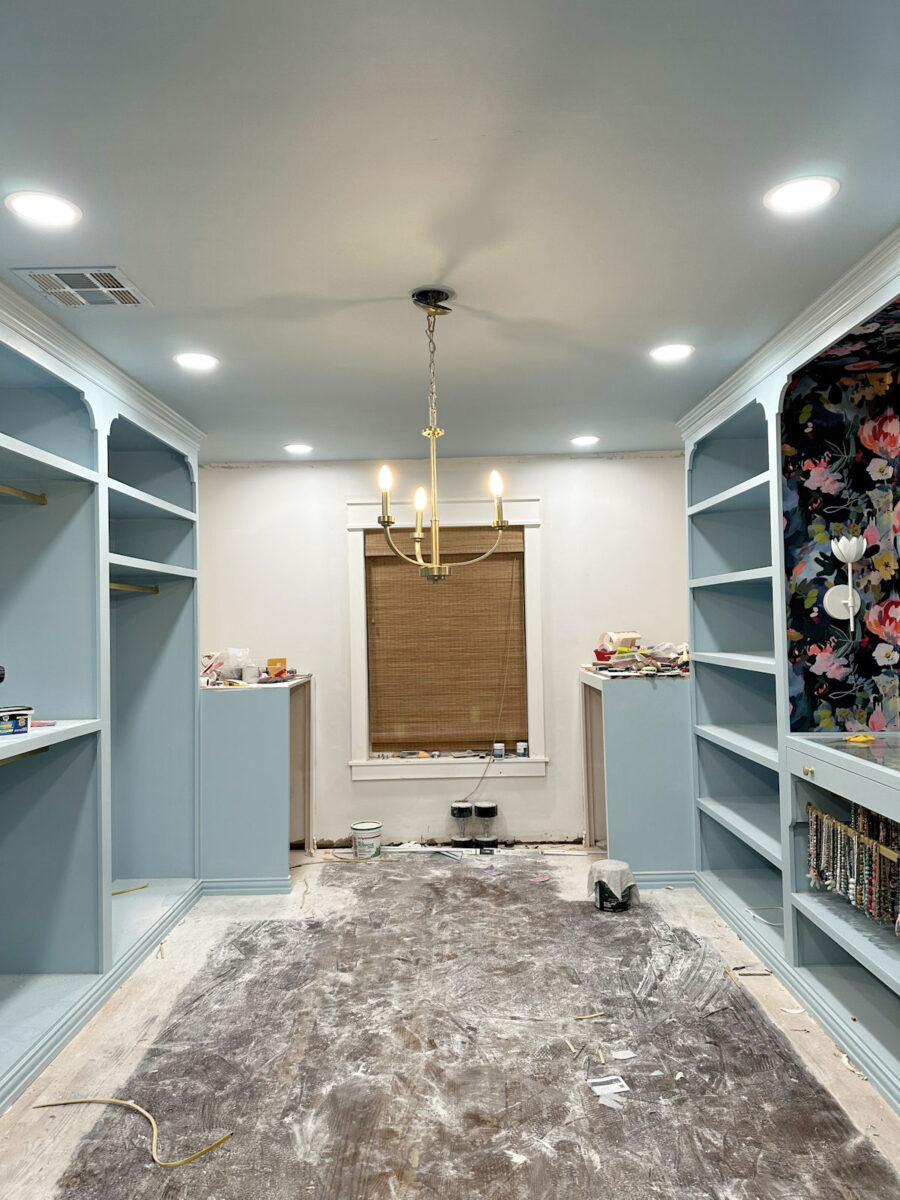
I used a satin sheen on the cabinets and flat on the ceiling.
It’s actually kind of hard to tell that the ceiling is blue unless you can see it next to the white walls.

But I’m really proud of how this turned out. Drywall is my least favorite thing to do, and I’m not great at it. So when I had to do repairs on the ceiling, I really tried to take my time and not rush through that process so that I could get it as smooth as possible. A pro could have done it much better than I did, but even at that, I really don’t think that anyone would notice the repaired areas.

I think that looks pretty darn good! Of course, using flat paint helped. If you want to hide imperfections, flat paint is the way to go.
Here’s a reminder of what the ceiling looked like a couple of days ago…
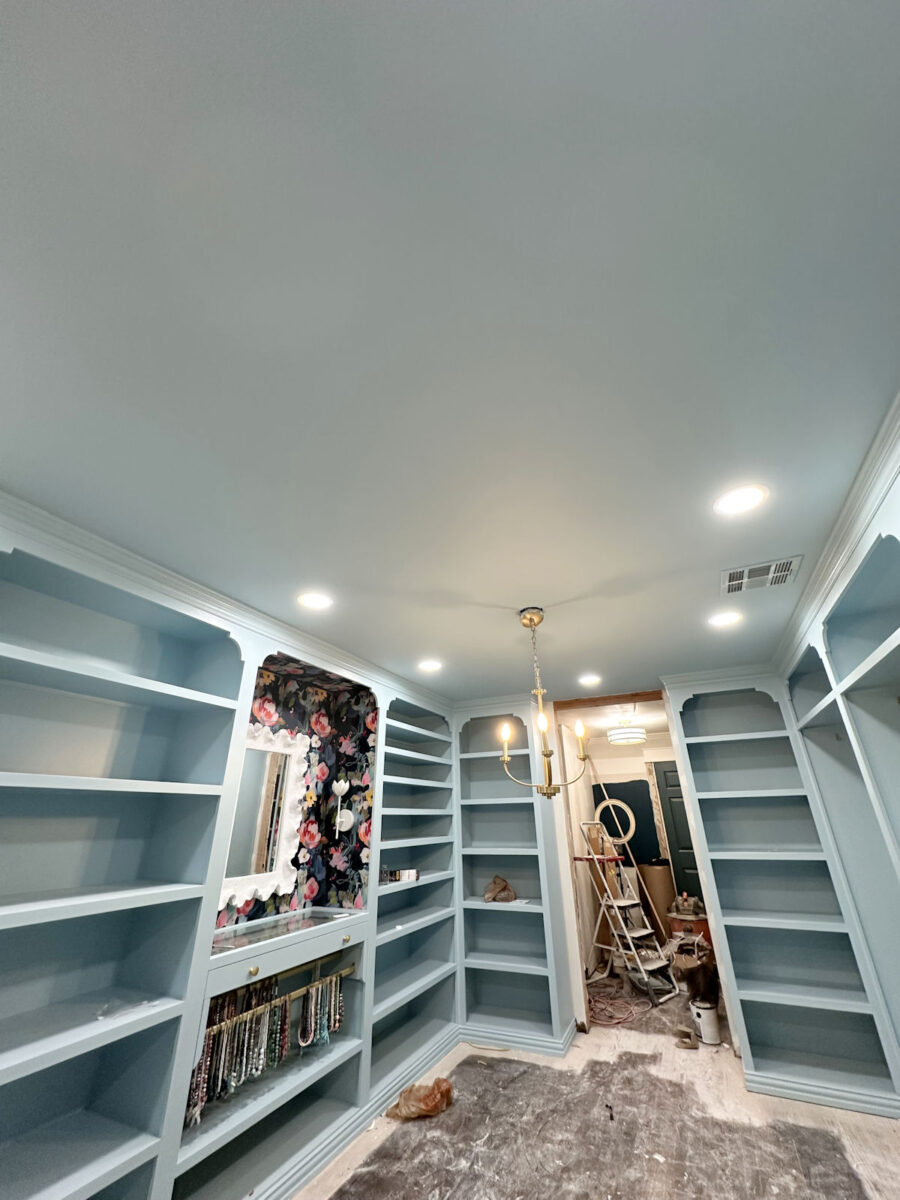
And here it is finished…
I’m not a drywall pro, but I’m pretty proud of how that turned out.
I should mention that it looks like the room is a little darker now with the darker ceiling, but I don’t really think it is. I had turned down the brightness on the lights because it was hurting my eyes to work on the ceiling with the lights turned up to full brightness. I forgot to turn them back up all the way before taking the pictures this morning. With them turned to full brightness, the room is still very bright.
So that big project is finished! New lighting…check. Repaired ceiling…check. Primed and painted ceiling…check. Closet rods installed…3/4 of a check.

That’s a pretty ceiling, if I do say so myself. 😀

Now the challenge will be to see if I can get this room, the foyer, and the bedroom cleaned up by the time I go to bed tonight. If I can, I’ll be at Home Depot first thing tomorrow morning to rent the sanders for the floor. I’m not going to stress over it, though. I’ll try my hardest, but if I just can’t get it done, I’ll finish the clean up tomorrow, and then rent the sanders first thing Friday morning. But either way, these floors are about to get sanded. I’m so excited to get this dark stain off of the floors and see how these rooms are going to look with light, bright floors!

Addicted 2 Decorating is where I share my DIY and decorating journey as I remodel and decorate the 1948 fixer upper that my husband, Matt, and I bought in 2013. Matt has M.S. and is unable to do physical work, so I do the majority of the work on the house by myself. You can learn more about me here.